react项目实战-好客租房
一.项目介绍好客租房-移动Web端项目介绍:本项目是一个在线租房项目,实现了类似链家等项目的功能,解决了用户租房的需求核心业务:在线找房(地图,条件搜索),用户登录,房源发布技术栈React核心库:react、react-dom、react-router-dom脚手架:create-react-app数据请求:axiosUI组件库:antd-mobile其他组件库:react-virtualize
一.项目介绍
- 好客租房-移动Web端
- 项目介绍:本项目是一个在线租房项目,实现了类似链家等项目的功能,解决了用户租房的需求
- 核心业务:在线找房(地图,条件搜索),用户登录,房源发布
- 技术栈
- React核心库:
react、react-dom、react-router-dom - 脚手架:
create-react-app - 数据请求:
axios - UI组件库:
antd-mobile - 其他组件库:
react-virtualized、formilk+yup、react-spring等 百度地图API
- React核心库:
二.本地接口部署
1.创建并导入数据:数据库名称:hkzf(固定名称)
2.启动接口:在API目录中执行npm start
三.项目搭建
1.初始化项目
1.初始化项目:npx create-react-app hkzf-mobile
2.启动项目,在项目根目录执行命令:npm start
3认识初始化的目录结构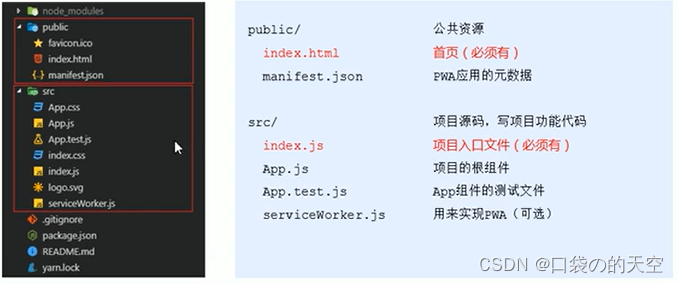
4.调整项目中src目录结构如下: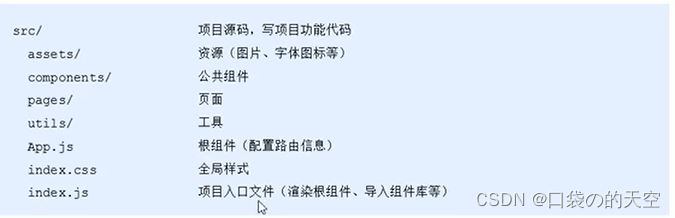
那么接下来就可以根据这个目录结构对初始化的项目进行改造了。
2.组件库antd-mobile
官网地址:mobile.ant.design,ant.design
使用步骤:
①安装:npm install --save antd-mobile@next
②在index.js中导入组件库样式
③直接引入组件即可,antd-mobile 会自动为你加载 css 样式文件:
import { Button } from ‘antd-mobile’
注意:每个版本不一样,有的旧版本需要在index.js中导入组件库样式。但我们这个新版本不需要导入
import ‘antd-mobile/dist/antd-mobile.css’;
3.配置基础路由
步骤:
①安装:npm i react-router-dom
②在page文件夹中创建Home/index.js和cityList/index.js两个文件夹
import React from 'react'
export default class Home extends React.Component{
    render(){
        return <div>这是首页</div>
    }
}
③在App.js导入路由组件:Router/Route/Link,并且引入路由页面
//引入路由
import { BrowserRouter as Router, Route, Link } from 'react-router-dom'

//引入路由页面
import Home from './pages/Home'
import CityList from './pages/CityList'

function App() {
  return (
    <Router>
      <div className="App">
        {/* 路由按钮 */}
        <ul>
          <li>
            <Link to='/home'>首页</Link>
          </li>
          <li>
            <Link to='/cityList'>城市选择</Link>
          </li>
        </ul>

        {/* 路由对应的页面 */}
        <Route path='/home' component={Home}></Route>
        <Route path='/cityList' component={CityList}></Route>
      </div>
    </Router>
  );
}

export default App;
4.外观和样式调整
步骤:
①修改页面标题:在Index.html中修改
<title>React 好客租房</title>
②基础样式调整:在Index.css中修改
html,body{
  height: 100%;
  font-family: '微软雅黑';
  color:'#333';
  background: #fff;
}
*{
  box-sizing: border-box;
}
四.路由的配置
1.嵌套路由
也就是路由包含路由
使用步骤:
①在pages文件夹中创建News/index.js组件
②在Home组件中,添加一个Route作为子组件(嵌套的路由)的出口,Route的属性设置嵌套路由的path,格式以父路由path开头(父组件展示,子组件才会展示)
import React from 'react'

//1.导入路由
import {Route} from 'react-router-dom'

//2.导入News组件
import News from '../News'

export default class Home extends React.Component{
    render(){
        return <div>这是首页
            {/* 3.渲染子路由 */}
            <Route path='/home/news' component={News}></Route>
        </div>
    }
}
④在浏览器地址栏输入地址为为/home/news,News组件的内容就会展示在Home组件中了。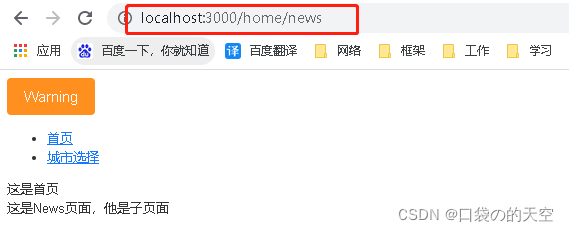
2.实现tabBar
1)导入字体图标库
-
在
index.js页面导入import ‘./assets/fonts/iconfont.css’
-
在其他页面就可以直接使用
2)添加样式文件
1)在Home文件夹内创建一个index.css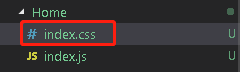
2)index.css里面可以直接写样式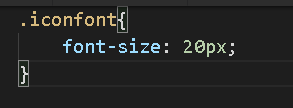
3)index.js页面导入index.css
import './index.css'
3)tabBar`配置路由
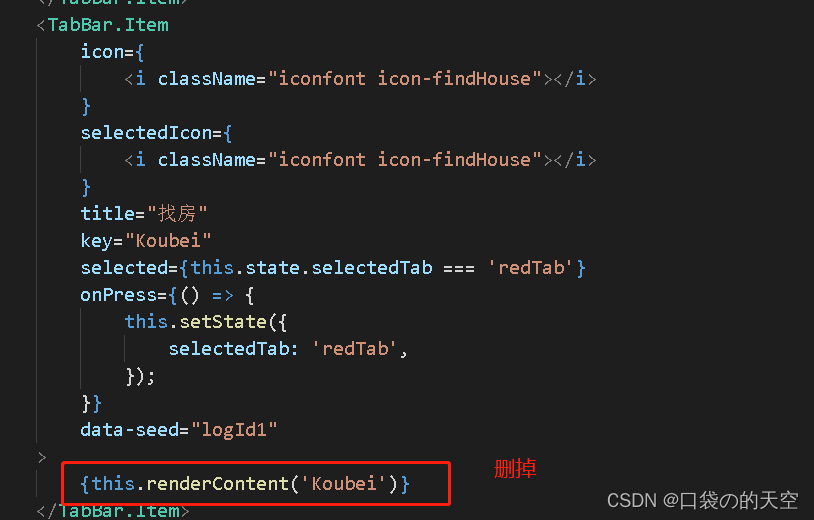
①根据tabBar组件设置不渲染内容部分(只保留菜单项,不显示内容)
- 在
TabBar标签添加noRenderContent={true}的属性,就不显示内容部分; - 就可以把内容渲染的那部分代码删掉
②给tabbar.item绑定点击事件,在点击事件中调用history.push()实现路由切换
                <TabBar.Item
                    icon={
                        <i className="iconfont icon-infom"></i>
                    }
                    selectedIcon={
                        <i className="iconfont icon-infom"></i>
                    }
                    title="咨询"
                    key="Friend"
                    selected={this.state.selectedTab === 'greenTab'}
                    onPress={() => {
                        this.setState({
                            selectedTab: 'greenTab',
                        });
                        this.props.history.push('/home/index')
                    }}
                >
                </TabBar.Item>
④创建tabBar组件菜单项对应的其他3个组件,并在Home组件中配置路由信息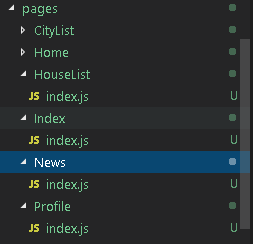
在Home文件夹的index.js下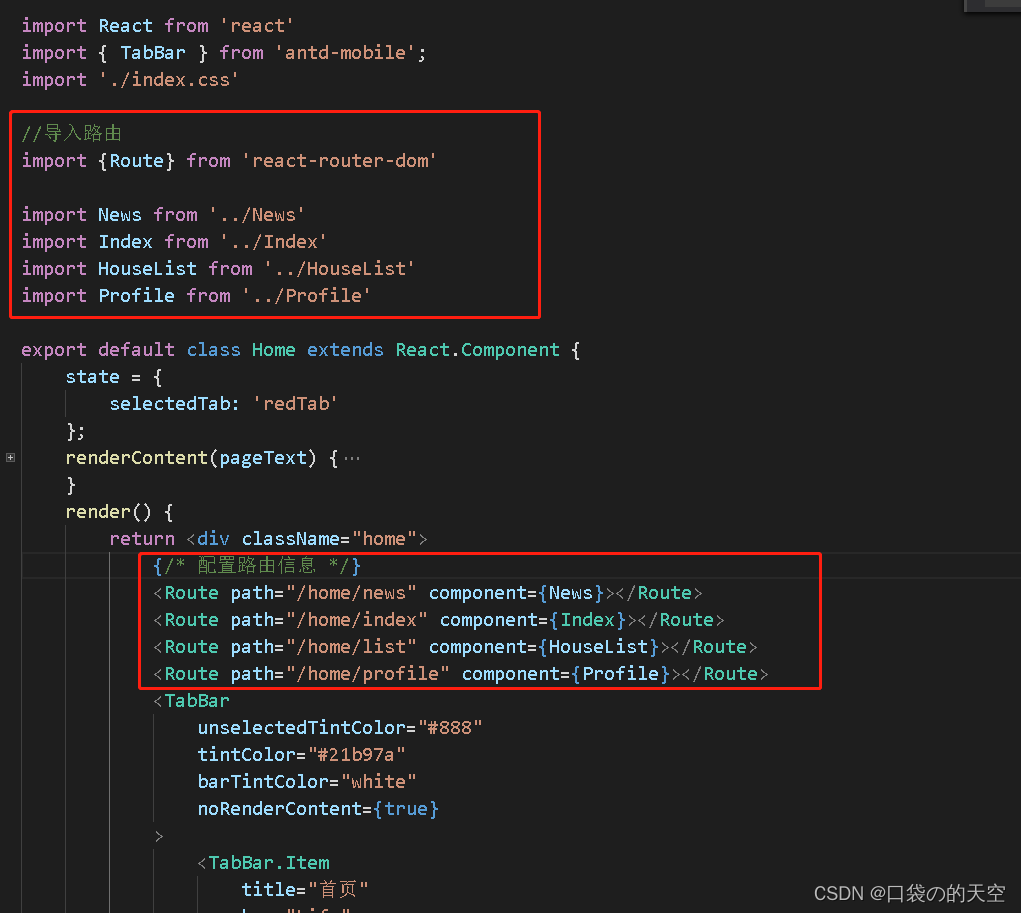
⑤给菜单项添加selected属性,设置当前匹配的菜单项高亮
现在state里面设置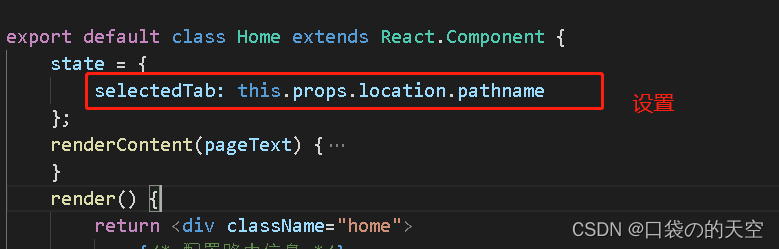
然后下面两个主要是分别控制刷新的时候和点击的时候对应高亮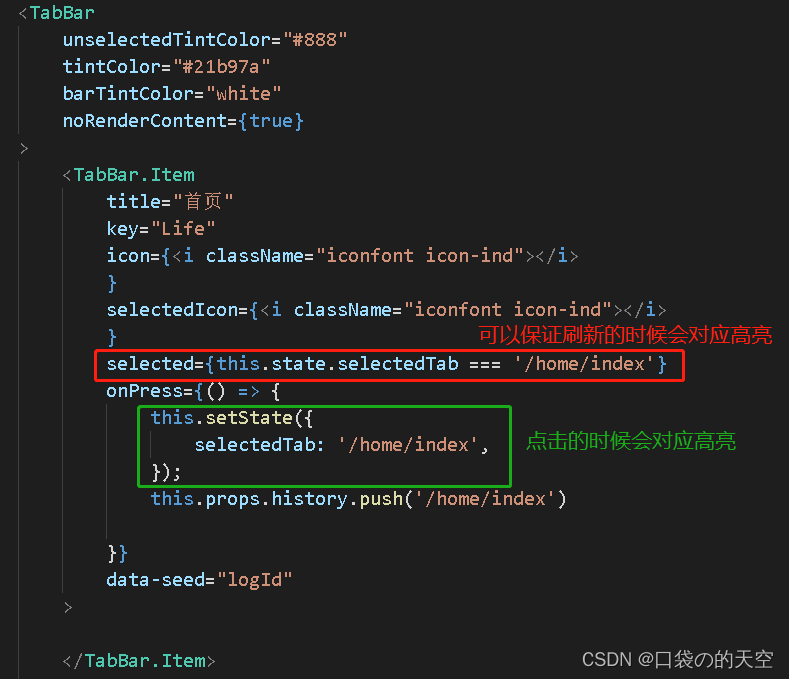
3.代码优化重构
优化前:
import React from 'react'
import { TabBar } from 'antd-mobile';
import './index.css'
//导入路由
import {Route} from 'react-router-dom'
import News from '../News'
import Index from '../Index'
import HouseList from '../HouseList'
import Profile from '../Profile'
export default class Home extends React.Component {
state = {
selectedTab: this.props.location.pathname
};
render() {
return <div className="home">
{/* 配置路由信息 */}
<Route path="/home/news" component={News}></Route>
<Route path="/home/index" component={Index}></Route>
<Route path="/home/list" component={HouseList}></Route>
<Route path="/home/profile" component={Profile}></Route>
<TabBar
unselectedTintColor="#888"
tintColor="#21b97a"
barTintColor="white"
noRenderContent={true}
>
<TabBar.Item
title="首页"
key="Life"
icon={<i className="iconfont icon-ind"></i>
}
selectedIcon={<i className="iconfont icon-ind"></i>
}
selected={this.state.selectedTab === '/home/index'}
onPress={() => {
this.setState({
selectedTab: '/home/index',
});
this.props.history.push('/home/index')
}}
data-seed="logId"
>
</TabBar.Item>
<TabBar.Item
icon={
<i className="iconfont icon-findHouse"></i>
}
selectedIcon={
<i className="iconfont icon-findHouse"></i>
}
title="找房"
key="Koubei"
selected={this.state.selectedTab === '/home/list'}
onPress={() => {
this.setState({
selectedTab: '/home/list',
});
this.props.history.push('/home/list')
}}
data-seed="logId1"
>
</TabBar.Item>
<TabBar.Item
icon={
<i className="iconfont icon-infom"></i>
}
selectedIcon={
<i className="iconfont icon-infom"></i>
}
title="咨询"
key="Friend"
selected={this.state.selectedTab === '/home/news'}
onPress={() => {
this.setState({
selectedTab: '/home/news',
});
this.props.history.push('/home/news')
}}
>
</TabBar.Item>
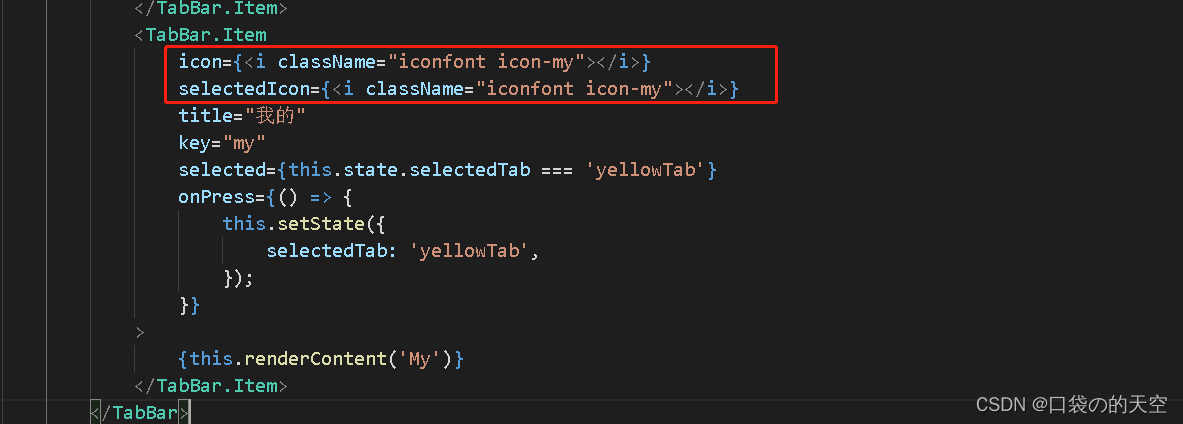
<TabBar.Item
icon={<i className="iconfont icon-my"></i>}
selectedIcon={<i className="iconfont icon-my"></i>}
title="我的"
key="my"
selected={this.state.selectedTab === '/home/profile'}
onPress={() => {
this.setState({
selectedTab: '/home/profile',
});
this.props.history.push('/home/profile')
}}
>
</TabBar.Item>
</TabBar>
</div>
}
}
优化后:
import React from 'react'
import { TabBar } from 'antd-mobile';
import './index.css'

//导入路由
import { Route } from 'react-router-dom'

import News from '../News'
import Index from '../Index'
import HouseList from '../HouseList'
import Profile from '../Profile'


const tabsItems = [
    {
        title: '首页',
        icon: 'icon-ind',
        path: '/home/index'
    },
    {
        title: '找房',
        icon: 'icon-findHouse',
        path: '/home/list'
    },
    {
        title: '咨询',
        icon: 'icon-infom',
        path: '/home/news'
    },
    {
        title: '我的',
        icon: 'icon-my',
        path: '/home/profile'
    }
]

export default class Home extends React.Component {
    state = {
        selectedTab: this.props.location.pathname
    }
    renderTabBarItem() {
        return tabsItems.map(item => <TabBar.Item
            title={item.title}
            key={item.title}
            icon={<i className={`iconfont ${item.icon}`}></i>
            }
            selectedIcon={<i className={`iconfont ${item.icon}`}></i>
            }
            selected={this.state.selectedTab === item.path}
            onPress={() => {
                this.setState({
                    selectedTab: item.path,
                });
                this.props.history.push(item.path)

            }}
        >

        </TabBar.Item>)
    }
    render() {
        return <div className="home">
            {/* 配置路由信息 */}
            <Route path="/home/news" component={News}></Route>
            <Route path="/home/index" component={Index}></Route>
            <Route path="/home/list" component={HouseList}></Route>
            <Route path="/home/profile" component={Profile}></Route>
            <TabBar
                unselectedTintColor="#888"
                tintColor="#21b97a"
                barTintColor="white"
                noRenderContent={true}
            >
                {this.renderTabBarItem()}
            </TabBar>
        </div>
    }
}
五.首页
1./home/index(去掉/index)
- 把这个的path修改为
/home,主要是为了图标的匹配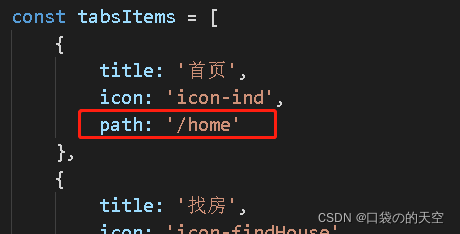
- 把
/home/index改为/home,并且加上exact,不加上就会模糊匹配/home,那么每次切换路由 首页的内容都会被匹配上
<Route exact path="/home" component={Index}></Route>
2.默认地址重定向到home页
地址栏只输入域名,如:localhost://3000会自动跳到localhost://3000/home的页面,需要使用重定向redirect
redirect组件用于实现路由重定向,to属性指定要跳转到的路由地址render属性:是一个函数prop,用于指定要渲染的内容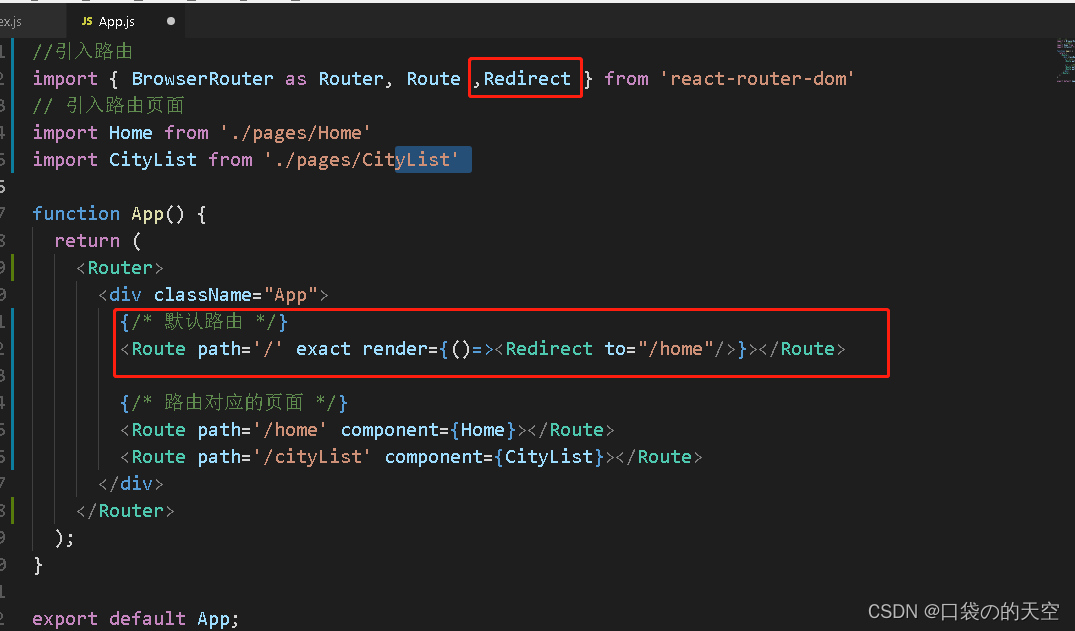
六.轮播图
1.把轮播图的样式拷贝进来,有的浏览器会有 未阻止默认事件的报错,修改下样式可以了
*{
  box-sizing: border-box;
  touch-action: pan-y;
}
但我这边还是不行,是通过注释了node_module的这一段注释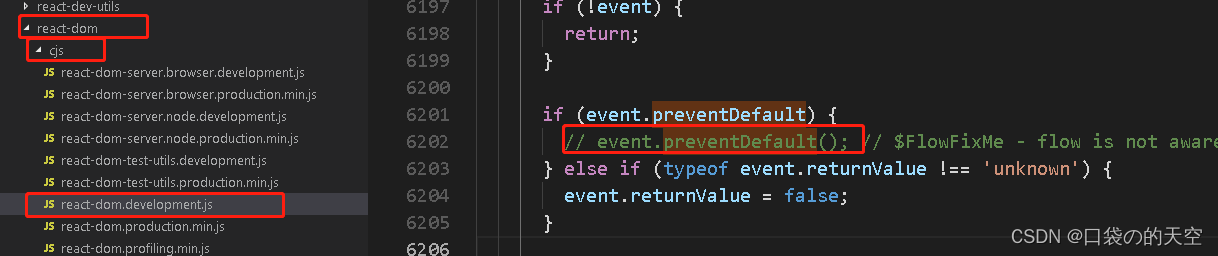
2.获取数据
-
安装axios :
npm i axios --save -
在
package.json加上那个这么一段代码:
"proxy": "http://localhost:8080"
- 然后在页面引入
axios就可以直接调用:
import axios from 'axios'
axios.get('/swiper')
.then(res => {
    console.log(res)
})
.catch(err => console.log(err))
我这边出现了一个问题就是:
图片src的路径是我自己从其他网站上扒过来的,图片在浏览器地址展示没问题,但奇怪的是在轮播图展示图片的时候报错403.我是在html页面加了一行代码就解决了。<meta name="referrer" content="no-referrer" />
import React from 'react'
import { Carousel } from 'antd-mobile';

import axios from 'axios'
export default class Index extends React.Component {
    state = {
        //轮播图状态数据
        swipers: []
    }
    async getSwiper() {
        const res = await axios.get('/swiper')
        this.setState({
            swipers:res.data.data
        })
    }
    componentDidMount() {
        this.getSwiper()

    }
    //渲染轮播图
    renderSwipers(){
        return this.state.swipers.map(item => (
            <span
                key={item.id}
                style={{ display: 'inline-block', width: '100%', height: 188 }}
            >
                <img
                    src={item.imgScr}
                    alt=""
                    style={{ width: '100%', verticalAlign: 'top' }}
                />
            </span>
        ))
    }
    render() {
        return (
            <div>
                <Carousel
                    autoplay={false}
                    infinite
                >
                    {this.renderSwipers()}
                </Carousel>
            </div>
        );
    }
}
3.导航菜单
出现的bug:
1)默认进入页面轮播图不会自动轮播
2)切换进入页面,轮播图的高度没有自动撑开
解决的办法:
第一种方法:
根据官网,给state一个默认数据,这样解决了问题,但页面会报错
//轮播图状态数据
swipers: [1,2,3],
第二种方法:
1.在state中添加状态数据
state = {
   //轮播图状态数据
   swipers: [],
  //状态
  isSwiperLoaded: false
}
2.数据加载按成,修改该数据状态值为true
async getSwiper() {
        const res = await axios.get('/swiper')
        this.setState({
            swipers: res.data.data,
            isSwiperLoaded: true
        })
    }
3.只有轮播图数据加载完成的情况下,才渲染轮播图组件
    render() {
        return (
            <div>
                {/* 轮播图 */}
                {
                    this.state.isSwiperLoaded ? (
                        <Carousel
                            autoplay
                            infinite
                        >
                            {this.renderSwipers()}
                        </Carousel>
                    ) : ''
                }


                {/* 导航菜单 */}
                <Flex className="nav">
                    {this.renderNavs()}
                </Flex>
            </div>
        );
    }
第三种方法:
外元素宽度百分百,计算外元素高度
图片原型的高度 /图片原型的宽度 = 外元素的高度/100vw
那么:外元素的高度 = 图片原型的高度 * 100vw / 图片原型的宽度
.am-carousel,.slider-frame,.slider-list{
    height: 50vw!important;
}
整体代码:
import React from 'react'
import { Carousel } from 'antd-mobile';
import { Flex } from 'antd-mobile';
import axios from 'axios'
import './index.css'

import nav1 from '../../assets/images/nav-1.png'
import nav2 from '../../assets/images/nav-2.png'
import nav3 from '../../assets/images/nav-3.png'
import nav4 from '../../assets/images/nav-4.png'
export default class Index extends React.Component {
    state = {
        //轮播图状态数据
        swipers: [],
        flexData: [
            {
                src: nav1,
                text: '整租',
                id: '1',
                path: '/home/list'
            },
            {
                src: nav2,
                text: '合租',
                id: '2',
                path: '/home/news'
            },
            {
                src: nav3,
                text: '地图找房',
                id: '3',
                path: '/home'
            },
            {
                src: nav4,
                text: '整租',
                id: '4',
                path: '/home/profile'
            }
        ],
        isLoad: false,
        isSwiperLoaded: false
    }
    async getSwiper() {
        const res = await axios.get('/swiper')
        this.setState({
            swipers: res.data.data,
            isSwiperLoaded: true
        })
    }
    componentDidMount() {
        this.getSwiper()

    }
    //渲染轮播图
    renderSwipers() {
        return this.state.swipers.map(item => (
            <span
                key={item.id}
                className="swiperItem"
            >
                <img
                    src={item.imgScr}
                    alt=""
                    style={{ width: '100%', verticalAlign: 'top' }}
                />
            </span>
        ))
    }
    renderNavs(){
        return this.state.flexData.map(item => (
            <Flex.Item key={item.id} onClick={() => {
                this.props.history.push(item.path)
            }}>
                <img src={item.src} alt="" />
                <h2>{item.text}</h2>
            </Flex.Item>
        )
        )
    }
    render() {
        return (
            <div>
                {/* 轮播图 */}
                {
                    this.state.isSwiperLoaded ? (
                        <Carousel
                            autoplay
                            infinite
                        >
                            {this.renderSwipers()}
                        </Carousel>
                    ) : ''
                }


                {/* 导航菜单 */}
                <Flex className="nav">
                    {this.renderNavs()}
                </Flex>
            </div>
        );
    }
}
4.tabBar菜单高亮问题
问题:点击首页导航菜单,路由变了,渲染内容也变了,但下面图标高亮没变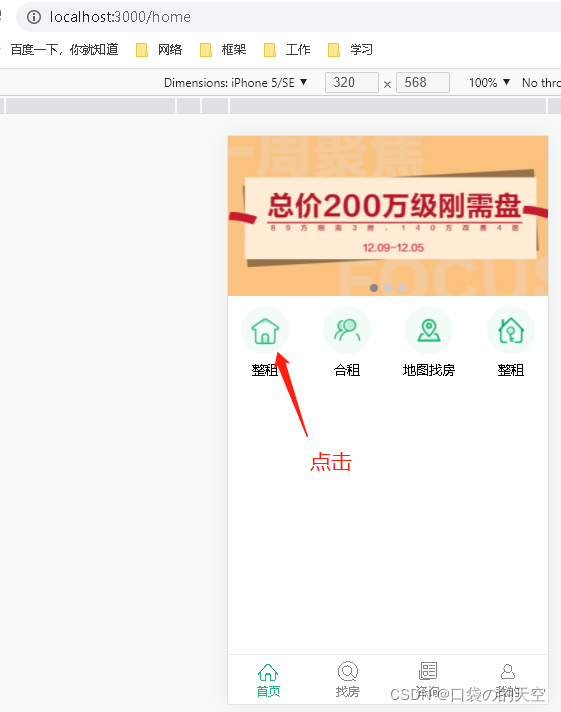
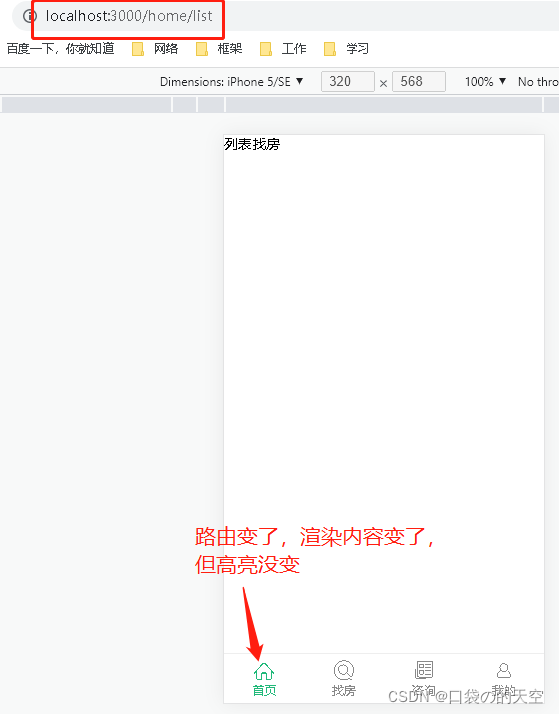
原因:因为点击图标的时候,没有重新加载Home组件,只是组件路由的切换
解决:在路由切换的时候,也执行菜单高亮的逻辑代码
1.添加componentDidUpdate钩子函数
2.在钩子函数中判断路由地址是否切换(比较前后的两个props,因为路由的信息是通过props传递给组件的)
3.在路由地址切换时,让菜单高亮
    componentDidUpdate(preProps){
        console.log('上一次的路由信息',preProps)
        console.log('当前路有信息',this.props)
        if(preProps.location.pathname!==this.props.location.pathname){
            this.setState({
                selectedTab:this.props.location.pathname
            })
        }
    }
七.node-sass
安装:npm i node-sass
然后就可以直接使用了,把之前的.css结尾的文件改成.scss的文件,然后.scss的文件就可以直接使用语法。
有时候版本太高了会报错,建议手动安装5.0或者6.0的版本
八.租房小组
import React from 'react'
import { Carousel } from 'antd-mobile';
import { Flex } from 'antd-mobile';
import { Grid } from 'antd-mobile';
import { WingBlank } from 'antd-mobile';
import axios from 'axios'
import './index.scss'

export default class Index extends React.Component {
    state = {
        groups: [],
        news: []
    }
    async getGroup() {
        const res = await axios.get('/groups')
        console.log(res)
        this.setState({
            groups: res.data.data
        })
    }
    async getNews() {
        const res = await axios.get('/news')
        this.setState({
            news:res.data.data
        })
        console.log(res)
    }
    componentDidMount() {
        this.getSwiper()
        this.getGroup()
        this.getNews()
    }
    renderNavs() {
        return this.state.flexData.map(item => (
            <Flex.Item key={item.id} onClick={() => {
                this.props.history.push(item.path)
            }}>
                <img src={item.src} alt="" />
                <h2>{item.text}</h2>
            </Flex.Item>
        )
        )
    }
    renderNews() {
        return this.state.news.map(item => (
            <div className="news-item" key={item.id}>
                <div className="imgWrap">
                    <img className="img" src={item.imgSrc} alt="" />
                </div>
                <Flex className="content" direction="column" justify="between">
                    <h3 className="title">{item.title}</h3>
                    <div className="news-from">
                        <span>{item.from}</span>
                        <span>{item.data}</span>
                    </div>
                </Flex>
            </div>
        ))
    }
    render() {
        return (
            <div>
                {/* 租房小组 */}
                <div className="group">
                    <h3 className="title">租房小组
                        <span className="more">更多</span>
                    </h3>
                    {/* 宫格组件 */}
                    <Grid
                        data={this.state.groups}
                        columnNum={2}
                        square={false}
                        hasLine={false}
                        renderItem={(item) => (
                            <Flex className="group-item" justify="around" key={item.id}>
                                <div className="desc">
                                    <p className="title">{item.title}</p>
                                    <span className="info">{item.desc}</span>
                                </div>
                                {/* {item.imgScr} */}
                                <img src={item.imgScr} alt="" />
                            </Flex>
                        )
                        }
                    />

                </div>

                 {/* 最新资讯 */}
                 <div className="news">
                        <h3 className="group-title">最新资讯</h3>
                        <WingBlank size="md">
                            {this.renderNews()}
                        </WingBlank>
                    </div>
            </div>
        );
    }
}
九.搜索框
import React from 'react'
import { Carousel } from 'antd-mobile';
import { Flex } from 'antd-mobile';
import { Grid } from 'antd-mobile';
import { WingBlank } from 'antd-mobile';
import axios from 'axios'
import './index.scss'

import nav1 from '../../assets/images/nav-1.png'
import nav2 from '../../assets/images/nav-2.png'
import nav3 from '../../assets/images/nav-3.png'
import nav4 from '../../assets/images/nav-4.png'


export default class Index extends React.Component {
    state = {
        //轮播图状态数据
        swipers: [],
        flexData: [
            {
                src: nav1,
                text: '整租',
                id: '1',
                path: '/home/list'
            },
            {
                src: nav2,
                text: '合租',
                id: '2',
                path: '/home/news'
            },
            {
                src: nav3,
                text: '地图找房',
                id: '3',
                path: '/home'
            },
            {
                src: nav4,
                text: '整租',
                id: '4',
                path: '/home/profile'
            }
        ],
        isLoad: false,
        isSwiperLoaded: false,
        groups: [],
        news: []
    }
    async getSwiper() {
        const res = await axios.get('/swiper')
        this.setState({
            swipers: res.data.data,
            isSwiperLoaded: true
        })
    }
    componentDidMount() {
        this.getSwiper()
    }
    //渲染轮播图
    renderSwipers() {
        return this.state.swipers.map(item => (
            <span
                key={item.id}
                className="swiperItem"
            >
                <img
                    src={item.imgScr}
                    alt=""
                    style={{ width: '100%', verticalAlign: 'top' }}
                />
            </span>
        ))
    }


    render() {
        return (
            <div className="index">
                {/* 轮播图 */}
                <div className="swiper">
                    {
                        this.state.isSwiperLoaded ? (
                            <Carousel
                                autoplay
                                infinite
                            >
                                {this.renderSwipers()}
                            </Carousel>
                        ) : ''
                    }
                    {/* 搜索框 */}
                    <Flex className="search-box">
                        {/* 左侧白色区域 */}
                        <Flex className="search">
                            {/* 位置 */}
                            <div
                                className="location"
                                onClick={() => this.props.history.push('/citylist')}
                            >
                                <span className="name">上海</span>
                                <i className="iconfont icon-arrow" />
                            </div>

                            {/* 搜索表单 */}
                            <div
                                className="form"
                                onClick={() => this.props.history.push('/search')}
                            >
                                <i className="iconfont icon-seach" />
                                <span className="text">请输入小区或地址</span>
                            </div>
                        </Flex>
                        {/* 右侧地图图标 */}
                        <i
                            className="iconfont icon-map"
                            onClick={() => this.props.history.push('/map')}
                        />
                    </Flex>

                </div>
            </div>
        );
    }
}
css:
// 轮播图
.swiper {
    position: relative;

    // 顶部导航
    .search-box {
      position: absolute;
      top: 25px;
      width: 100%;
      padding: 0 10px;

      // 左侧白色区域
      .search {
        flex: 1;
        height: 34px;
        margin: 0 10px;
        padding: 5px 5px 5px 8px;
        border-radius: 3px;
        background-color: #fff;

        // 位置
        .location {
          .icon-arrow {
            margin-left: 2px;
            font-size: 12px;
            color: #7f7f80;
          }
        }

        // 搜索表单
        .form {
          border-left: solid 1px #e5e5e5;
          margin-left: 12px;
          line-height: 16px;

          .icon-seach {
            vertical-align: middle;
            padding: 0 2px 0 12px;
            color: #9c9fa1;
            font-size: 15px;
          }

          .text {
            padding-left: 4px;
            font-size: 13px;
            color: #9c9fa1;
          }
        }
      }

      // 右侧地图图标
      .icon-map {
        font-size: 25px;
        color: #fff;
      }
    }
  }
十.H5中的地理位置API
- 场景:根据当前地理位置,获取当前所在城市的房源信息
- 作用:在Web应用程序中获取地理位置(文档地址)
- 说明:地理位置API通过
navigator.geolocation对象提供,通过getCurrentPosition方法获取 - 注意:获取到的地理位置跟 GPS,IP地址,WIFI和蓝牙的MAC地址,GSM/CDMS的ID有关
- 比如:手机优先使用GPS定位,笔记本等最准确的定位是WIFI
navigator.geolocation.getCurrentPosition(function(position) {
	//position对象表示当前位置信息
	//latitude 纬度,longitude 经度
  	console.log(positione);
});
返回的数据:
coords: GeolocationCoordinates
accuracy: 1804475.2390180232 //经纬度的精度
altitude: null //海拔高度
altitudeAccuracy: null //海拔高度的精度
heading: null //设备行进方向
latitude: 35.86166 //纬度
longitude: 104.195397 //经度
speed: null //速度
timestamp: 1640055543943
进入页面就可以直接获取到: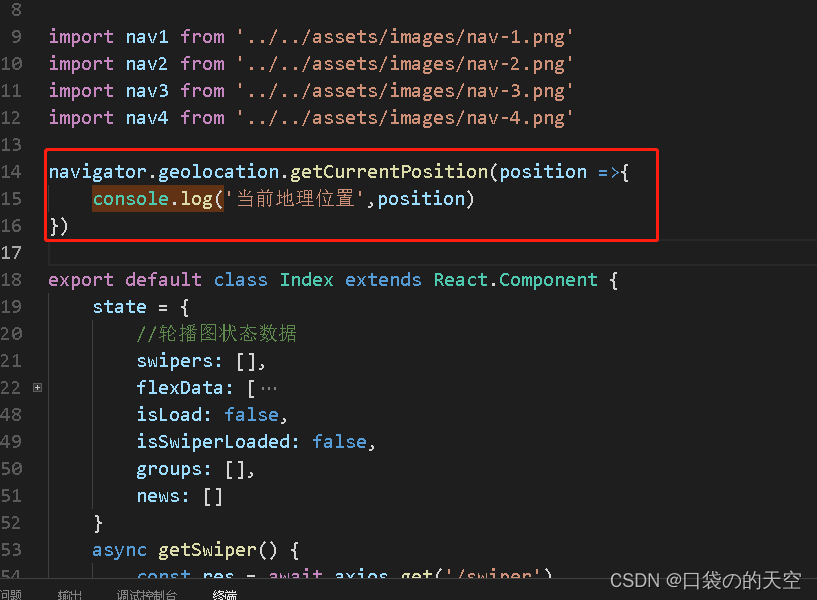
十一.百度地图API
1.介绍
H5的地理位置API只能获取到经纬度信息,实际开发中,会使用百度地图、高德地图来完成地理位置的相关功能
百度地图API官网 (首页 -> 开发者文档 -> Javascript API)
注意:使用前,需要先申请百度账号和ak,获取到密钥ak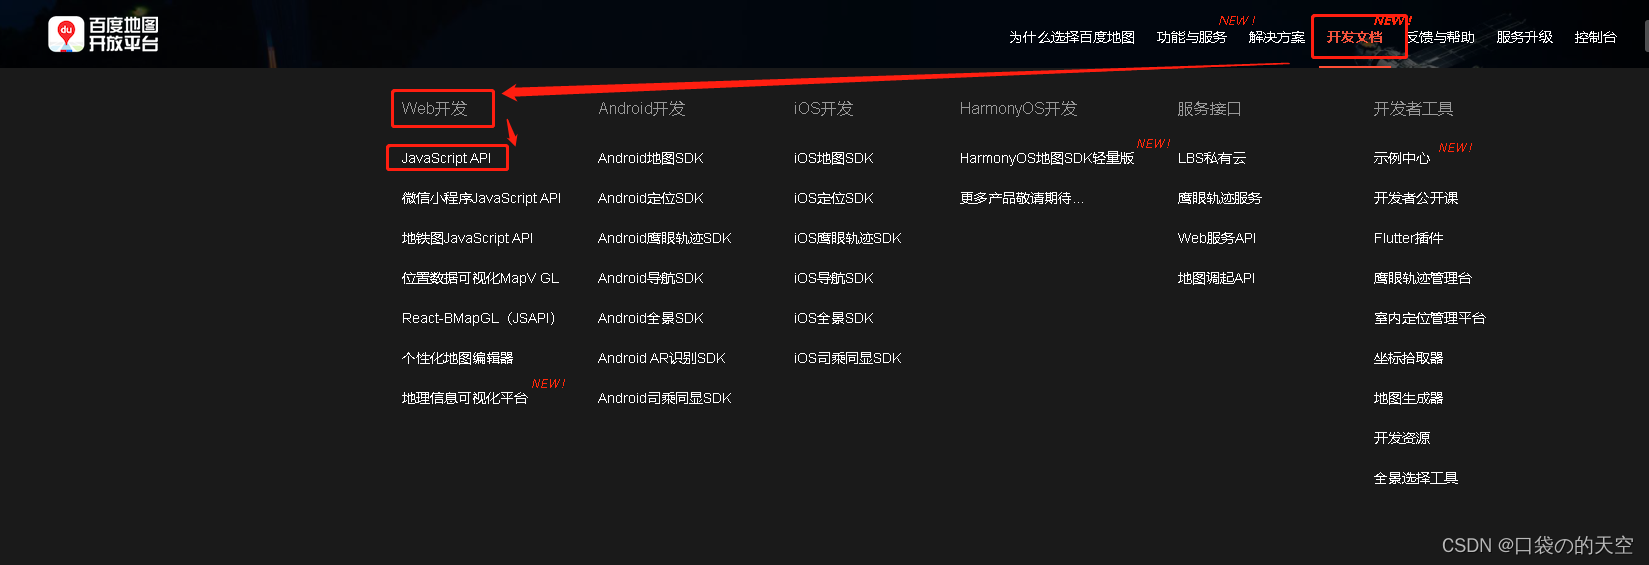
2.申请百度账号和密钥
①注册百度账号,登录 百度地图开发平台
②点击控制台 ->应用管理 -> 我的应用 -> 创建应用
③获取到密钥(ak)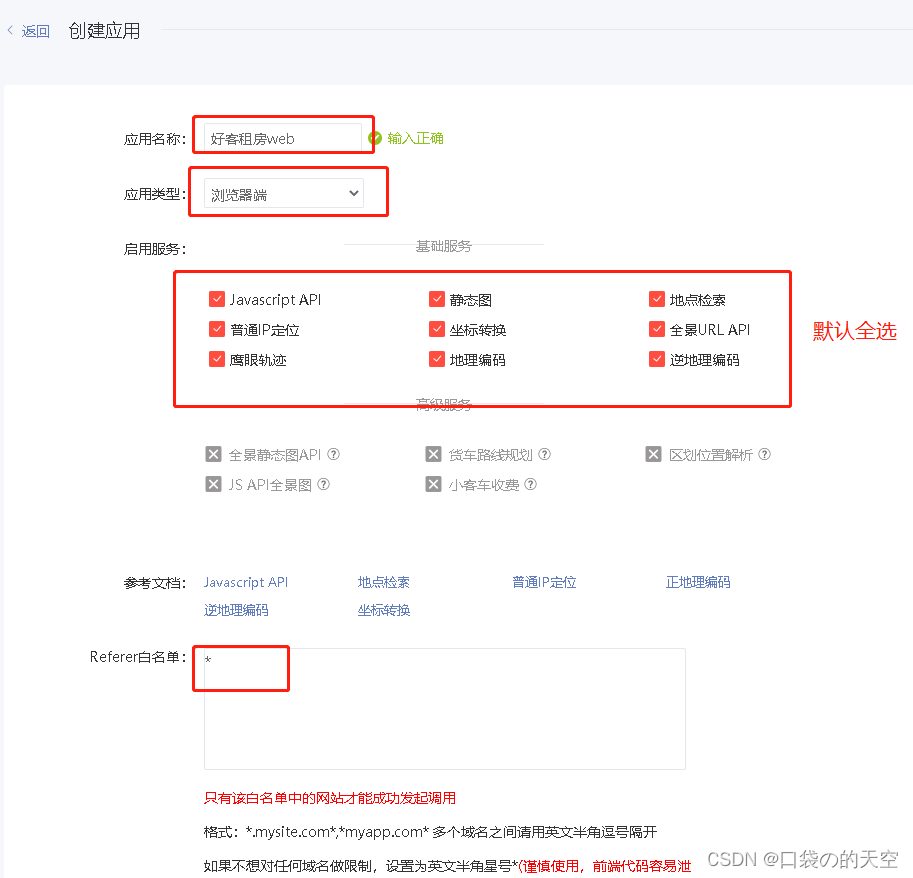
申请成功以后,ak就是密钥
3.使用步骤
1)根据经纬度展示地图
(参考Hello World的写法)
①在html页面引入百度地图API的JS文件,替换自己申请号的密钥
<script type="text/javascript" src="https://api.map.baidu.com/api?v=1.0&&type=webgl&ak=您的密钥"></script >
②在index.css中设置全局样式
html,body{
  height: 100%;
  margin: 0;
  padding: 0;
}

#root,.App{
  height: 100%;
}
③创建Map组件,配置路由,并在Map组件中,创建地图容器元素,并设置样式
(pages路径下创建一个Map文件夹,在内创建index.js文件)
import React from 'react'
// 导入样式
import './index.scss'

export default class Map extends React.Component {
    componentDidMount() {
        // 初始化地图实例
        // 注意:在react脚手架中全局对象需要使用window来访问,否则,会造成Eslint校验报错
        var map = new window.BMapGL.Map("container");
        // 设置中心点坐标
        const point = new window.BMapGL.Point(116.404, 39.915)
        // 初始化地图
        map.centerAndZoom(point, 15)
    }
    render() {
        return <div className='map'>
            {/* 地图容器元素 */}
            <div id='container'></div>
        </div>
    }
}
引入的index.sss文件:
#container,.map{
    height: 100%;
}
由于页面下面没有tabBar,所以在App.js页面配置路由,引入Map组件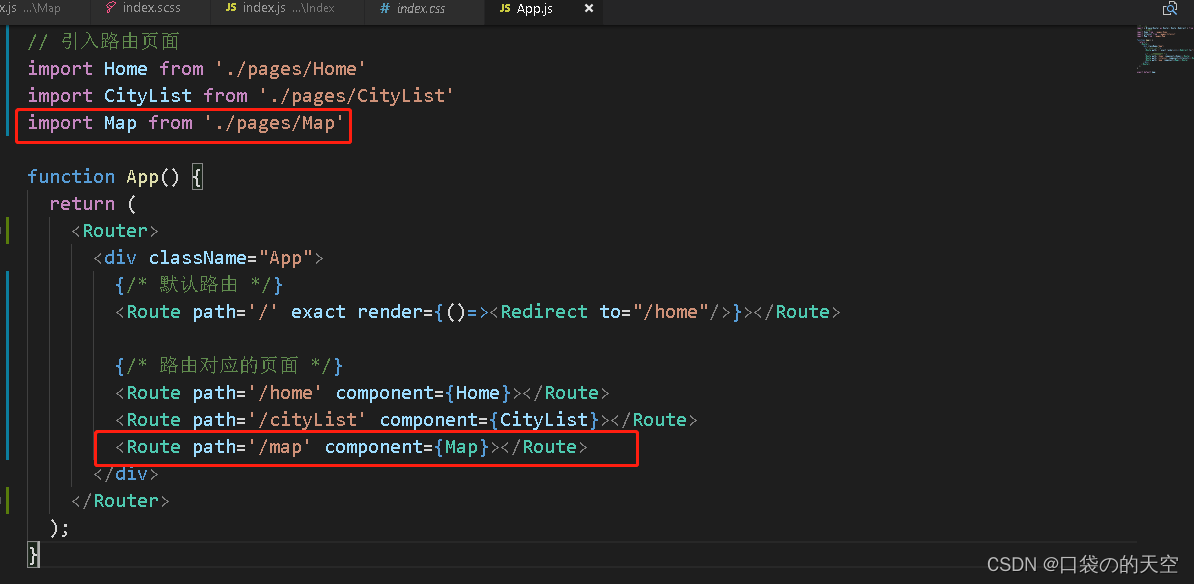
2) 获取当前的地理位置
下面的方法是:通过IP定位获取到当前城市名称
componentDidMount() {
        // 通过IP定位获取到当前城市名称
        const curCity = new window.BMapGL.LocalCity()
        curCity.get(res => {
            console.log('当前地理名称为',res.name)
        })
    }
十二.城市选择模块
1.处理数据
1) 数据字母排序
原本接口返回的数据是没有按照字母的顺序,而且是这种格式
所以我们需要处理,处理成这种格式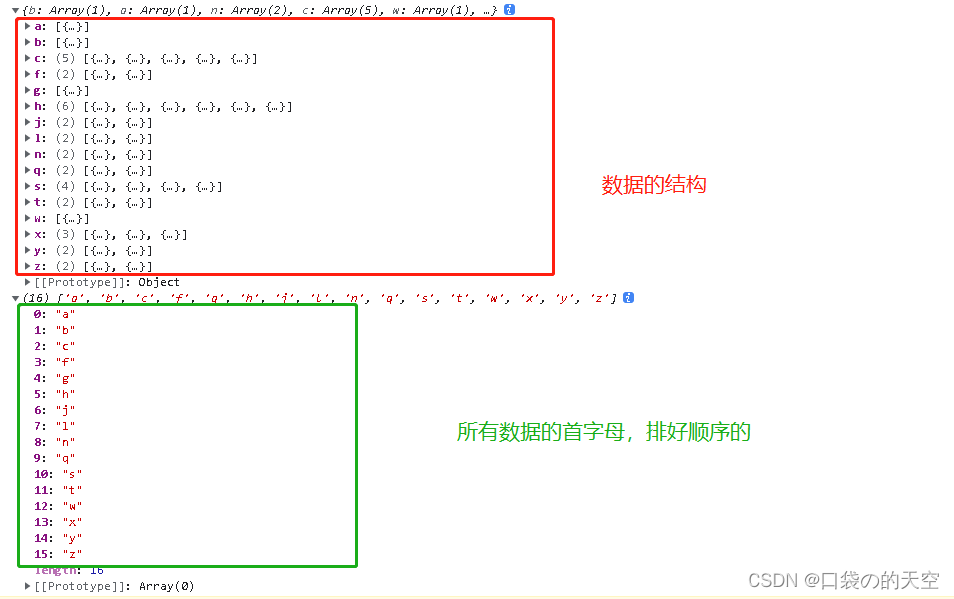
代码:
import React from 'react'
import axios from 'axios'
import { NavBar } from 'antd-mobile';
import './index.scss'

const formatCityData = (list) => {
    const cityList = {}
    //1.遍历list数组
    list.forEach(item =>{
        //2.获取每一个城市的首字母
        const first=item.short.substr(0,1)
        //3.判断cityList中是否有该分类
        if(cityList[first]){
            //4.如果有,直接往该分类中push数据
            cityList[first].push(item)
        }else{
            //5.如果没有,就先创建一个数组,把当前城市信息添加到数组中
            cityList[first]=[item]
        }
    })

    //获取索引数据,要想按照字母顺序就用sort自动排序
    const cityIndex = Object.keys(cityList).sort()

    return{
        cityList,cityIndex
    }
}


export default class CityList extends React.Component {
    componentDidMount() {
        this.getCityList()
    }
    async getCityList() {
        const res = await axios.get('/cityList')
        console.log(res)
        const { cityList, cityIndex } = formatCityData(res.data.data)
        console.log(cityList, cityIndex)
    }
    render() {
        return <div className="cityList">
            <NavBar className='navBar'
                mode="light"
                icon={<i className="iconfont icon-back"></i>}
                onLeftClick={() => this.props.history.go(-1)}
            >城市选择</NavBar>
        </div>
    }
}
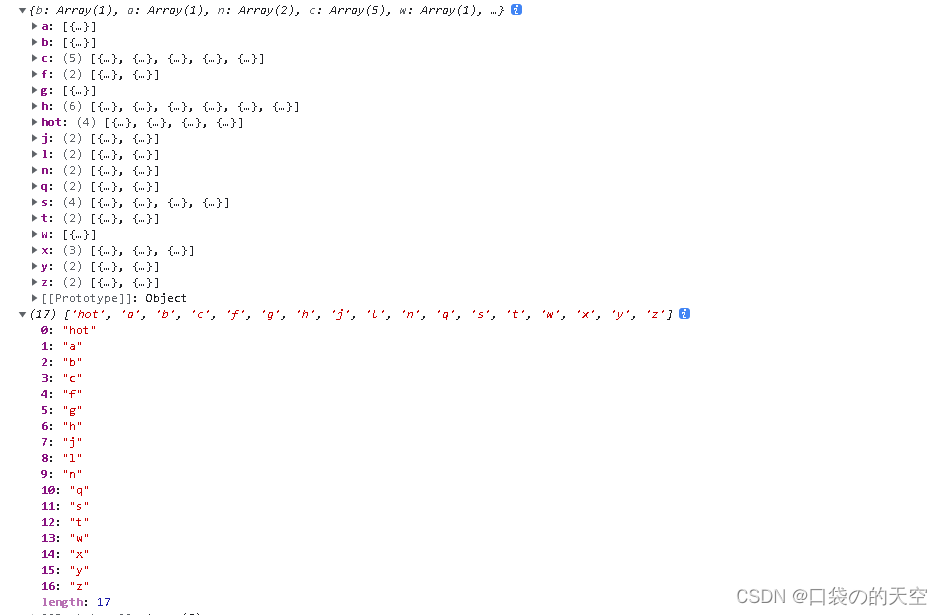
2)添加热门数据和索引
async getCityList() {
        //获取所有城市数据
        const res = await axios.get('/cityList')
        const { cityList, cityIndex } = formatCityData(res.data.data)

        //获取热门城市数据
        const hotRes= await axios.get('/hotCityList')
        // console.log(hotRes)

        //将热门数据添加到所有城市数据中
        cityList['hot'] = hotRes.data.data

        //将热门索引添加到cityIndex中
        cityIndex.unshift('hot')

        console.log(cityList,cityIndex)

    }
2.封裝函數:获取当前地址
1.在utils目录中,新建Index.js,在该文件中封装
2.创建并导出获取定位城市的函数getCurrentCity
3.判断localStorage中是否有定位城市
4.如果没有,就是用手也中获取尘世定位的代码来获取,并且存储到本地存储中,然后返回该城市数据
5.如果有,直接返回本地存储中的城市数据
utils文件内的index.js:
//1.在utils目录中,新建Index.js,在该文件中封装
// 2.创建并导出获取定位城市的函数getCurrentCity
export const getCurrentCity = () => {
    // 3.判断localStorage中是否有定位城市
    const localCity = JSON.parse(localStorage.getItem('hkzf_city'))
    if (!localCity) {
        // 4.如果没有,就是用手也中获取尘世定位的代码来获取,并且存储到本地存储中,然后返回该城市数据
        return new Promise((resolve,reject) => {
            const curCity = new window.BMapGL.LocalCity()
            curCity.get(async res => {
                console.log(res.name)
                localStorage.setItem('hkzf_city', JSON.stringify(res.name))
                resolve()
            })
        })
    }
    //5.如果有,直接返回本地存储中的城市数据
    //注意:因为上面为了处理异步操作,使用了Promise,因此为了该函数返回值的统一,此处也是用Promise.
    //由于此处的Promise不会失败,所以此处之需要返回一个成功的Promise即可
    return Promise.resolve(localCity)
}
在需要的页面引入,直接调用就可以了
import { getCurrentCity } from './../../utils'

 // 通过IP定位获取到当前城市名称
const res = await getCurrentCity()
 this.setState({
     curCityName: res
 })
3.长列表性能优化
场景:大型列表和表格数据(如:通讯录,微博。城市列表等),会导致页面卡顿,滚动不流畅
原因:大量DOM节点的重绘和重排
优化方案:1.懒渲染,2.可区域渲染
1) 懒渲染说明
- 常见的长列表优化方案,常见于移动端
- 原理:每次只渲染一部分(比如10条数据),等渲染的数据即将滚动完时,再渲染下面部分
- 优点:每次渲染一部分数据,速度快
- 缺点:数据量大时,页面依然存在大量DOM节点,占用内存过多、降低浏览器性能,导致页面卡顿
- 使用场景:数据量不大的情况(比如1000条,具体还要看每条数据的复杂程度)
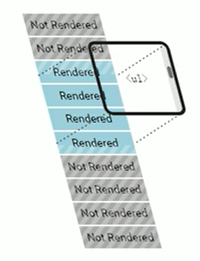
2) 可视区域渲染 —— react-virtualized
- 原理:只渲染页面可视区域的列表项,非可视区域的数据“完全不渲染”,在滚动列表时动态更新列表项
- 使用场景:一次性展示大量数据的情况(比如:大表格,微博,聊天应用等)
2-1 文档地址
react-virtualized是React组件,用来高效渲染大型列表和表格数据
github地址
2-2 基本使用:
①安装:npm i react-virtualized
②在项目入口文件 index.js中导入样式文件
import 'react-virtualized/styles.css';
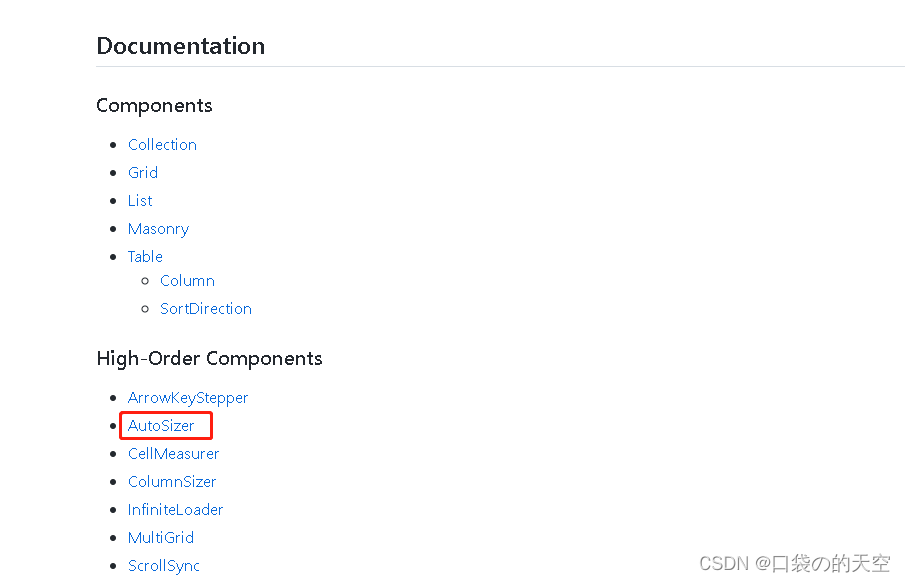
③打开文档,找到List组件,进入List的文档中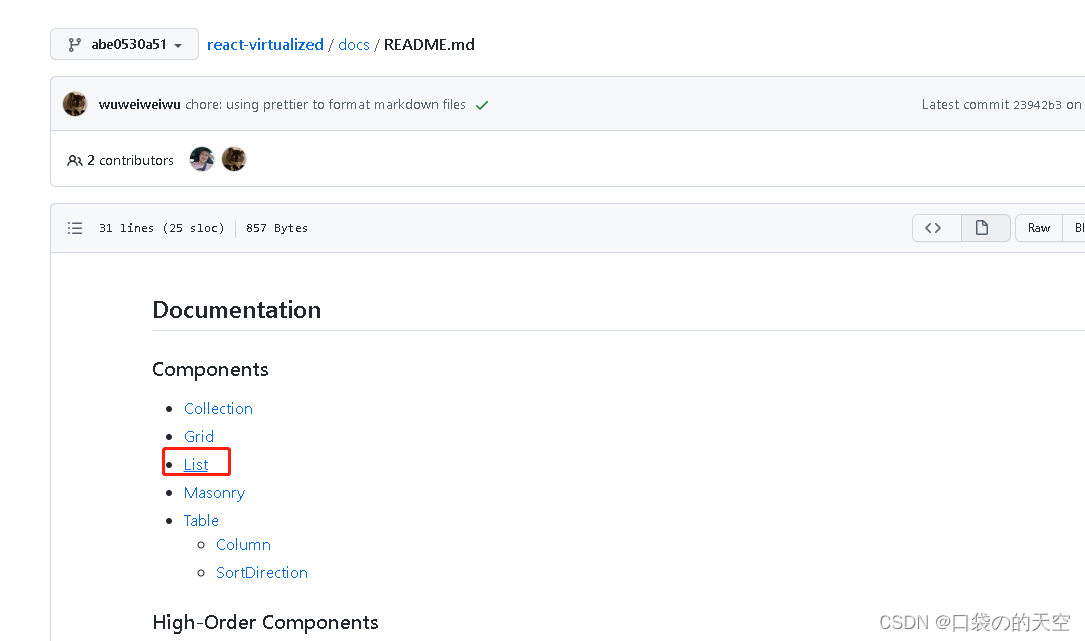
假数据:
import React from 'react'
import axios from 'axios'
import { NavBar } from 'antd-mobile';
import './index.scss'
import { List } from 'react-virtualized';

//列表数据的数据源
const list = Array(100).fill('react-virtualized');

//渲染每一行数据的渲染函数
function rowRenderer({
    key, // 唯一值
    index, // I索引号
    isScrolling, // 当前项是否在滚动中
    isVisible, //  当前项在list中是可见的
    style, // 用于给每一行数据添加样式,指定每一行的位置(非常重要,一定要加)
  }) {
    return (
      <div key={key} style={style}>
        {list[index]}
      </div>
    );
  }


export default class CityList extends React.Component {
    render() {
        return <div className="cityList">
            {/* rowCount 行数,rowHeight  每行高度,rowRenderer  渲染每一行的函数 */}
            <List
                width={300}
                height={300}
                rowCount={list.length}
                rowHeight={20}
                rowRenderer={rowRenderer}
            />
        </div>
    }
}
2-3 List组件占满屏幕——AutoSizer高阶组件
import { List, AutoSizer } from 'react-virtualized';

            <AutoSizer>
                {
                    ({ height, width }) => (
                        <List
                            width={width}
                            height={height}
                            rowCount={list.length}
                            rowHeight={20}
                            rowRenderer={rowRenderer}
                        />
                    )
                }
            </AutoSizer>
此时高度和宽度就是占满屏,但还需要用css调节父级的高度为100%,可父级设置为100%的时候,发现父级有滚动条,因为内容区域由于AutoSizer 也自动高度为100%,也就是多出了导航头部区域,导致100%+45px,所以父级有滚动条。解决方法就是把这45px设置为padiing的高度,然后导航栏的margin-top:-45px即可。因为padding也在height里面一起计算,这个就可以把height缩短。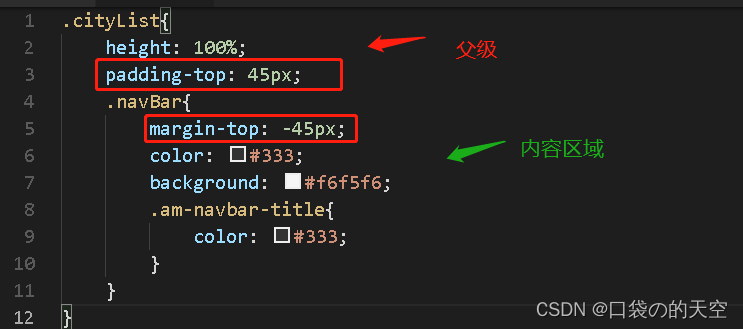
页面结果是这样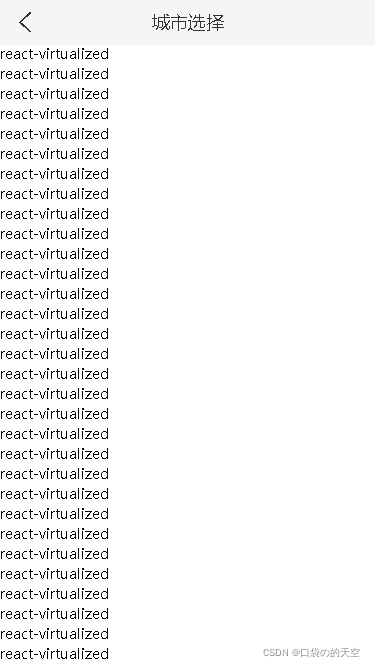
2-4 渲染列表左边部分
①将获取到的cityList和cityIndex添加为组件的状态数据
②修改List组件的rowCount为cityIndex数组的长度
③将rowRenderer函数,添加到组件中,以便在函数中获取到状态数据cityList和cityIndex
④修改List组件的rowRenderer为组件中的rowRenderer方法
⑤修改rowRenderer方法中渲染的每行结构和样式
⑥修改List组件的rowHeight为函数,动态计算每一行的高度(因为每一行高度都不相同)
import React from 'react'
import axios from 'axios'
import { NavBar } from 'antd-mobile';
import './index.scss'
import { List, AutoSizer } from 'react-virtualized';

const formatCityData = (list) => {
    const cityList = {}
    //1.遍历list数组
    list.forEach(item => {
        //2.获取每一个城市的首字母
        const first = item.short.substr(0, 1)
        //3.判断cityList中是否有该分类
        if (cityList[first]) {
            //4.如果有,直接往该分类中push数据
            cityList[first].push(item)
        } else {
            //5.如果没有,就先创建一个数组,把当前城市信息添加到数组中
            cityList[first] = [item]
        }
    })

    //获取索引数据,要想按照字母顺序就用sort自动排序
    const cityIndex = Object.keys(cityList).sort()

    return {
        cityList, cityIndex
    }
}
//封装处理字母索引的方法
const formatCityIndex = (letter) => {
    switch (letter) {
        case '#':
            return '当前定位';

        case 'hot':
            return '热门城市';

        default:
            return letter.toUpperCase()
    }
}
//每个索引高度
const TITLE_HEIGHT = 36
//每个城市高度
const NAME_HEIGHT = 50


export default class CityList extends React.Component {
    state = {
        cityList: {},
        cityIndex: []
    }
    componentDidMount() {
        this.getCityList()
    }
    async getCityList() {
        //获取所有城市数据
        const res = await axios.get('/cityList')
        const { cityList, cityIndex } = formatCityData(res.data.data)

        //获取热门城市数据
        const hotRes = await axios.get('/hotCityList')
        // console.log(hotRes)

        //将热门数据添加到所有城市数据中
        cityList['hot'] = hotRes.data.data

        //将热门索引添加到cityIndex中
        cityIndex.unshift('hot')

        // 通过IP定位获取到当前城市名称
        // const curCity = await getCurrentCity()
        const curCity = [{ label: '上海', value: '38' }]

        //由于我们这边没有接口,所以造个假数据
        cityList['#'] = curCity
        cityIndex.unshift('#')
        console.log(cityList, cityIndex)
        this.setState({
            cityList,
            cityIndex
        })
    }

    //渲染每一行数据的渲染函数
    rowRenderer = ({
        key, // 唯一值
        index, // 索引号
        isScrolling, // 当前项是否在滚动中
        isVisible, //  当前项在list中是可见的
        style, // 用于给每一行数据添加样式,指定每一行的位置(非常重要,一定要加)
    }) => {
        //获取每一行的字母索引
        const { cityIndex, cityList } = this.state
        const letter = cityIndex[index]

        //获取指定字母索引下的城市列表数据
        return (
            <div key={key} style={style} className="city">
                <div className='title'>{formatCityIndex(letter)}</div>
                {
                    cityList[letter].map(item =>
                        <div className='name' key={item.value}>{item.label}</div>
                    )
                }
            </div>
        );
    }

    //动态计算每一行高度,这里的参数index和上面的方法一样,插件自带的
    getRowHeight = ({ index }) => {
        // 索引标题高度 + 城市高度 * 城市名称数量
        // TITLE_HEIGHT + cityList[cityIndex[index]].length * NAME_HEIGHT
        const { cityIndex, cityList } = this.state
        return TITLE_HEIGHT + cityList[cityIndex[index]].length * NAME_HEIGHT
    }
    render() {
        return <div className="cityList">
            <NavBar className='navBar'
                mode="light"
                icon={<i className="iconfont icon-back"></i>}
                onLeftClick={() => this.props.history.go(-1)}
            >城市选择</NavBar>

            {/* rowCount 行数,rowHeight  每行高度,rowRenderer  渲染每一行的函数 */}
            <AutoSizer>
                {
                    ({ height, width }) => (
                        <List
                            width={width}
                            height={height}
                            rowCount={this.state.cityIndex.length}
                            rowHeight={this.getRowHeight}
                            rowRenderer={this.rowRenderer}
                        />
                    )
                }
            </AutoSizer>

        </div>
    }
}
效果:
2-5 渲染列表右边部分
展示所有索引,添加默认高亮:
①封装renderCityIndex方法,用来渲染城市索引列表
②在方法中,获取到索引数组cityIndex,遍历cityIndex,渲染索引列表
③将索引hot替换为热
④在state中添加状态activeIndex,来指定当前高亮的索引
⑤在遍历cityIndex时,添加当前字母索引是否高亮的判断条件
滚动城市列表,让对应索引高亮:
①给List组件添加onRowsRendered配置项,用于获取当前列表渲染的行信息
②通过参数startIndex获取到起始行索引(也就是城市列表可视区最顶部一行的索引号)
③判断startIndex和activeIndex是否相同(判断的目的是为了提升性能,避免不必要的state更新)
④当startIndex和activeIndex不同时,更新状态activeIndex为startIndex的值
onRowsRendered的参数有四个 ({ overscanStartIndex: number, overscanStopIndex: number, startIndex: number, stopIndex: number }): void
overscanStartIndex: ,
overscanStopIndex: ,
startIndex: , 指当前列表中顶部的索引号
stopIndex: ,指当前列表中底部的索引号
import React from 'react'
import axios from 'axios'
import { NavBar } from 'antd-mobile';
import './index.scss'
import { List, AutoSizer } from 'react-virtualized';

const formatCityData = (list) => {
    const cityList = {}
    //1.遍历list数组
    list.forEach(item => {
        //2.获取每一个城市的首字母
        const first = item.short.substr(0, 1)
        //3.判断cityList中是否有该分类
        if (cityList[first]) {
            //4.如果有,直接往该分类中push数据
            cityList[first].push(item)
        } else {
            //5.如果没有,就先创建一个数组,把当前城市信息添加到数组中
            cityList[first] = [item]
        }
    })

    //获取索引数据,要想按照字母顺序就用sort自动排序
    const cityIndex = Object.keys(cityList).sort()

    return {
        cityList, cityIndex
    }
}
//封装处理字母索引的方法
const formatCityIndex = (letter) => {
    switch (letter) {
        case '#':
            return '当前定位';

        case 'hot':
            return '热门城市';

        default:
            return letter.toUpperCase()
    }
}
//每个索引高度
const TITLE_HEIGHT = 36
//每个城市高度
const NAME_HEIGHT = 50


export default class CityList extends React.Component {
    state = {
        cityList: {},
        cityIndex: [],
        activeIndex: 0
    }
    componentDidMount() {
        this.getCityList()
    }
    async getCityList() {
        //获取所有城市数据
        const res = await axios.get('/cityList')
        const { cityList, cityIndex } = formatCityData(res.data.data)

        //获取热门城市数据
        const hotRes = await axios.get('/hotCityList')
        // console.log(hotRes)

        //将热门数据添加到所有城市数据中
        cityList['hot'] = hotRes.data.data

        //将热门索引添加到cityIndex中
        cityIndex.unshift('hot')

        // 通过IP定位获取到当前城市名称
        // const curCity = await getCurrentCity()
        const curCity = [{ label: '上海', value: '38' }]

        //由于我们这边没有接口,所以造个假数据
        cityList['#'] = curCity
        cityIndex.unshift('#')
        console.log(cityList, cityIndex)
        this.setState({
            cityList,
            cityIndex
        })
    }
    renderCityIndex = () => {
        return this.state.cityIndex.map((item, index) =>
            <li className='city-index-item' key={item}>
                <span className={this.state.activeIndex == index ? 'index-active' : ''}>
                    {item == 'hot' ? '热' : item.toUpperCase()}
                </span>
            </li>
        )
    }

    //渲染每一行数据的渲染函数
    rowRenderer = ({
        key, // 唯一值
        index, // 索引号
        isScrolling, // 当前项是否在滚动中
        isVisible, //  当前项在list中是可见的
        style, // 用于给每一行数据添加样式,指定每一行的位置(非常重要,一定要加)
    }) => {
        //获取每一行的字母索引
        const { cityIndex, cityList } = this.state
        const letter = cityIndex[index]

        //获取指定字母索引下的城市列表数据
        return (
            <div key={key} style={style} className="city">
                <div className='title'>{formatCityIndex(letter)}</div>
                {
                    cityList[letter].map(item =>
                        <div className='name' key={item.value}>{item.label}</div>
                    )
                }
            </div>
        );
    }

    //动态计算每一行高度,这里的参数index和上面的方法一样,插件自带的
    getRowHeight = ({ index }) => {
        // 索引标题高度 + 城市高度 * 城市名称数量
        // TITLE_HEIGHT + cityList[cityIndex[index]].length * NAME_HEIGHT
        const { cityIndex, cityList } = this.state
        return TITLE_HEIGHT + cityList[cityIndex[index]].length * NAME_HEIGHT
    }
    //用于获取List组件中渲染行的信息
    onRowsRendered = ({ startIndex }) => {
        //当前高亮的字母和列表的第一个字母不一致,就赋值给高亮的字母
        if (this.state.activeIndex !== startIndex) {
            this.setState({
                activeIndex:startIndex
            })
        }
    }
    render() {
        return <div className="cityList">
            <NavBar className='navBar'
                mode="light"
                icon={<i className="iconfont icon-back"></i>}
                onLeftClick={() => this.props.history.go(-1)}
            >城市选择</NavBar>

            {/* rowCount 行数,rowHeight  每行高度,rowRenderer  渲染每一行的函数 */}
            <AutoSizer>
                {
                    ({ height, width }) => (
                        <List
                            width={width}
                            height={height}
                            rowCount={this.state.cityIndex.length}
                            rowHeight={this.getRowHeight}
                            rowRenderer={this.rowRenderer}
                            onRowsRendered={this.onRowsRendered}
                        />
                    )
                }
            </AutoSizer>
            {/* 右侧索引列表 */}
            <ul className='city-index'>
                {
                    this.renderCityIndex()
                }
            </ul>

        </div>
    }
}
点击索引置顶该索引城市
①给索列表顶绑定点击事件
②在点击事件中,通过index获取到当前项索引号
③调用List组件的scrollToRow方法,让List组件滚动到指定行
- 在
constructor中,调用React.createRef()创建ref对象 - 将创建好的
ref对象,添加为List组件的ref属性 - 通过
ref的current属性,获取组件实例,再调用组件的scrollToRow方法
④设置List组件的scrollToAlignment配置项为start,保证被点击行出现在页面顶部否则会出现偏差
⑤对于没有出现过在可视区,导致点击索引无法正确定位的问题。通过调用List组件的measureAllRows方法来解决,因为在还没有完全渲染之前,提前计算每一行的高度,当知道每一行的高度之后,就相当于这一行已经被渲染过了。使用方法就是直接在钩子函数里面调用即可。
scrollToRow 是组件的实例方法(Public Methods),需要通过react的ref来实现方法的调用。但他有个弊端就是必须要在可视区渲染过,当前被渲染或者之前被渲染过才行,要不然滚不到。
scrollToAlignment 是属性,配置项
import React from 'react'
import axios from 'axios'
import { NavBar } from 'antd-mobile';
import './index.scss'
import { List, AutoSizer } from 'react-virtualized';

const formatCityData = (list) => {
    const cityList = {}
    //1.遍历list数组
    list.forEach(item => {
        //2.获取每一个城市的首字母
        const first = item.short.substr(0, 1)
        //3.判断cityList中是否有该分类
        if (cityList[first]) {
            //4.如果有,直接往该分类中push数据
            cityList[first].push(item)
        } else {
            //5.如果没有,就先创建一个数组,把当前城市信息添加到数组中
            cityList[first] = [item]
        }
    })

    //获取索引数据,要想按照字母顺序就用sort自动排序
    const cityIndex = Object.keys(cityList).sort()

    return {
        cityList, cityIndex
    }
}
//封装处理字母索引的方法
const formatCityIndex = (letter) => {
    switch (letter) {
        case '#':
            return '当前定位';

        case 'hot':
            return '热门城市';

        default:
            return letter.toUpperCase()
    }
}
//每个索引高度
const TITLE_HEIGHT = 36
//每个城市高度
const NAME_HEIGHT = 50


export default class CityList extends React.Component {
    constructor(props) {
        super(props)

        this.state = {
            cityList: {},
            cityIndex: [],
            activeIndex: 0
        }

        //创建ref对象
        this.cityListComponent = React.createRef()
    }
  async componentDidMount() {
        await this.getCityList()

        //调用 measureAllRows,提前计算list中每一行的高度,实现 scrollToRows的精确跳转
        // 注意:调用这个方法的时候,需要保证list组件中已经有数据了,如果List组件中的数据为空,就会导致调用方法报错!
        // 解决:获取到数据之后调用即可。
        this.cityListComponent.current.measureAllRows()
    }
    async getCityList() {
        //获取所有城市数据
        const res = await axios.get('/cityList')
        const { cityList, cityIndex } = formatCityData(res.data.data)

        //获取热门城市数据
        const hotRes = await axios.get('/hotCityList')
        // console.log(hotRes)

        //将热门数据添加到所有城市数据中
        cityList['hot'] = hotRes.data.data

        //将热门索引添加到cityIndex中
        cityIndex.unshift('hot')

        // 通过IP定位获取到当前城市名称
        // const curCity = await getCurrentCity()
        const curCity = [{ label: '上海', value: '38' }]

        //由于我们这边没有接口,所以造个假数据
        cityList['#'] = curCity
        cityIndex.unshift('#')
        console.log(cityList, cityIndex)
        this.setState({
            cityList,
            cityIndex
        })
    }
    renderCityIndex = () => {
        return this.state.cityIndex.map((item, index) =>
            <li className='city-index-item' key={item} onClick={() => {
                this.cityListComponent.current.scrollToRow(index)
            }}>
                <span className={this.state.activeIndex == index ? 'index-active' : ''}>
                    {item == 'hot' ? '热' : item.toUpperCase()}
                </span>
            </li>
        )
    }

    //渲染每一行数据的渲染函数
    rowRenderer = ({
        key, // 唯一值
        index, // 索引号
        isScrolling, // 当前项是否在滚动中
        isVisible, //  当前项在list中是可见的
        style, // 用于给每一行数据添加样式,指定每一行的位置(非常重要,一定要加)
    }) => {
        //获取每一行的字母索引
        const { cityIndex, cityList } = this.state
        const letter = cityIndex[index]

        //获取指定字母索引下的城市列表数据
        return (
            <div key={key} style={style} className="city">
                <div className='title'>{formatCityIndex(letter)}</div>
                {
                    cityList[letter].map(item =>
                        <div className='name' key={item.value}>{item.label}</div>
                    )
                }
            </div>
        );
    }

    //动态计算每一行高度,这里的参数index和上面的方法一样,插件自带的
    getRowHeight = ({ index }) => {
        // 索引标题高度 + 城市高度 * 城市名称数量
        // TITLE_HEIGHT + cityList[cityIndex[index]].length * NAME_HEIGHT
        const { cityIndex, cityList } = this.state
        return TITLE_HEIGHT + cityList[cityIndex[index]].length * NAME_HEIGHT
    }
    //用于获取List组件中渲染行的信息
    onRowsRendered = ({ startIndex }) => {
        //当前高亮的字母和列表的第一个字母不一致,就赋值给高亮的字母
        if (this.state.activeIndex !== startIndex) {
            this.setState({
                activeIndex: startIndex
            })
        }
    }
    render() {
        return <div className="cityList">
            <NavBar className='navBar'
                mode="light"
                icon={<i className="iconfont icon-back"></i>}
                onLeftClick={() => this.props.history.go(-1)}
            >城市选择</NavBar>

            {/* rowCount 行数,rowHeight  每行高度,rowRenderer  渲染每一行的函数 */}
            <AutoSizer>
                {
                    ({ height, width }) => (
                        <List
                            ref={this.cityListComponent}
                            width={width}
                            height={height}
                            rowCount={this.state.cityIndex.length}
                            rowHeight={this.getRowHeight}
                            rowRenderer={this.rowRenderer}
                            onRowsRendered={this.onRowsRendered}
                            scrollToAlignment="start"   //添加,设置
                        />
                    )
                }
            </AutoSizer>
            {/* 右侧索引列表 */}
            <ul className='city-index'>
                {
                    this.renderCityIndex()
                }
            </ul>

        </div>
    }
}
2-5 切换城市
①给城市列表绑定点击事件
②判断当前城市是否有房源数据(只有北、上、广、深四个城市有数据)
③如果有房源数据,则保存当前城市数据到本地缓存中,并返回上一页
④如果没有房源数据,则提示用户:该城市暂无房源数据,不执行任何操作。
html页面:
            <div key={key} style={style} className="city">
                <div className='title'>{formatCityIndex(letter)}</div>
                {
                    cityList[letter].map(item =>
                        <div className='name' key={item.value} onClick={()=>this.changeCity(item)}>{item.label}</div>
                    )
                }
            </div>
js:
 changeCity=({label,value})=>{
        if(HOUSE_CITY.indexOf(label)>-1){
            localStorage.setItem('hkzf_city',JSON.stringify({label,value}))
            this.props.history.go(-1)
        }else{
            Toast.info('该城市暂无房源信息!', 1);
        }
    }
十三.地图找房
业务:使用百度地图 API实现地图找房。
功能:
- 展示当前定位城市
- 展示该城市所有区的房源数据
- 展示某区下所有镇的房源数据
- 展示某镇下所有小区的房源数据
- 展示某小区下的房源数据列表
难点:百度地图标注,缩放级别,缩放事件等的使用
1.封装顶部导航栏组件
1)为什么获取不到路由信息history
注意:默认情况下,只有路由
Route直接渲染的组件才能够或取到路由信息(比如:history.go(-1)等),由于这个组件是路由组件的部分组件,所以获取不到路由信息history。如果需要获取到路由信息,可以通过withRouter高阶组件来获取。
1.从react-router-dom中导入withRouter高阶组件
2.使用withRouter高阶组件包装NavHeader组件
目的:包装后,就可以在组件中获取到当前路由信息了
3.从props中结构出history对象
4.调用history.go()实现返回上一页功能
5.从props中解构出onLeftClick函数,实现自定义 < 按钮的点击事件
2)添加props校验
1.安装:npm install --save prop-types
2.导入import PropTypes from 'prop-types';
3.给NavHeader组件的children和onLeftClick属性添加props校验
//添加props校验
NavHeader.propTypes = {
    children:PropTypes.string.isRequired,
    onLeftClick:PropTypes.func
}
整体代码:NavHeader组件:
import React from 'react'
import {NavBar} from 'antd-mobile'
import {withRouter} from 'react-router-dom'
import PropTypes from 'prop-types';

import './index.scss'

function NavHeader({children,history,onLeftClick}){

    //onLeftClick如果有传入的方法就用传入的方法,否则用默认方法
    const defaultHandle = ()=>history.go(-1)
    return(
        <NavBar className='navBar'
                mode="light"
                icon={<i className="iconfont icon-back"></i>}
                onLeftClick={onLeftClick||defaultHandle }
            >{children}</NavBar>
    )
}

//添加props校验
NavHeader.propTypes = {
    children:PropTypes.string.isRequired,
    onLeftClick:PropTypes.func
}

//withRouter(NavHeader) 函数的返回值也是一个组件
export default withRouter(NavHeader)
Map组件调用:
import React from 'react'
import NavHeader from './../../components/NavHeader'
// 导入样式
import './index.scss'

export default class Map extends React.Component {
    render() {
        return <div className='map'>
            <NavHeader onLeftClick={()=>{
                console.log('点击了')
            }}>地图找房</NavHeader>
        </div>
    }
}
2.组件间样式覆盖问题
1)概述
①原因:cityList组件的样式,会影响Map组件的样式
②原因:在配置路由时,cityList和Map组件都被导入到项目中,你们组件的样式也就被导入到项目中了,如果组件之间样式名称相同,那么一个组件中的样式就会在另一个组件中也生效。从而造成组件之间样式相互覆盖的问题。
③结论:默认,只要导入了组件,不管组件有没有显示在页面中,组件的样式就会生效
④如何解决?
- 手动处理(利用scss包裹,起不同的类名)
- CSS IN JS
2)CSS IN JS
CSS IN JS:是使用Javascript编写的CSS的统称,用来解决CSS样式冲突、覆盖等问题CSS IN JS的具体实现有50多种,比如:CSS Modules,styled-components等- 推荐使用:
CSS Modules(React脚手架已集成,可是直接使用)
3)CSS Modules的说明
- CSS Modules同对CSS类名重命名,保证每一个类名的唯一性,从而避免样式冲突的问题
- 换句话说:所有类名都具有“局部作用域”,只在当前组件内部生效
- 实现方式:
webpack的css-loader插件 - 命名采用:BEM(Block块、Element元素、Modifier三部分组成)命名规范,比如:
list__item_active - 最终在
React脚手架中演化成:文件名、类名、hash(随机)三部分,只需要指定类名即可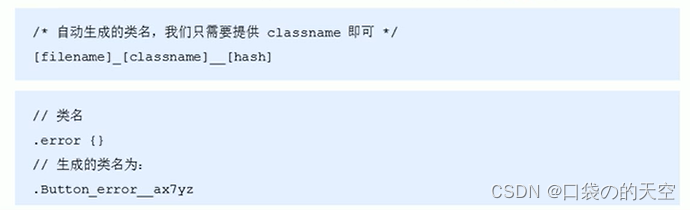
4)CSS Modules在项目中的使用
1.创建名为[name].modules.css的样式文件(React脚手架的约定,与普通css作区分)
//在cityList组件中创建的样式文件名称
index.module.css
2.组件中导入该样式文件(注意语法)
//在cityList组件中导入样式文件
import styles from './index.module.css'
3.通过style对象访问对象中的样式名来设置样式
<div className="{style.test}"></div>
因为style是个对象
5)使用CSS Modules修改NavHeader样式
1.在NavHeader目录中创建名为index.module.css的样式文件
2.在样式文件中修改当前组件的样式(使用单个类名设置样式,不使用嵌套样式)
//OK
.navBar{}

//不推荐嵌套,也没必要,因为是局部样式,不会与其他样式冲突
.navBar .test{}
3.对于组件库中已经有的全局样式(比如:am-navbar-title),必须要需要使用:global()来指定
:global(.am-navbar-title){color:#333;}

//或者这样嵌套写法,这个是可以嵌套的,而且有时候样式和其他的不一样,也需要加个父级样式制定下当前的样式
.root :global(.am-navbar-title){color:#333;}
整体使用:index.module.css:
.navBar{
    color: #333;
    background: #f6f5f6;
    width: 100%;
    height: 45px;
    top: 0;
    z-index: 1;

}
/* 全局类型,有时候不加前面的父级样式怕不生效 */
.navBar :global(.am-navbar-title){
    color: #333;
}
在index.js文件中引入index.module.css,引入这个,之前的scss的文件就不用引入了:
import style from './index.module.css'

<NavBar className={style.navBar}
                mode="light"
                icon={<i className="iconfont icon-back"></i>}
                onLeftClick={onLeftClick||defaultHandle }
            >{children}</NavBar>

3.根据定位展示当前城市
步骤:
1.获取当前定位城市
2.使用地址解析器解析当前城市坐标(地理名称 找到对应 地理坐标)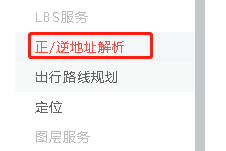
3.调用centerAndZoom()方法在地图中展示当前城市,并设置缩放级别为11
4.在地图中添加比例尺和平移缩放控件。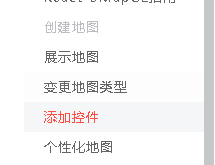
整体代码:
		//这个label就是地理位置名称
        const {label} = JSON.parse(localStorage.getItem('hkzf_city'))

        // 初始化地图实例
        // 注意:在react脚手架中全局对象需要使用window来访问,否则,会造成Eslint校验报错
        var map = new window.BMapGL.Map("container");
        //创建地址解析器实例
        var myGeo = new window.BMapGL.Geocoder();
        // 将地址解析结果显示在地图上,并调整地图视野
        myGeo.getPoint(label, (point) => {
            if (point) {
                //缩放
                map.centerAndZoom(point, 11);
                //添加标记
                map.addOverlay(new window.BMapGL.Marker(point))
                //添加控件
                map.addControl(new window.BMapGL.ScaleControl())
                map.addControl(new window.BMapGL.ZoomControl())
            } else {
                alert('您选择的地址没有解析到结果!');
            }
        }, label)
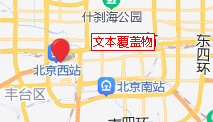
4.创建文本覆盖物
1)实现步骤
①打开百度地图 -> 示例DEMO -> 覆盖物
②创建label实例对象
③调用setStyle()方法设置样式
④在map对象上调用addOverlay()方法,将文本覆盖物添加到地图中。
//添加文本覆盖物
 const opts = {
       position:point,
      offset:new window.BMapGL.Size(30,-30)
}
const label = new window.BMapGL.Label('文本覆盖物',opts)

label.setStyle({
   color:'red'
})
//添加覆盖物到地图中
map.addOverlay(label)
整体代码:
const {label} = JSON.parse(localStorage.getItem('hkzf_city'))

        // 初始化地图实例
        // 注意:在react脚手架中全局对象需要使用window来访问,否则,会造成Eslint校验报错
        var map = new window.BMapGL.Map("container");
        //创建地址解析器实例
        var myGeo = new window.BMapGL.Geocoder();
        // 将地址解析结果显示在地图上,并调整地图视野
        myGeo.getPoint(label, (point) => {
            if (point) {
                //缩放
                map.centerAndZoom(point, 11);
                //添加标记
                map.addOverlay(new window.BMapGL.Marker(point))
                //添加控件
                map.addControl(new window.BMapGL.ScaleControl())
                map.addControl(new window.BMapGL.ZoomControl())

                //添加文本覆盖物
                const opts = {
                    position:point,
                    offset:new window.BMapGL.Size(30,-30)
                }
                const label = new window.BMapGL.Label('文本覆盖物',opts)

                label.setStyle({
                    color:'red'
                })
                //添加覆盖物到地图中
                map.addOverlay(label)
            } else {
                alert('您选择的地址没有解析到结果!');
            }
        }, label)
2)绘制房源覆盖物
点击“类参考” -> 覆盖物类 ->label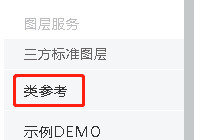
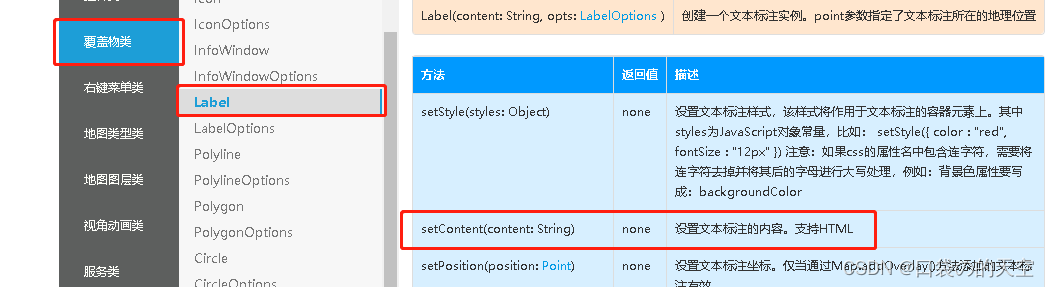
步骤:
1.调用Lbel色setContent()方法,传入HTML结构,修改HTML内容的样式
                //设置房源覆盖物内容
                label.setContent(`
                <div class="${style.bubble}">
                    <p class="${style.name}">浦东</p>
                    <p>99套</p>
                </div>
                `)
2.调用setStyle()修改覆盖物样式
                //设置样式
                const labelStyle = {
                    cursor: 'pointer',
                    border: '0px solid rgb(255,0,0)',
                    padding: '0px',
                    whiteSpace: 'nowrap',
                    fontSize: '12px',
                    color: 'rgb(255,255,255)',
                    textAlign: 'center'
                }
                label.setStyle(labelStyle)
3.给文本覆盖物添加单击事件
                //添加单击事件
                label.addEventListener('click', () => {
                    console.log('房源覆盖物被点击了')
                })

                //添加覆盖物到地图中
                map.addOverlay(label)
整体代码:
        const { label } = JSON.parse(localStorage.getItem('hkzf_city'))

        // 初始化地图实例
        // 注意:在react脚手架中全局对象需要使用window来访问,否则,会造成Eslint校验报错
        var map = new window.BMapGL.Map("container");
        //创建地址解析器实例
        var myGeo = new window.BMapGL.Geocoder();
        // 将地址解析结果显示在地图上,并调整地图视野
        myGeo.getPoint(label, (point) => {
            if (point) {
                //缩放
                map.centerAndZoom(point, 11);
                //添加标记
                map.addOverlay(new window.BMapGL.Marker(point))
                //添加控件
                map.addControl(new window.BMapGL.ScaleControl())
                map.addControl(new window.BMapGL.ZoomControl())

                //添加文本覆盖物
                const opts = {
                    position: point,
                    offset: new window.BMapGL.Size(30, -30)
                }
                //注意:设置setContent以后,第一个参数中设置的文本内容就失效了,因此直接清空即可
                const label = new window.BMapGL.Label('11', opts)

                //设置房源覆盖物内容
                label.setContent(`
                <div class="${style.bubble}">
                    <p class="${style.name}">浦东</p>
                    <p>99套</p>
                </div>
                `)

                //设置样式
                const labelStyle = {
                    cursor: 'pointer',
                    border: '0px solid rgb(255,0,0)',
                    padding: '0px',
                    whiteSpace: 'nowrap',
                    fontSize: '12px',
                    color: 'rgb(255,255,255)',
                    textAlign: 'center'
                }
                label.setStyle(labelStyle)

                //添加单击事件
                label.addEventListener('click', () => {
                    console.log('房源覆盖物被点击了')
                })

                //添加覆盖物到地图中
                map.addOverlay(label)
            } else {
                alert('您选择的地址没有解析到结果!');
            }
        }, label)
5.地图找房功能
1)功能分析
①获取房源数据,渲染覆盖物
②单机覆盖物后:1.放大地图;2.获取数据;3.渲染下一级覆盖物(重复第一步)
③区、镇:单机事件中,清除现有覆盖物,创建新的覆盖物;
④小区:不清除覆盖物。移动地图,展示该小区下面的房源列表
2)渲染所有区的房源覆盖物
①获取房源数据
②遍历数据,创建覆盖物,给每个覆盖物添加唯一标识(后面要用)
③给覆盖物添加单击事件
④再点击事件中,获取到当前单单击项的唯一标识
⑤放大地图(级别为13),调用clearOverlays()方法清除当前覆盖物
        const { label } = JSON.parse(localStorage.getItem('hkzf_city'))

        // 初始化地图实例
        // 注意:在react脚手架中全局对象需要使用window来访问,否则,会造成Eslint校验报错
        var map = new window.BMapGL.Map("container");
        //创建地址解析器实例
        var myGeo = new window.BMapGL.Geocoder();
        // 将地址解析结果显示在地图上,并调整地图视野
        myGeo.getPoint(label, async (point) => {
            if (point) {
                //缩放
                map.centerAndZoom(point, 11);
                //添加标记
                map.addOverlay(new window.BMapGL.Marker(point))
                //添加控件
                map.addControl(new window.BMapGL.ScaleControl())
                map.addControl(new window.BMapGL.ZoomControl())

                //获取房源覆盖物信息
                const res = await axios.get('/areas')

                res.data.data.forEach(item => {
                    const {
                        coord: { longitude, latitude },
                        label: areaName,
                        count
                    } = item

                    const areaPoint = new window.BMapGL.Point(longitude,latitude)
                    //添加文本覆盖物
                    const opts = {
                        position: areaPoint,
                        offset: new window.BMapGL.Size(30, -30)
                    }
                    //注意:设置setContent以后,第一个参数中设置的文本内容就失效了,因此直接清空即可
                    const label = new window.BMapGL.Label('', opts)

                    //设置房源覆盖物内容
                    label.setContent(`
                    <div class="${style.bubble}">
                        <p class="${style.name}">${areaName}</p>
                        <p>${count}套</p>
                    </div>
                    `)

                    //设置样式
                    const labelStyle = {
                        cursor: 'pointer',
                        border: '0px solid rgb(255,0,0)',
                        padding: '0px',
                        whiteSpace: 'nowrap',
                        fontSize: '12px',
                        color: 'rgb(255,255,255)',
                        textAlign: 'center'
                    }
                    label.setStyle(labelStyle)

                    //添加单击事件
                    label.addEventListener('click', () => {
                        //放大地图,以当前点击的覆盖物为中心放大地图
                        //第一个参数:坐标对象
                        //第二个参数:放大级别
                        map.centerAndZoom(areaPoint,13)

                        //清除当前覆盖物信息
                        map.clearOverlays()
                    })

                    //添加覆盖物到地图中
                    map.addOverlay(label)
                })
            } else {
                alert('您选择的地址没有解析到结果!');
            }
        }, label)
3)点击下一级,获取新数据
点击 -> 获取新数据 -> 放大地图 -> 清除覆盖物 -> 添加覆盖物
//1.添加单击事件
label.addEventListener('click', () => {
//2.调接口获取房源数据

//3.放大地图,以当前点击的覆盖物为中心放大地图
 map.centerAndZoom(areaPoint,13)

//4.清除当前覆盖物信息
  map.clearOverlays()
})

 //5.添加覆盖物到地图中
 map.addOverlay(label)
4)点击地点,该地点移到地图中心点
调用地图panBy()方法,移动地图到中间位置
公式:
垂直位移:(window.innerHeight - 330) / 2 - target.clientY
水平平移:window.innerWidth / 2 - target.clientX
//添加单击事件,移到中心点
label.addEventListener('click', (e) => {
// 获取当前被点击项
const target = e.domEvent.changedTouches[0]
map.panBy(
  window.innerWidth / 2 -target.clientX,
 (window.innerHeight - 300)/2  -target.clientY
)

//这个必须要放后面,要不然直接 出发后面的移动事件
this.setState({
   isShow:true
})
})
5)监听地图moveStart事件,在地图移动时隐藏房源列表
        map.addEventListener('movestart',()=>{
            if(this.state.isShow){
                this.setState({
                    isShow:false
                })
            }
        })
整体代码:
import React from 'react'
import NavHeader from './../../components/NavHeader'
import axios from 'axios'
// 导入样式
import './index.scss'
import style from './index.module.css'


export default class Map extends React.Component {
    state={
        isShow:false
    }
    componentDidMount() {
        const { label } = JSON.parse(localStorage.getItem('hkzf_city'))

        // 初始化地图实例
        // 注意:在react脚手架中全局对象需要使用window来访问,否则,会造成Eslint校验报错
        var map = new window.BMapGL.Map("container");
        //创建地址解析器实例
        var myGeo = new window.BMapGL.Geocoder();
        // 将地址解析结果显示在地图上,并调整地图视野
        myGeo.getPoint(label, async (point) => {
            if (point) {
                //缩放
                map.centerAndZoom(point, 11);
                //添加标记
                map.addOverlay(new window.BMapGL.Marker(point))
                //添加控件
                map.addControl(new window.BMapGL.ScaleControl())
                map.addControl(new window.BMapGL.ZoomControl())

                //获取房源覆盖物信息
                const res = await axios.get('/areas')

                res.data.data.forEach(item => {
                    const {
                        coord: { longitude, latitude },
                        label: areaName,
                        count
                    } = item

                    const areaPoint = new window.BMapGL.Point(longitude,latitude)
                    //添加文本覆盖物
                    const opts = {
                        position: areaPoint,
                        offset: new window.BMapGL.Size(30, -30)
                    }
                    //注意:设置setContent以后,第一个参数中设置的文本内容就失效了,因此直接清空即可
                    const label = new window.BMapGL.Label('', opts)

                    //设置房源覆盖物内容
                    label.setContent(`
                    <div class="${style.bubble}">
                        <p class="${style.name}">${areaName}</p>
                        <p>${count}套</p>
                    </div>
                    `)

                    //设置样式
                    const labelStyle = {
                        cursor: 'pointer',
                        border: '0px solid rgb(255,0,0)',
                        padding: '0px',
                        whiteSpace: 'nowrap',
                        fontSize: '12px',
                        color: 'rgb(255,255,255)',
                        textAlign: 'center'
                    }
                    label.setStyle(labelStyle)

                    //添加单击事件,移到中心点
                    label.addEventListener('click', (e) => {
                        // 获取当前被点击项
                        const target = e.domEvent.changedTouches[0]
                        map.panBy(
                            window.innerWidth / 2 -target.clientX,
                            (window.innerHeight - 300)/2  -target.clientY
                        )

                        //这个必须要放后面,要不然直接 出发后面的移动事件
                        this.setState({
                            isShow:true
                        })
                    })


                    //添加覆盖物到地图中
                    map.addOverlay(label)
                })
            } else {
                alert('您选择的地址没有解析到结果!');
            }
        }, label)
        map.addEventListener('movestart',()=>{
            if(this.state.isShow){
                this.setState({
                    isShow:false
                })
            }
        })
    }

    render() {
        return <div className="map">
            < NavHeader > 地图找房</NavHeader >

            {/* 地图容器元素 */}
            < div id="container" className={this.state.isShow?'containerStyle2':'containerStyle'}></div >
            <div className={this.state.isShow?style.box:''}></div>
        </div >
    }
}
index.scss:
.map{
    height: 100%;
}
#container{
    // height: calc(100% - 45px);
    overflow: hidden;
}
.containerStyle{
    height: calc(100% - 45px);
}
.containerStyle2{
    height: calc(100% - 345px);
}

CSDN联合极客时间,共同打造面向开发者的精品内容学习社区,助力成长!
更多推荐


 19
19 0
0- 0


 已为社区贡献2条内容

所有评论(0)