【SpringBoot论坛项目实战】1、初识Spring Boot,开发社区首页
目录1 初识Spring Boot,开发社区首页1.1 课程介绍1.1.1 课程目标1.1.2 项目需求1.1.3 技术架构1.1.4 开发环境1.2 搭建开发环境1.2.2 安装Apache Maven配套视频:BV1qV411z7K21 初识Spring Boot,开发社区首页1.1 课程介绍1.1.1 课程目标学会主流的web开发技术和框架积累一个真实的web项目的开发经验掌握热点面试题的答
文章列表:
1、初识Spring Boot,开发社区首页
2、开发社区登录模块
3、开发社区核心功能
初识Spring Boot,开发社区首页
1 课程介绍
1.1 课程目标
- 学会主流的web开发技术和框架
- 积累一个真实的web项目的开发经验
- 掌握热点面试题的答题技巧
1.2 项目需求
简化版牛客网首页
可以按最新、最热查看帖子
右上角可以发帖
为了防止发不健康的帖子,网站服务端需要敏感词过滤,把一些词隐藏掉
课程中重点探讨的话题:采用什么算法做敏感词过滤?
没有登陆:只能看贴(权限控制:动态地让功能或显示或隐藏)
点进帖子可以看到详情,右上方按钮“置顶”“精华”只有管理员和帖主才能看到,这里也要做权限控制
注册功能
登陆功能:1.验证密码与验证码是否正确;2.记住登陆状态
登陆后可查看个人主页
点赞和关注是非常高频的操作,采用什么方案才能提高服务器性能?在流量高峰时段不让服务器挂掉
账号设置:修改头像
退出登陆
当别人评论你的帖子或者点赞,系统就会自动发消息通知你
网站每天会产生大量消息,需要用专门的消息队列,需要加强多线程方面的知识,需要理解生产者与消费者模式
可以全栈搜索,搜索不是说查一下数据库就完事了,要通过专业的搜索引擎实现,这也是出于性能的考虑
数据库和搜索引擎之间是如何同步数据的?如何支持中间分词的?如何高亮显示的?
管理员可以统计一段时间内网站的UV或活跃人数。统计用户行为的时候怎样才能节约存储空间,拥有更高的统计效率
如何提高系统性能?如何让系统更安全?
1.3 技术架构
- Spring Boot
- Spring、Spring MVC、MyBatis(SSM)整个项目的基础
- Redis、Kafka、Elasticsearch 重点掌握内容 可以提高性能
- Spring Security、Spring Actuator
1.4 开发环境
- 构建工具:Apache Maven
- 集成开发工具: IntelliJ IDEA
- 数据库: MySql、Redis
- 应用服务器:Apache Tomcat
- 版本控制工具:Git
2 搭建开发环境
养成好习惯:所有开发工具放到英文的没有空格的目录下
JDK版本在8以上
2.2 安装Apache Maven
- 可以帮组我们构建项目、管理项目中的jar包
- Maven仓库:存放构建的位置
- 本地仓库:默认是 ~/.m2/repository
- 远程仓库:中央仓库、镜像仓库、私服仓库
- 示例:安装、配置、常用命令

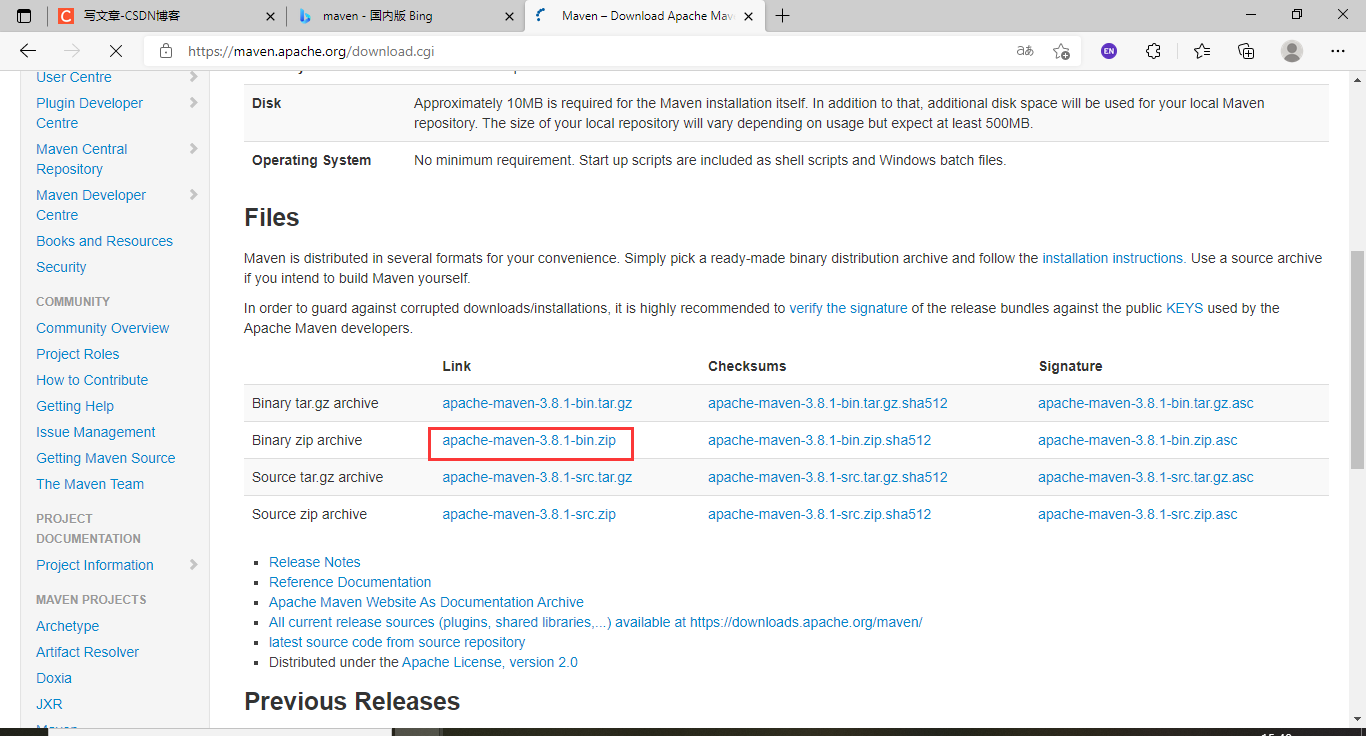
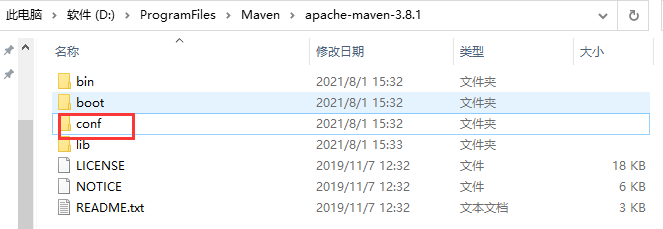
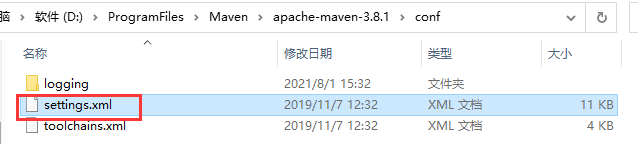
解压,maven解压目录\conf\settings.xml修改镜像仓库
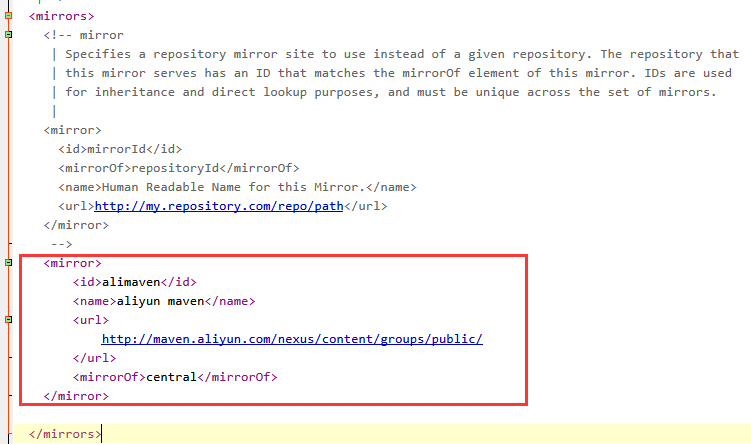
<mirror>
    <id>alimaven</id>
    <name>aliyun maven</name>
    <url>
        http://maven.aliyun.com/nexus/content/groups/public/
    </url>
    <mirrorOf>central</mirrorOf>
</mirror>
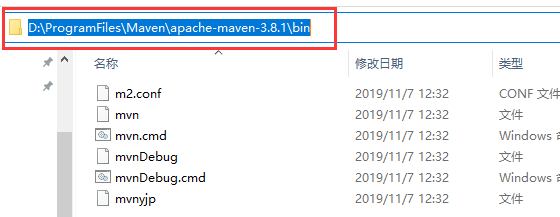
将bin的路径配置到环境变量
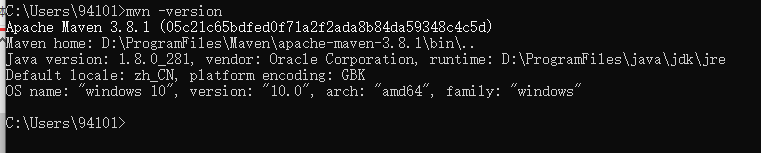
cmd输入mvn -version,安装成功
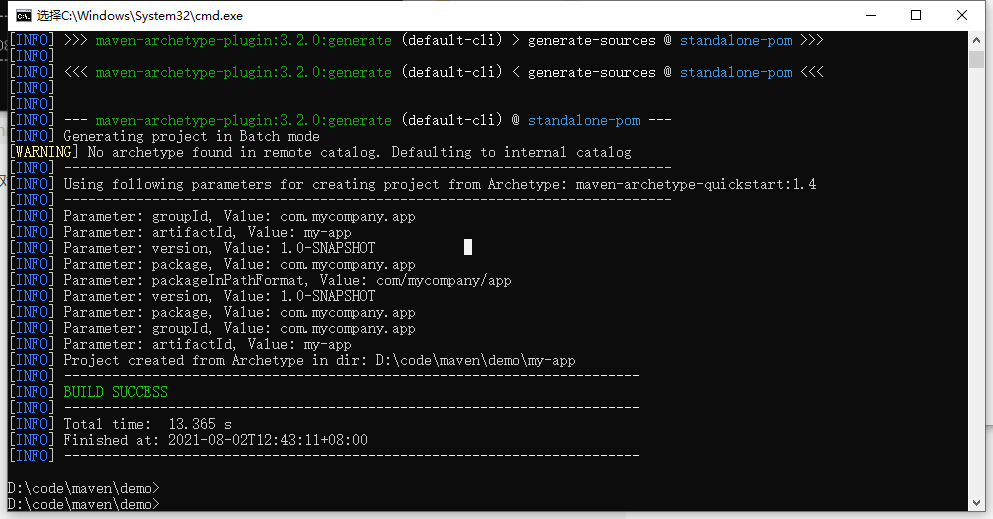
官网-左侧栏 use-user centre-maven in 5 min 快速入门!里面很清楚地讲了怎么创建项目
cd到想创建工程的目录下
根据官网提供的创建项目的代码,改了名称,运行
mvn archetype:generate -DgroupId=com.nowcoder.mavendemo1 -DartifactId=mavendemo1 -DarchetypeArtifactId=maven-archetype-quickstart -DarchetypeVersion=1.4 -DinteractiveMode=false
2.2 安装IntelliJ IDEA
2.3 Spring Initializr
要下载的包太多了,用maven一个一个下载很麻烦
Spring Initializr把我们平时用的包做了整合
官网:https://start.spring.io/

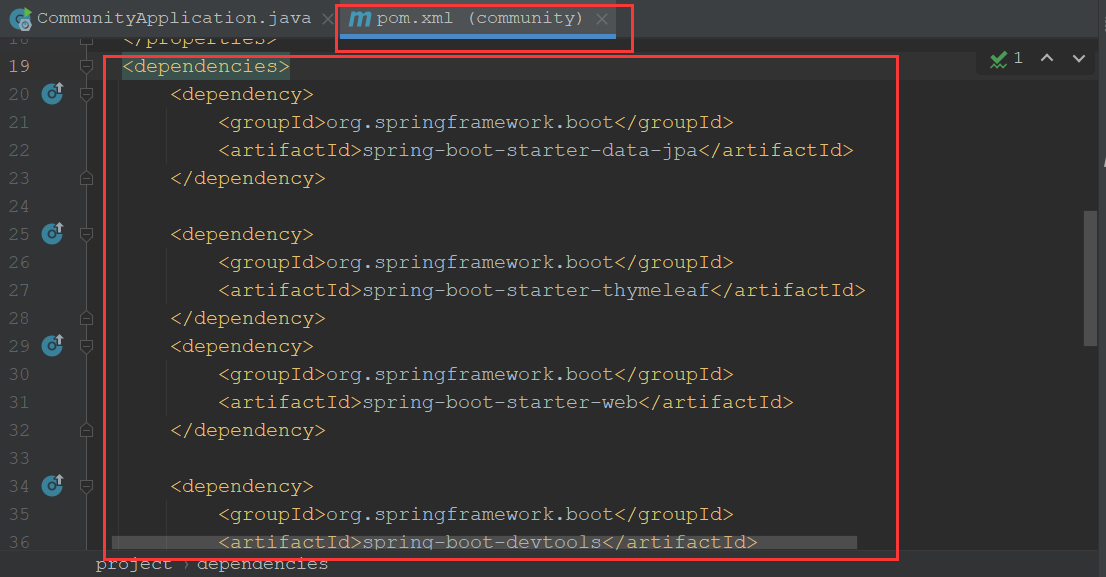
依赖库:
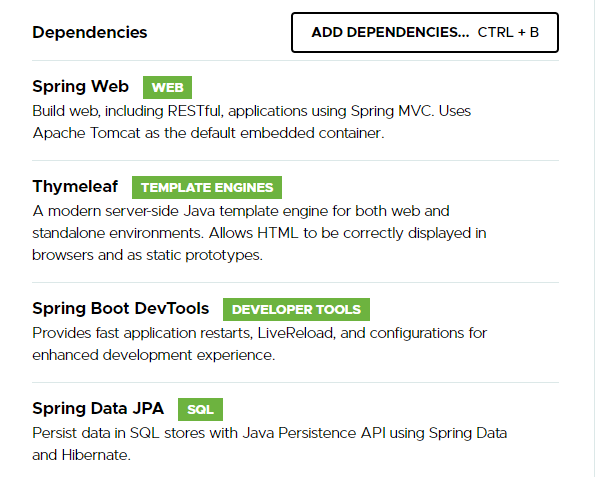
老师的:
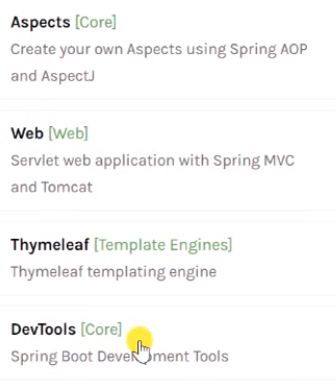
没有找到老师演示的AOP,https://ask.csdn.net/questions/1066562里网友说JPA会依赖AOP,就把JPA加上了。
还看到网友另一种解决办法是去maven网站上下载Spring Boot Start AOP
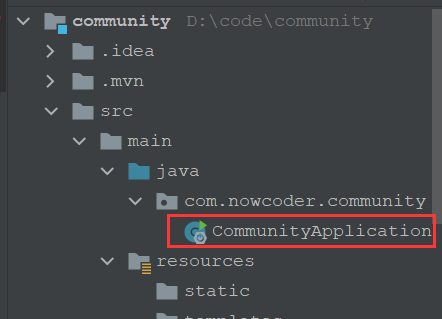
点击Generate,解压后用IDEA打开
run这个文件
出错:
  .   ____          _            __ _ _
 /\\ / ___'_ __ _ _(_)_ __  __ _ \ \ \ \
( ( )\___ | '_ | '_| | '_ \/ _` | \ \ \ \
 \\/  ___)| |_)| | | | | || (_| |  ) ) ) )
  '  |____| .__|_| |_|_| |_\__, | / / / /
 =========|_|==============|___/=/_/_/_/
 :: Spring Boot ::                (v2.5.3)

2021-08-02 17:14:03.741  INFO 12784 --- [  restartedMain] c.n.community.CommunityApplication       : Starting CommunityApplication using Java 1.8.0_281 on DESKTOP-4IODCBI with PID 12784 (D:\code\community\target\classes started by 94101 in D:\code\community)
2021-08-02 17:14:03.741  INFO 12784 --- [  restartedMain] c.n.community.CommunityApplication       : No active profile set, falling back to default profiles: default
2021-08-02 17:14:03.850  INFO 12784 --- [  restartedMain] .e.DevToolsPropertyDefaultsPostProcessor : Devtools property defaults active! Set 'spring.devtools.add-properties' to 'false' to disable
2021-08-02 17:14:03.850  INFO 12784 --- [  restartedMain] .e.DevToolsPropertyDefaultsPostProcessor : For additional web related logging consider setting the 'logging.level.web' property to 'DEBUG'
2021-08-02 17:14:05.241  INFO 12784 --- [  restartedMain] .s.d.r.c.RepositoryConfigurationDelegate : Bootstrapping Spring Data JPA repositories in DEFAULT mode.
2021-08-02 17:14:05.256  INFO 12784 --- [  restartedMain] .s.d.r.c.RepositoryConfigurationDelegate : Finished Spring Data repository scanning in 6 ms. Found 0 JPA repository interfaces.
2021-08-02 17:14:06.022  INFO 12784 --- [  restartedMain] o.s.b.w.embedded.tomcat.TomcatWebServer  : Tomcat initialized with port(s): 8080 (http)
2021-08-02 17:14:06.038  INFO 12784 --- [  restartedMain] o.apache.catalina.core.StandardService   : Starting service [Tomcat]
2021-08-02 17:14:06.038  INFO 12784 --- [  restartedMain] org.apache.catalina.core.StandardEngine  : Starting Servlet engine: [Apache Tomcat/9.0.50]
2021-08-02 17:14:06.131  INFO 12784 --- [  restartedMain] o.a.c.c.C.[Tomcat].[localhost].[/]       : Initializing Spring embedded WebApplicationContext
2021-08-02 17:14:06.131  INFO 12784 --- [  restartedMain] w.s.c.ServletWebServerApplicationContext : Root WebApplicationContext: initialization completed in 2281 ms
2021-08-02 17:14:06.194  WARN 12784 --- [  restartedMain] ConfigServletWebServerApplicationContext : Exception encountered during context initialization - cancelling refresh attempt: org.springframework.beans.factory.UnsatisfiedDependencyException: Error creating bean with name 'dataSourceScriptDatabaseInitializer' defined in class path resource [org/springframework/boot/autoconfigure/sql/init/DataSourceInitializationConfiguration.class]: Unsatisfied dependency expressed through method 'dataSourceScriptDatabaseInitializer' parameter 0; nested exception is org.springframework.beans.factory.BeanCreationException: Error creating bean with name 'dataSource' defined in class path resource [org/springframework/boot/autoconfigure/jdbc/DataSourceConfiguration$Hikari.class]: Bean instantiation via factory method failed; nested exception is org.springframework.beans.BeanInstantiationException: Failed to instantiate [com.zaxxer.hikari.HikariDataSource]: Factory method 'dataSource' threw exception; nested exception is org.springframework.boot.autoconfigure.jdbc.DataSourceProperties$DataSourceBeanCreationException: Failed to determine a suitable driver class
2021-08-02 17:14:06.194  INFO 12784 --- [  restartedMain] o.apache.catalina.core.StandardService   : Stopping service [Tomcat]
2021-08-02 17:14:06.209  INFO 12784 --- [  restartedMain] ConditionEvaluationReportLoggingListener :

Error starting ApplicationContext. To display the conditions report re-run your application with 'debug' enabled.
2021-08-02 17:14:06.241 ERROR 12784 --- [  restartedMain] o.s.b.d.LoggingFailureAnalysisReporter   :
***************************
APPLICATION FAILED TO START
***************************

Description:

Failed to configure a DataSource: 'url' attribute is not specified and no embedded datasource could be configured.

Reason: Failed to determine a suitable driver class


Action:

Consider the following:
	If you want an embedded database (H2, HSQL or Derby), please put it on the classpath.
	If you have database settings to be loaded from a particular profile you may need to activate it (no profiles are currently active).

Disconnected from the target VM, address: '127.0.0.1:51799', transport: 'socket'

Process finished with exit code 0
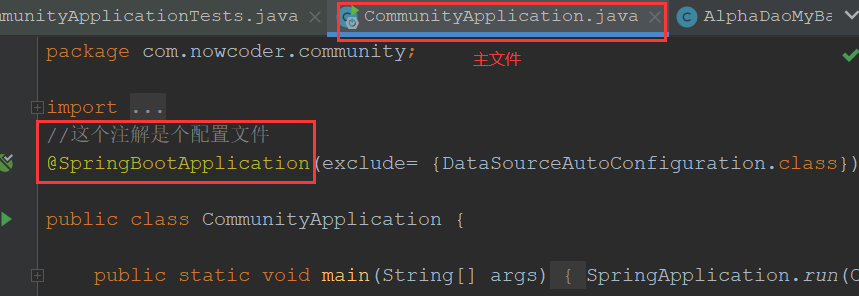
只要将该类的@SpringBootApplication修改为@SpringBootApplication(exclude= {DataSourceAutoConfiguration.class})就可以启动的时候不需要连接数据库。
注意:之后要用到数据库,要把这个注释改回来!

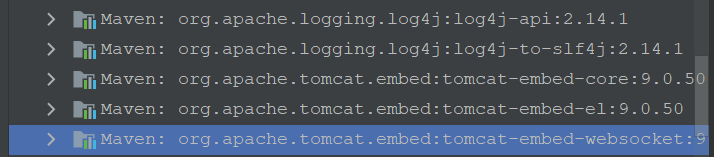
控制台右拉,信息显示:底层自动帮我们启动了tomcat应用服务器
因为springboot以jar包的形式内嵌了一个tomcat,如下:

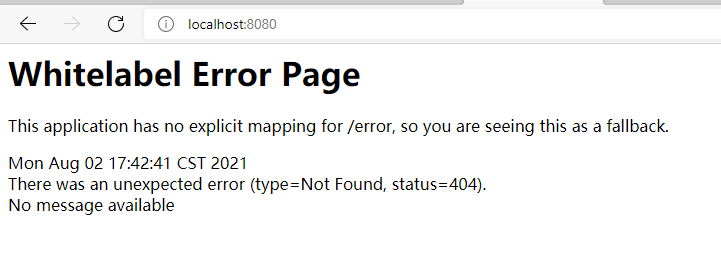
服务器启动之后我们就可以通过浏览器访问,浏览器输入localhost:8080,可得如下界面,因为当前项目为空,所以是空白错误页面
2.4 Spring Boot入门示例
Spring Boot核心作用:起步依赖、自动配置、端点监控
起步依赖:
自动配置:发布项目不用自己手动配置很多文件
端点监控:最后一章讲
示例:一个简单的处理客户端请求案例
package com.nowcoder.community.controller;
import org.springframework.stereotype.Controller;
import org.springframework.web.bind.annotation.RequestMapping;
import org.springframework.web.bind.annotation.ResponseBody;
@Controller//spring mvc的注解,以后会详细介绍
@RequestMapping("/alpha")//给类取一个访问的名字
public class AlphaController {
@RequestMapping("/hello")//该方法能被浏览器访问到的前提是前面有同样的注解
@ResponseBody//浏览器默认返回的是网页,加上这个之后返回的是字符串
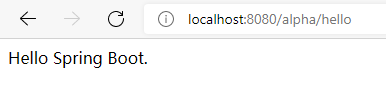
public String saveHello(){
return "Hello Spring Boot.";
}
}
build

浏览器访问http://localhost:8080/alpha/hello
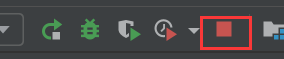
不用之后要关闭服务器
如果8080端口号被其他软件占了,需要修改tomcat的端口号
server.port=8080
server.servlet.context-path=/community
run

2.5 IDEA快捷键
多用快捷键!
- ctrl+shift+回车 自动完成:换行或是补全分号
- CTRL+点类名可以进入类的底层
- alt+insert: 快速生成面板-快捷生成get、set方法、构造函数、重写方法
按哪个字母,快速定位到该首字母 - sout:System.out.println();
- 居然可以一个函数一个函数的运行,不用写main函数,神奇
- CTRL+N 搜索(双击shift也一样)
- CTRL(+fn)+f9:重新编译
- Ctrl+f 网页搜索(IDEA也可以页面搜索)
- (不是IDEA快捷键)QQ可以截图提取文字,很方便
- 调试快捷键
向下一行F8
进入当前行F7
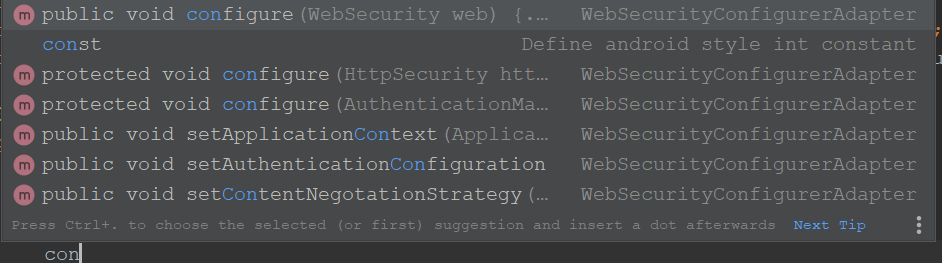
执行到下一段点F9 - 重写方法时,只用输入方法名称就会有提示整个方法
3 Spring入门
3.1 Spring全家桶
Spring全家桶
3.2 Spring Framework
Spring Framework
- Spring Core
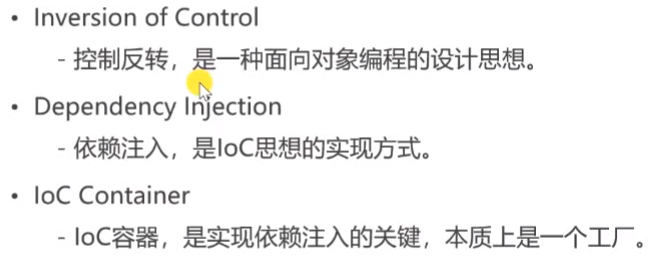
- IoC 、AOP
- Spring Data Access
- Transactions、Spring MyBatis
- Web Servlet
- Spring MVC
- Integration
- Email、Scheduling、AMQP、Security有
3.3 Spring IoC
3.3.1 实现容器管理Bean
CommunityApplicationTests.java
package com.nowcoder.community;

import com.nowcoder.community.dao.AlphaDao;
import org.junit.jupiter.api.Test;
import org.springframework.beans.BeansException;
import org.springframework.boot.test.context.SpringBootTest;
import org.springframework.context.ApplicationContext;
import org.springframework.context.ApplicationContextAware;
import org.springframework.test.context.ContextConfiguration;

@SpringBootTest
@ContextConfiguration(classes = CommunityApplication.class)//以CommunityApplication为配置类
//哪个类想得到Spring容器,就实现这个接口
class CommunityApplicationTests implements ApplicationContextAware {
	private ApplicationContext applicationContext;

	//传入的这个参数ApplicationContext就是Spring容器
	@Override
	public void setApplicationContext(ApplicationContext applicationContext) throws BeansException {
		this.applicationContext=applicationContext;
	}

	//测试Spring容器
	@Test
	public void testApplicationContext() {
		System.out.println(applicationContext);
		//打印信息:org.springframework.web.context.support.GenericWebApplicationContext@1458ed9c, started on Mon Aug 02 19:34:31 CST 2021

		//实例化Bean,用容器来调用
		AlphaDao alphaDao = applicationContext.getBean(AlphaDao.class);
		System.out.println(alphaDao.select());
		//通过类型访问只访问得到 一个实现类Bean,要访问其他实现类Bean怎么办?
		//通过Bean的名字访问
		alphaDao = applicationContext.getBean("alphaDaoHibernate",AlphaDao.class);
		System.out.println(alphaDao.select());
	}

}
AlphaDao接口
package com.nowcoder.community.dao;

public interface AlphaDao {
    String select();
}
AlphaDaoHibernateImpl实现类
package com.nowcoder.community.dao;

import org.springframework.stereotype.Repository;

@Repository("alphaDaoHibernate")//加这个注解容器才能访问到这个Bean,括号里是Bean的名字(可不写,不写的话,Bean的名字默认为类名首字母小写)
public class AlphaDaoHibernateImpl implements AlphaDao{
    @Override
    public String select() {
        return "Hibernate";
    }
}
AlphaDaoMyBatisimpl实现类
package com.nowcoder.community.dao;

import org.springframework.context.annotation.Primary;
import org.springframework.stereotype.Repository;

//场景:技术更新,有了比Hibernate更好用的Mybatis
@Repository
@Primary//容器按接口的类获取Bean时,这个实现类有更高的优先级
public class AlphaDaoMyBatisimpl implements AlphaDao{
    @Override
    public String select() {
        return "Mybatis";
    }
}
3.3.2 容器管理Bean的初始化、销毁
package com.nowcoder.community.service;

import org.springframework.context.annotation.Scope;
import org.springframework.stereotype.Service;

import javax.annotation.PostConstruct;
import javax.annotation.PreDestroy;

@Service//加注解才能被容器管理,业务组件加Service注解,刚刚那个数据库组件加Repository
@Scope("prototype")//被容器管理的Bean,默认是单例,要想多个实例化就加此注解  一般情况下都是单例哈
public class AlphaService {
    public AlphaService(){
        System.out.println("实例化AlphaService");
    }
    //要想让容器管理Bean的初始化,就要在初始化方法前面加注解
    @PostConstruct//在构造器之后调用
    public void init(){
        System.out.println("init AlphaService");
    }
    @PreDestroy//在销毁对象之前调用
    public void destory(){
        System.out.println("destory AlphaService");
    }
}
测试类
@Test
	public void testBeanManagement(){
		AlphaService alphaService = applicationContext.getBean(AlphaService.class);
		System.out.println(alphaService);
		//打印信息:com.nowcoder.community.service.AlphaService@6272c96f

		alphaService = applicationContext.getBean(AlphaService.class);
		System.out.println(alphaService);
		//打印的信息一样,被容器管理的Bean,默认是单例
	}
3.3.3 容器管理第三方包下的Bean
不能在第三方包下的Bean下加注解以让容器管理,那要怎么才能让容器管理呢?
需要自己写配置类,在配置类中写注解来声明
package com.nowcoder.community.config;

import org.springframework.context.annotation.Bean;
import org.springframework.context.annotation.Configuration;

import java.text.SimpleDateFormat;

@Configuration//表示这个类是个配置类不是个普通类
public class AlphaConfig {
    @Bean//要定义第三方的Bean,需要加此注解

    //这个代码的意思是这个方法返回的对象将被装到容器里
    public SimpleDateFormat simpleDateFormat(){//方法名就是Bean的名字
        return new SimpleDateFormat("yyyy-mm-dd HH:mm:ss");
    }
}
@Test
	public void testBeanConfig(){
		SimpleDateFormat simpleDateFormat = applicationContext.getBean(SimpleDateFormat.class);
		System.out.println(simpleDateFormat.format(new Date()));
	}
3.3.4 依赖注入
上面都是手动获取Bean,不方便。依赖注入更方便一点
	//当前容器要使用Bean,只需在属性前声明注入该Bean即可
	@Autowired
	@Qualifier("alphaDaoHibernate")//如果想注入某个接口的具体实现类
	private AlphaDao alphaDao;

	@Test
	public void testDI(){
		System.out.println(alphaDao);
	}
controller会处理浏览器发来的请求,调用service业务组件,业务组件会调用Dao数据库,它们的依赖关系就可以用依赖注入的方式来实现
service调用Dao:
    @Autowired
    private AlphaDao alphaDao;

    public String find(){
        return alphaDao.select()
    }
controller调用service:
@Autowired
    private AlphaService alphaService;
    @RequestMapping("/data")
    @ResponseBody
    public String getData(){
        return alphaService.find();
    }

4 Spring MVC入门
4.1 HTTP
这个框架是用来做web开发的,所以我们先了解一下web知识
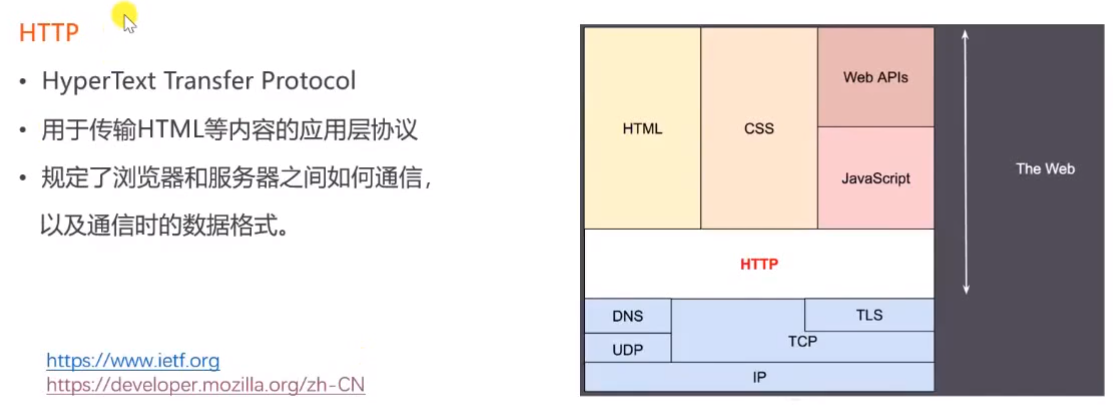
点击链接了解更多HTTP详情:https://developer.mozilla.org/zh-CN/docs/Web/HTML
4.2 Spring MVC
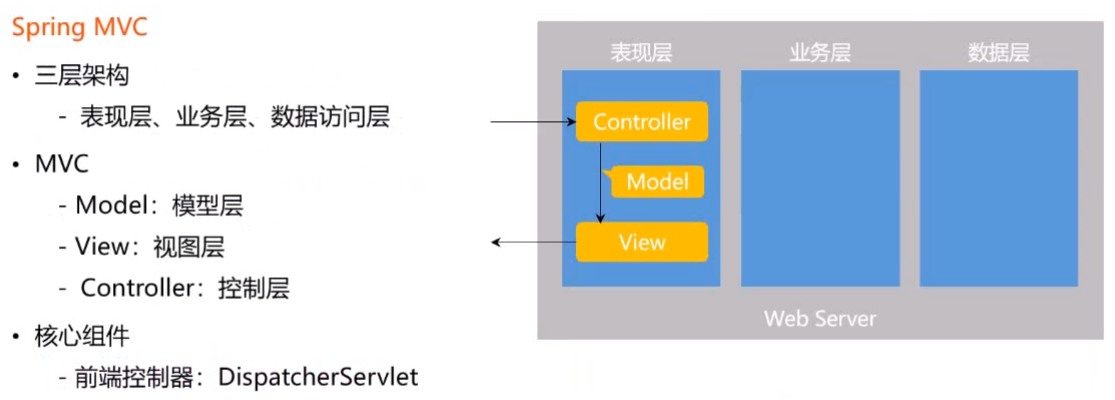
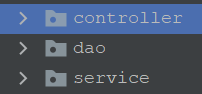
三层架构就是我们上节新建的三个包
MVC的三层:
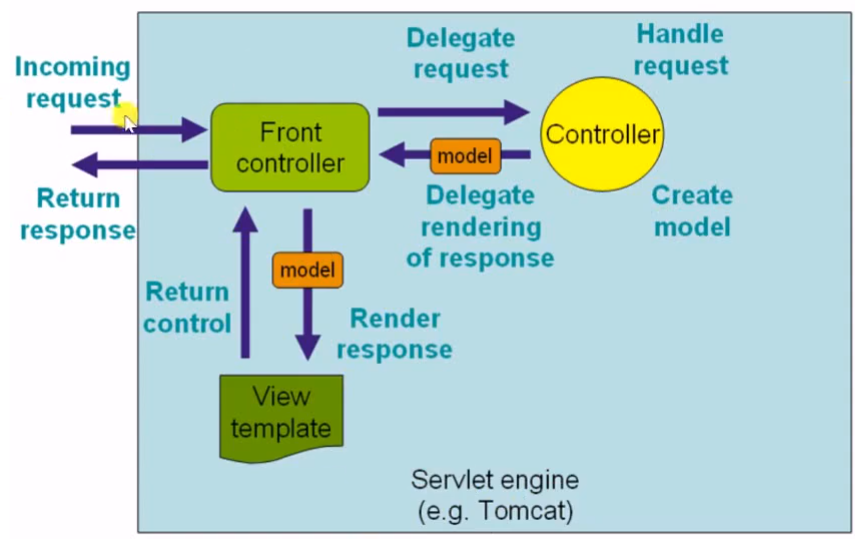
controller负责接收浏览器的请求,并调用业务层处理,处理完之后封装好发给Model
View负责将Model传过来的数据渲染成网页传给浏览器
MVC的三层都是由DispatcherServlet来调用的,怎么调用的呢?
查询:https://docs.spring.io/spring-framework/docs/current/reference/html/web.html#spring-web
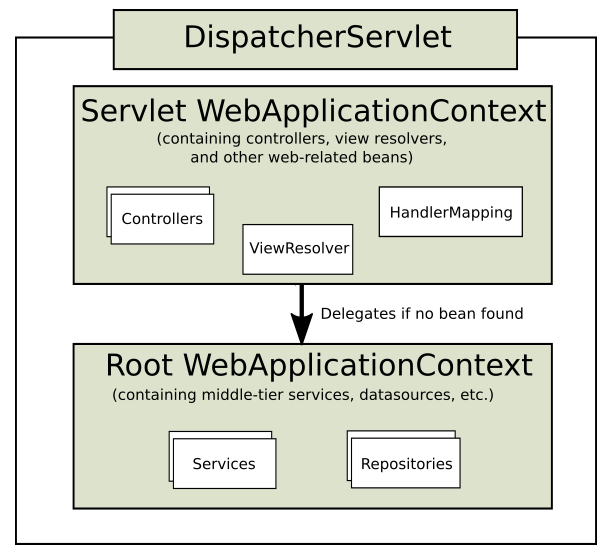
DispatcherServlet管理是基于Spring容器ApplicationContext
更详细的图:
4.3 Thymeleaf
我们上上节已经写了一个controller,要把它封装成View,需要用到模板引擎

标准表达式:网页上哪些数据需要被动态替换
判断与循环:判断是否为空;=1时怎么处理、=0时怎么处理;
模板的布局:将一样的区域复用
官网:https://www.thymeleaf.org/
文档:https://www.thymeleaf.org/doc/tutorials/3.0/usingthymeleaf.html#what-kind-of-templates-can-thymeleaf-process
4.4 案例演示
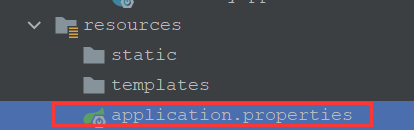
application.properties
#把thymeleaf的缓存关掉
#网站上线之后要打开,因为会降低服务器压力;但是开发的时候要关闭,方便及时查看网站效果
spring.thymeleaf.cache=false
Spring官网文档关于配置的说明:https://docs.spring.io/spring-boot/docs/2.4.9/reference/html/appendix-application-properties.html#common-application-properties-templating
按CTRL+F可以搜索thymeleaf
AlphaController.java
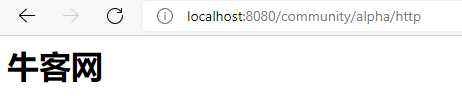
@RequestMapping("/http")
    public void http(HttpServletRequest request, HttpServletResponse response){
        //读取请求数据
        System.out.println(request.getMethod());
        System.out.println(request.getServletPath());
        Enumeration<String> enumeration = request.getHeaderNames();//返回的是迭代器对象
        while(enumeration.hasMoreElements()){
            String name = enumeration.nextElement();
            String value = request.getHeader(name);
            System.out.println(name+": "+value);
        }
        System.out.println(request.getParameter("code"));

        //给浏览器返回响应数据
        response.setContentType("text/html;charset=utf-8");
        try(//java7的新特性:在try后面加小括号写入声明,编译时会自动销毁,省得写finally
                PrintWriter writer = response.getWriter();
                ) {
            writer.write("<h1>牛客网</h1>");
        } catch (IOException e) {
            e.printStackTrace();
        }
    }
传参:

4.4.1 接收请求数据
    //接收请求数据
    //1.GET请求
    //1.1 比方说我要所有学生的数据:/students?current=1&limit=20
    @RequestMapping(path = "/students" , method = RequestMethod.GET)
    @ResponseBody//返回一个简单的字符串
    //要怎么获取请求的参数呢?方法的参数名称与请求的参数名称一致就行了
    //DispatcherServlet检测到方法有参数之后,就会把请求中与之匹配的参数传进来
    //如果请求没有传来参数怎么办呢?需要在方法参数前面加上注解。注解中第二个参数:可以不传;第三个参数:不传的话默认值
    public String getStudents(
            @RequestParam(name = "current",required = false,defaultValue = "1") int current ,
            @RequestParam(name = "limit",required = false,defaultValue = "10") int limit){
        System.out.println(current);
        System.out.println(limit);
        return "some students";
    }

    //1.2 根据学生id查询一个学生的信息:/student/123 直接把参数编排到路径中
    @RequestMapping(path = "/student/{id}",method = RequestMethod.GET)
    @ResponseBody
    public String getStudent(@PathVariable("id") int id){
        System.out.println(id);
        return "a student";
    }
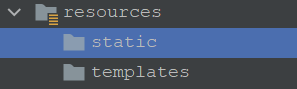
static:静态的网页、图片、css文件js文件等
templates:动态的模板
static.html文件夹下的student.html
<!DOCTYPE html>
<html lang="en">
<head>
    <meta charset="UTF-8">
    <title>增加学生</title>
</head>
<body>
    <!--表格的提交方式:post,提交路径:/community/alpha/student-->
    <form method="post" action="/community/alpha/student">
        <p>
            姓名:<input type="text" name="name">
        </p>
        <p>
            年龄:<input type="text" name="age">
        </p>
        <p>
            <input type="submit" value="保存">
        </p>
    </form>
</body>
</html>
    //2.POST请求 (浏览器向服务器提交数据)
    //提交数据为什么不用GET请求:1.GET是从明面上传数据2.传的数据有限
    @RequestMapping(path = "/student",method = RequestMethod.POST)
    @ResponseBody
    public String saveStudent(String name,int age){
        System.out.println("姓名:"+name+",年龄:"+age);
        return "success!";
    }
4.4.2 返回HTML数据
templates.demo目录下的view.html
<!DOCTYPE html>
<!--声明当前网页是模板-->
<html lang="en" xmlns:th="http://www.thymeleaf.org">
<head>
    <meta charset="UTF-8">
    <title>Teacher</title>
</head>
<body>
    <p th:text="${name}"></p>
    <p th:text="${age}"></p>
</body>
</html>
//响应HTML数据
    @RequestMapping(path = "/teacher",method = RequestMethod.GET)
    //不加@ResponseBody默认返回HTML
    public ModelAndView getTeacher(){
        ModelAndView mav = new ModelAndView();
        mav.addObject("name", "张三");
        mav.addObject("age", "30");
        mav.setViewName("/demo/view");
        return mav;
    }

	@RequestMapping(path = "/school",method = RequestMethod.GET)
    public String getSchool(Model model){//Model是DispatcherServlet在执行这个方法时自动创建的
        model.addAttribute("name", "北京大学");
        model.addAttribute("age", 80);
        return "/demo/view";//返回view的路径
    }
4.4.3 返回JSON数据
    //响应JSON数据(异步请求:访问服务器,当前网页不刷新)
    //java对象->JSON字符串->JS对象
    @RequestMapping(path = "/emp",method = RequestMethod.GET)
    @ResponseBody
    public Map<String, Object> getEmp(){
        Map<String, Object> emp = new HashMap<>();
        emp.put("name", "张三");
        emp.put("age", 23);
        emp.put("salary", 8000);
        return emp;
    }

    @RequestMapping(path = "/emps",method = RequestMethod.GET)
    @ResponseBody
    public List<Map<String, Object>> getEmps(){
        List<Map<String, Object>> list = new ArrayList<>();
        Map<String, Object> emp = new HashMap<>();
        emp.put("name", "张三");
        emp.put("age", 23);
        emp.put("salary", 8000);
        list.add(emp);

        emp = new HashMap<>();
        emp.put("name", "李四");
        emp.put("age", 24);
        emp.put("salary", 9000);
        list.add(emp);

        emp = new HashMap<>();
        emp.put("name", "王五");
        emp.put("age", 22);
        emp.put("salary", 8000);
        list.add(emp);

        return list;
    }
5 MyBatis入门
5.1 安装数据库
下载地址:
https://dev.mysql.com/downloads/mysql/
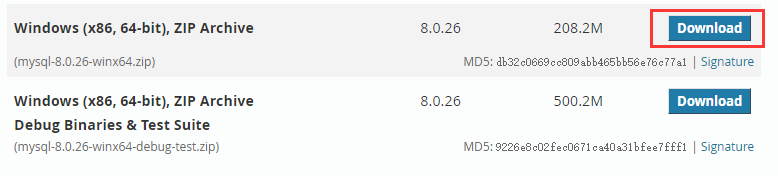
https://dev.mysql.com/downloads/workbench/
将MySQL安装好之后,bin目录加到环境变量,管理员打开cmd
 mysqld --initialize --console
 mysqld install
 net start mysql
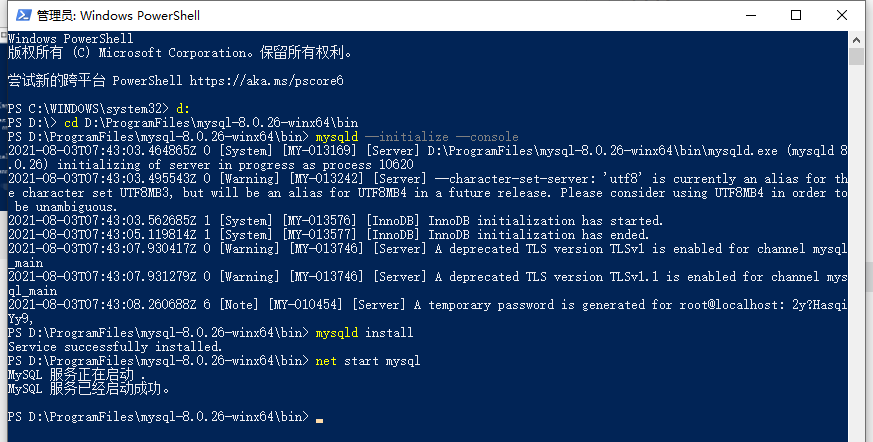
文件直接拖入命令行就会有文件的路径
5.2 MyBatis入门
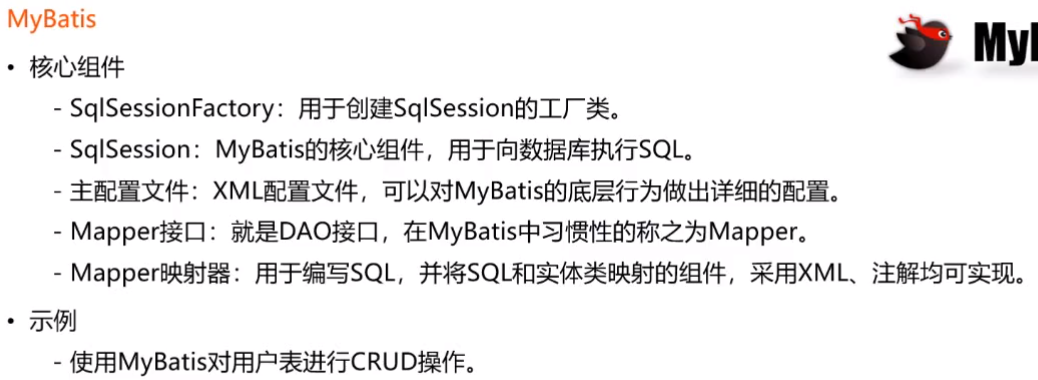
https://mybatis.org/mybatis-3/
https://mybatis.org/spring/
有中文版,很友好
5.2.1 使用MyBatis对用户进行CRUD操作
CRUD:增删改查
C:创建(Create)
R:查找(Retrieve)
U:更改(Update)
D:删除(Delete)
一、导入包
下载mysql依赖:https://mvnrepository.com/搜索mysql,选择排名第一的,选择版本
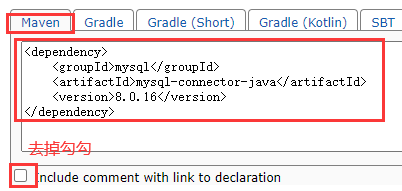
粘贴到pom.xml,右上角会显示一个更新按钮(如图),或者会自动下载所需要的包,就完成了

同样流程下载mybatis spring boot starter
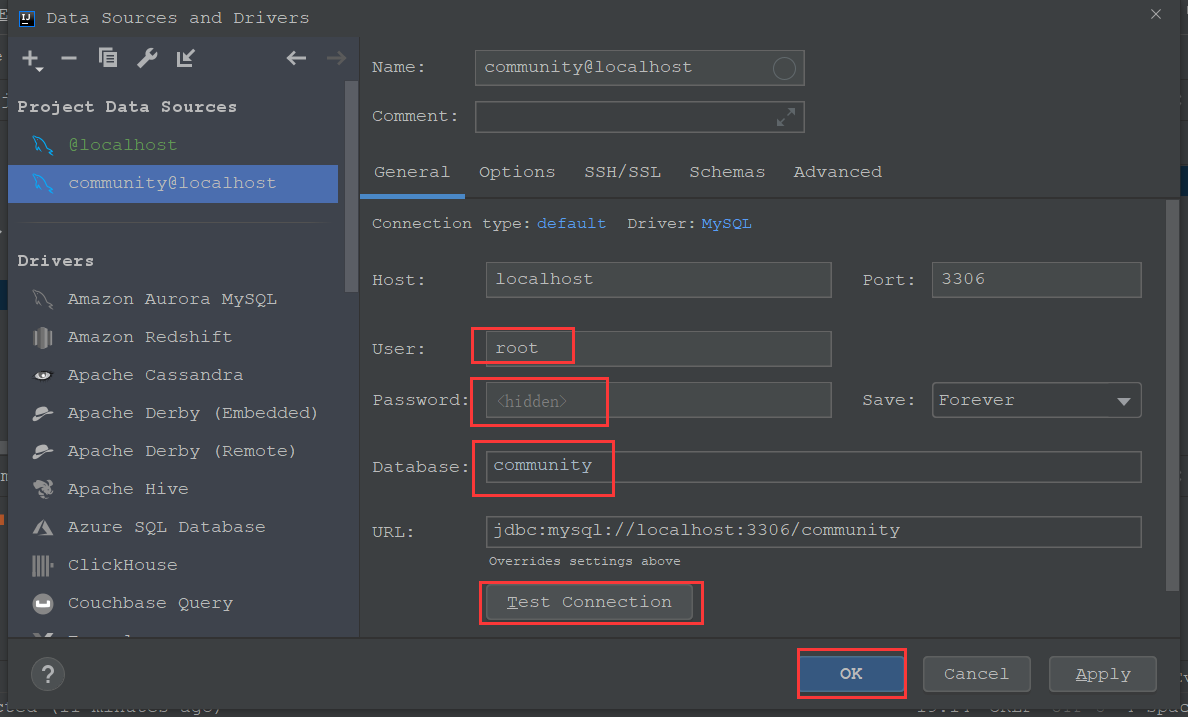
二、配置文件
# DataSourceProperties
#驱动
spring.datasource.driver-class-name=com.mysql.cj.jdbc.Driver
#连接格式
spring.datasource.url=jdbc:mysql://localhost:3306/community?characterEncoding=utf-8&useSSL=false&serverTimezone=Hongkong
spring.datasource.username=root
#1.写自己的密码
spring.datasource.password=
spring.datasource.type=com.zaxxer.hikari.HikariDataSource
spring.datasource.hikari.maximum-pool-size=15
spring.datasource.hikari.minimum-idle=5
spring.datasource.hikari.idle-timeout=30000

# MybatisProperties
#2.resourcees下创建mapper包
mybatis.mapper-locations=classpath:mapper/*.xml
#3.按路径创建entity包
mybatis.type-aliases-package=com.nowcoder.community.entity
mybatis.configuration.useGeneratedKeys=true
#header_url headerUrl这两种不同命名方式可以自动匹配
mybatis.configuration.mapUnderscoreToCamelCase=true
三、写代码
1.在entity包下写实体类User
2.要访问数据库,要在dao写组件 UserMapper接口
3.声明好Mapper之后,要想实现它,需要写一个配置文件,配置文件里给每个方法提供它所需要的sql,mybatis底层会自动生成实现类
在mapper包下创建user-mapper.xml文件
https://mybatis.org/mybatis-3/zh/getting-started.html
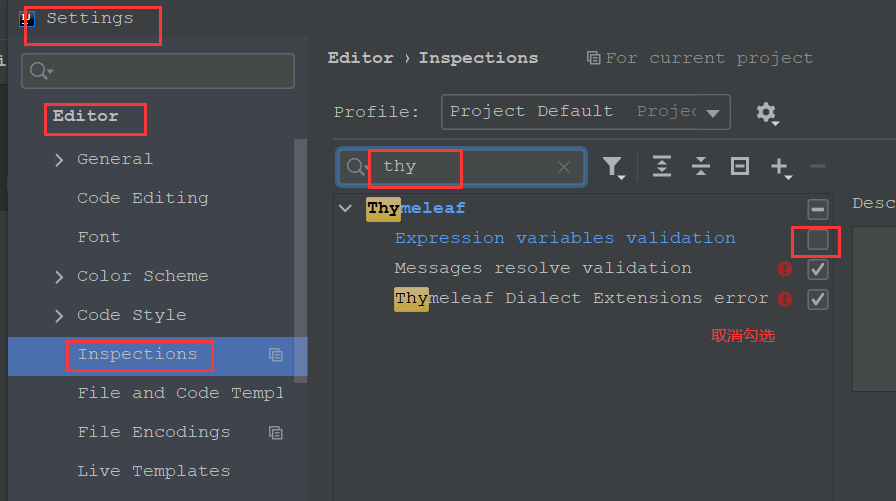
注意:此处标黄不用改,不碍事!
此处有黄色预警1:No data sources are configured to run this sql
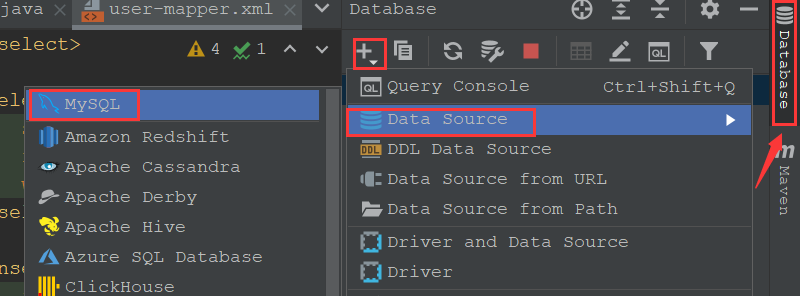

取消勾选

黄色预警3:XML tag has empty body XML 标签的主体为空,不慌,把两个尖括号分开就没有黄色预警了
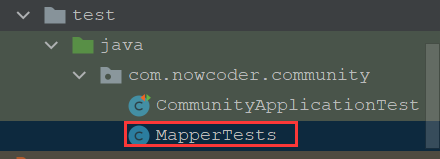
4.写完之后要测试一下,新建测试文件
5.调试
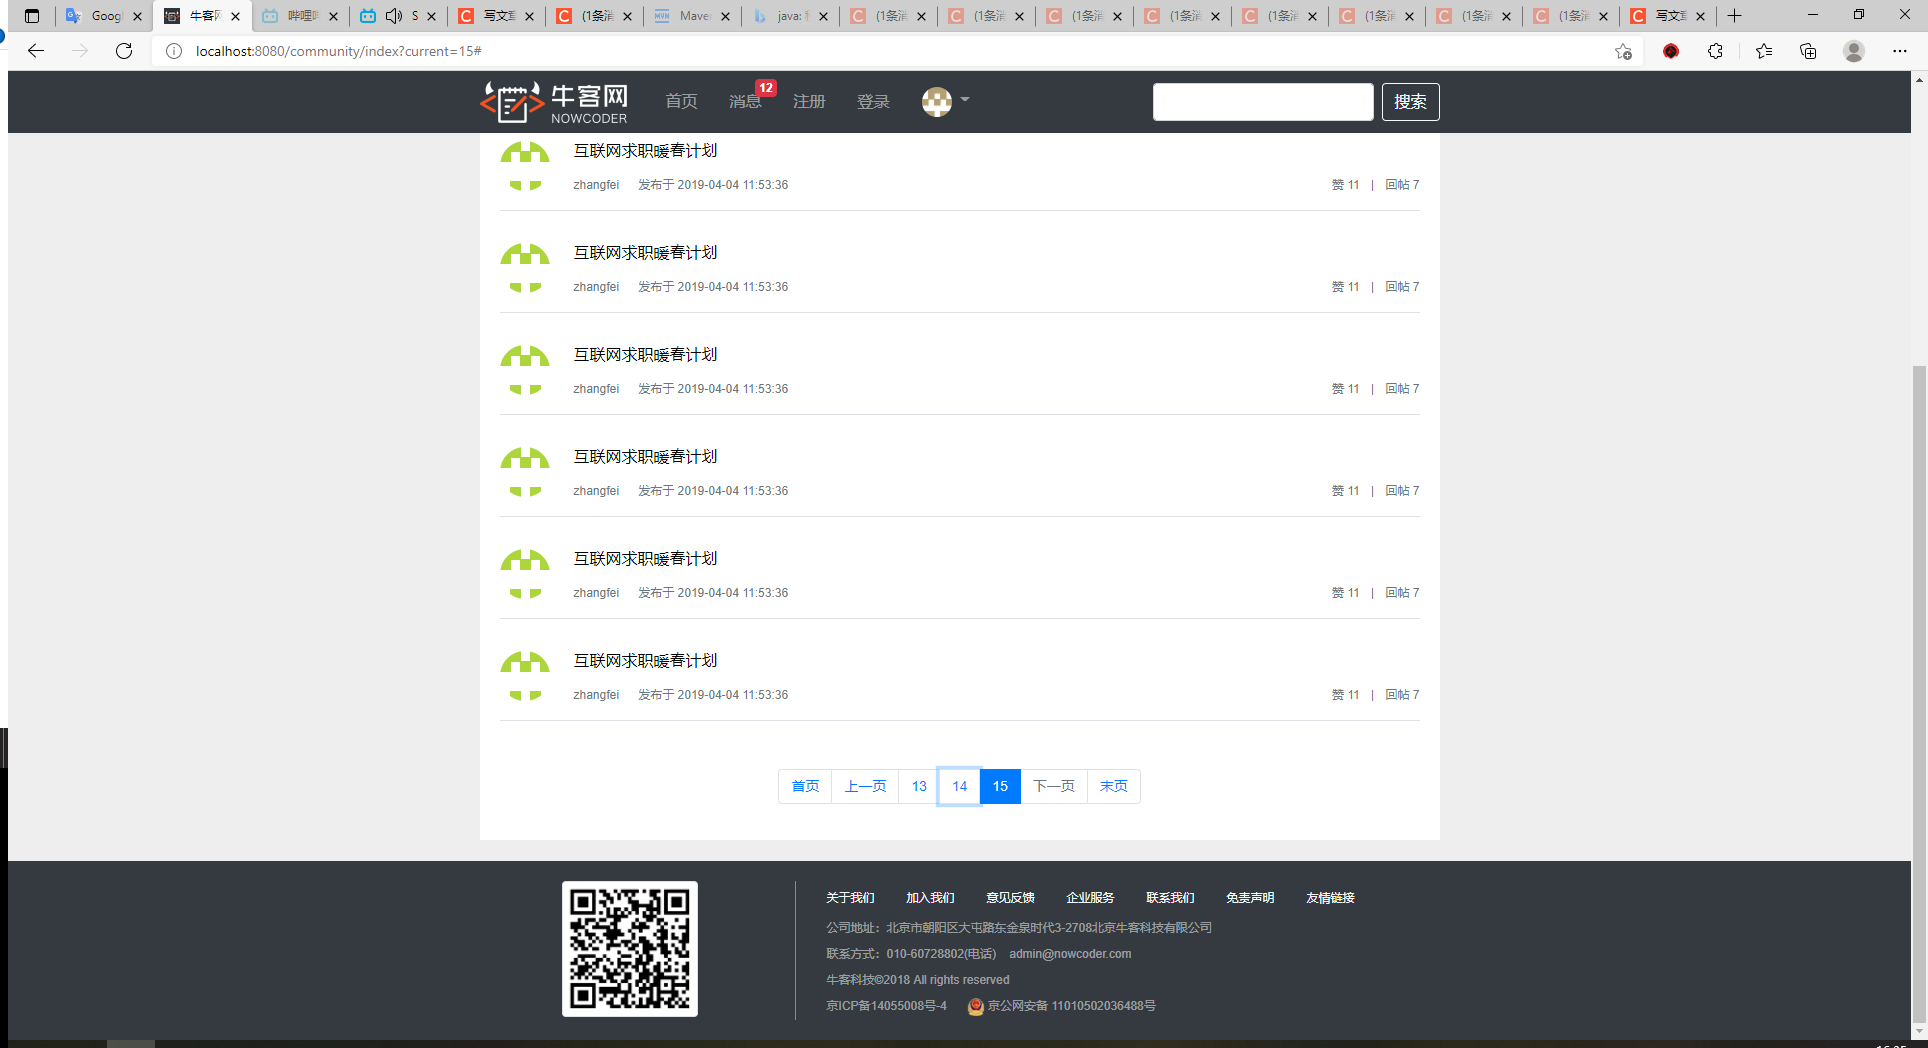
6 开发社区首页
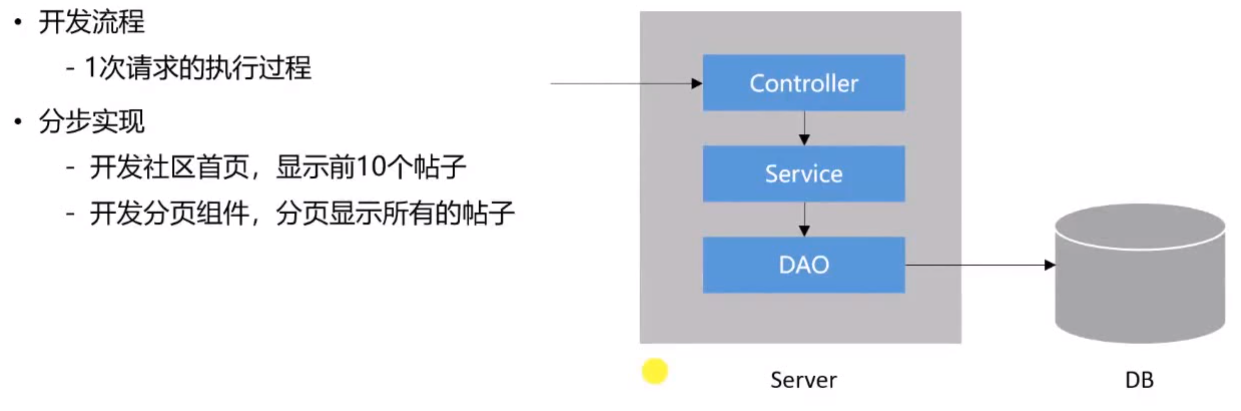
6.1 开发社区首页,显示前10个帖子
开发的时候先开发dao,再开发service。再开发controller,会舒服一点
把一个功能做拆解,第一步先实现什么功能,后面再慢慢完善
1.先写实体类,表里有什么字段,就创建什么属性就完了
2.在dao里写Mapper
2.1打开注解才能被容器扫描接口
2.2在这里声明查询方法,在配置文件里写出与之有关的sql
3.在mapper写配置文件
4.测试
遇到错误again。。。
org.springframework.beans.factory.UnsatisfiedDependencyException: Error creating bean with name 'com.nowcoder.community.MapperTests': Unsatisfied dependency expressed through field 'userMapper'; nested exception is org.springframework.beans.factory.NoSuchBeanDefinitionException: No qualifying bean of type 'com.nowcoder.community.dao.UserMapper' available: expected at least 1 bean which qualifies as autowire candidate. Dependency annotations: {@org.springframework.beans.factory.annotation.Autowired(required=true)}
试试是不是xml写错了?
确定Test文件没写错,往上推推
空testSelectPosts()出错,在testSelectPosts()前面加@Lazy,成功。里面写discussPostMapper,出错
试图把@Lazy加在所有相关文件,还是运行不起来,删去
把依赖库更新到最新试试 - 没用
启动类+@MapperScan,不行,不能加
 		<dependency>
            <groupId>org.aspectj</groupId>
            <artifactId>aspectjweaver</artifactId>
            <version>1.8.13</version>
        </dependency>
报错换成了:
org.springframework.beans.factory.NoSuchBeanDefinitionException: No qualifying bean of type 'com.nowcoder.community.dao.DiscussPostMapper' available: expected at least 1 bean which qualifies as autowire candidate. Dependency annotations: {@org.springframework.beans.factory.annotation.Autowired(required=true), @org.springframework.context.annotation.Lazy(value=true)}
改成@Repository+@Qualifier没用
这里出错困扰了我好几天,后来重建了个项目,把老师的代码、application.properties、pom.xml拷过来就跑通了。。。。。。。
所以,遇事不决就重启?
(后来因为别的又出错又新建了个项目,运行测试文件时有个错误说xxxxx public key xxxxxxx
然后我把application.properties里密码改成自己的、登陆MySQL workbench就运行成功了)
(这里需要运行CommunityApplication之后才能访问http://localhost:8080/community/,不然访问不到)
数据访问层开发完以后,我们就可以开发业务层了
业务层写好之后,我们可以开发视图层
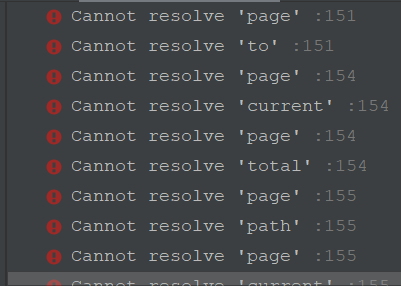
导入老师的index.html之后发现有很多错误提醒
(无视这句,不换也可以) index.html最后更换jquery为https://code.jquery.com/jquery-3.6.0.min.js
6.2 开发分页组件,分页显示所有内容
终于成功了,泪目,继续加油
(此处访问http://localhost:8080/community/会报错,不慌)
7 项目调试技巧

7.1 响应状态码的含义
HTTP文档:https://developer.mozilla.org/zh-CN/docs/Web/HTML
7.2 服务端断点调试技巧
快捷键:
向下一行F8
进入当前行F7
执行到下一段点F9
7.3 客户端断点调试技巧
(没听懂)
7.4 设置日志级别,并将日志输出到不同的终端
http://logback.qos.ch/
测试类也有专属注解的,每新建一个测试类就把注解们粘贴过来
将不同级别的日志分别存在文档里
使用示例:
private static final Logger logger = LoggerFactory.getLogger(AlphaInterceptor.class);//括号内是当前类名
//可以在方法里调用logger
logger.debug();//打印debug级别的日志
8 版本控制
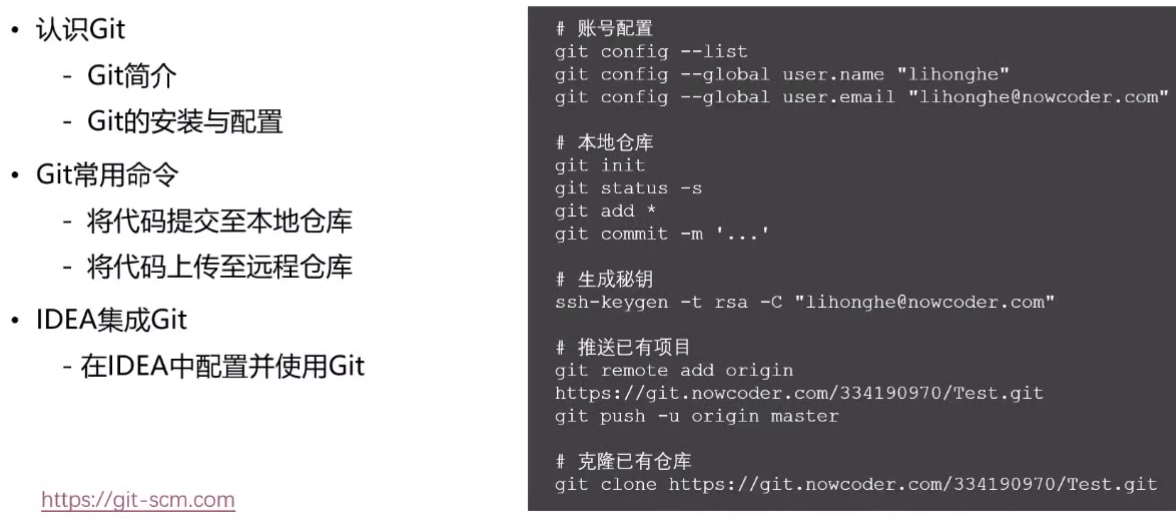
8.1 认识Git
http://git-scm.com/
doc-book,有简中版
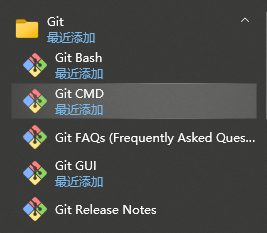
第一个:仿Linux命令行窗口
第二个:Windows窗口
第四个:UI界面
8.2 Git常用命令
# 账号配置
git config --list
git config --global user.name "uam"
git config --global user.email "邮箱@qq.com"
#先cd到要存的代码目录
git init
git status#红色表示未保存,绿色表示保存但未提交到本地仓库
git add *#添加到保存
git commit -m 'test'#提交到本地仓库,引号里是备注
#生成密钥
ssh-keygen -t rsa -C "邮箱@qq.com"
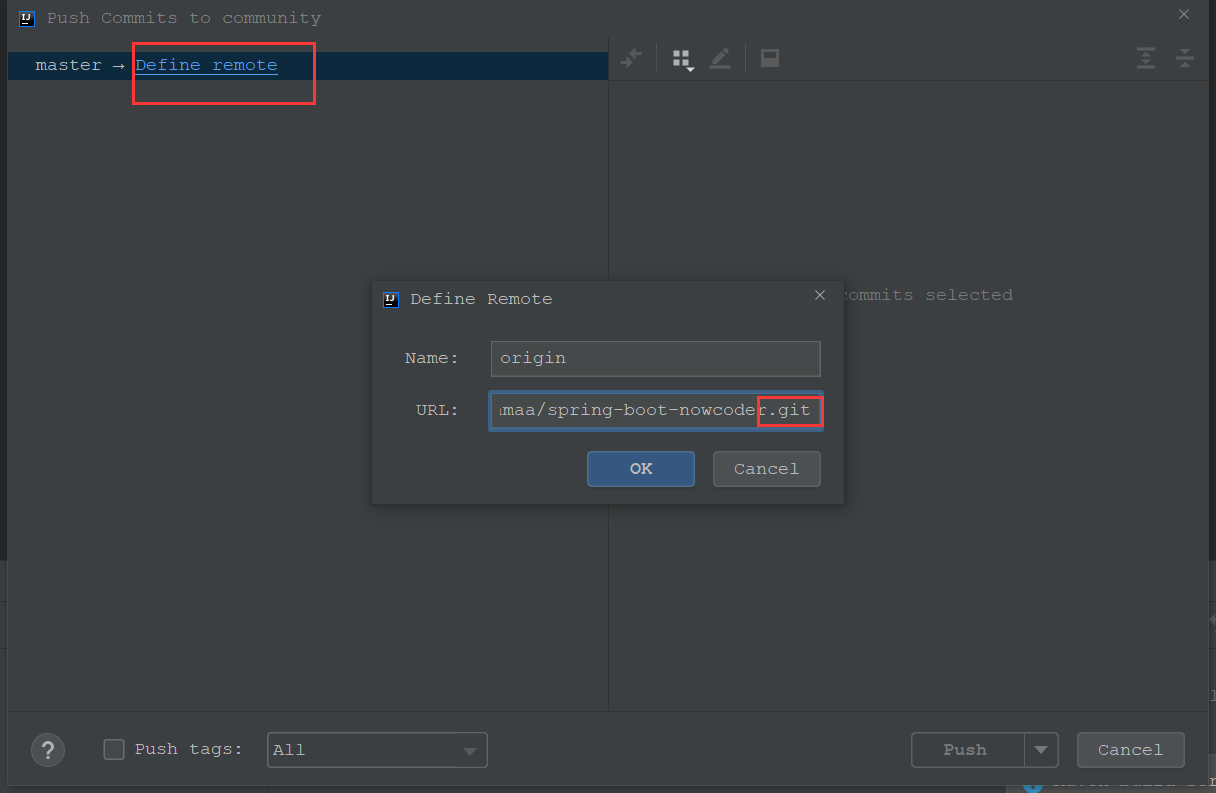
#推送已有项目到远程仓库:
#远程仓库添加相同邮箱、添加密钥、新建仓库(由此得到仓库链接)
#将该链接取别名叫origin
git remote add origin https://gitee.com/uamaa/spring-boot-nowcoder.git
#代码上传到master分支
git push -u origin master
#克隆已有仓库
git clone https://gitee.com/uamaa/spring-boot-nowcoder.git
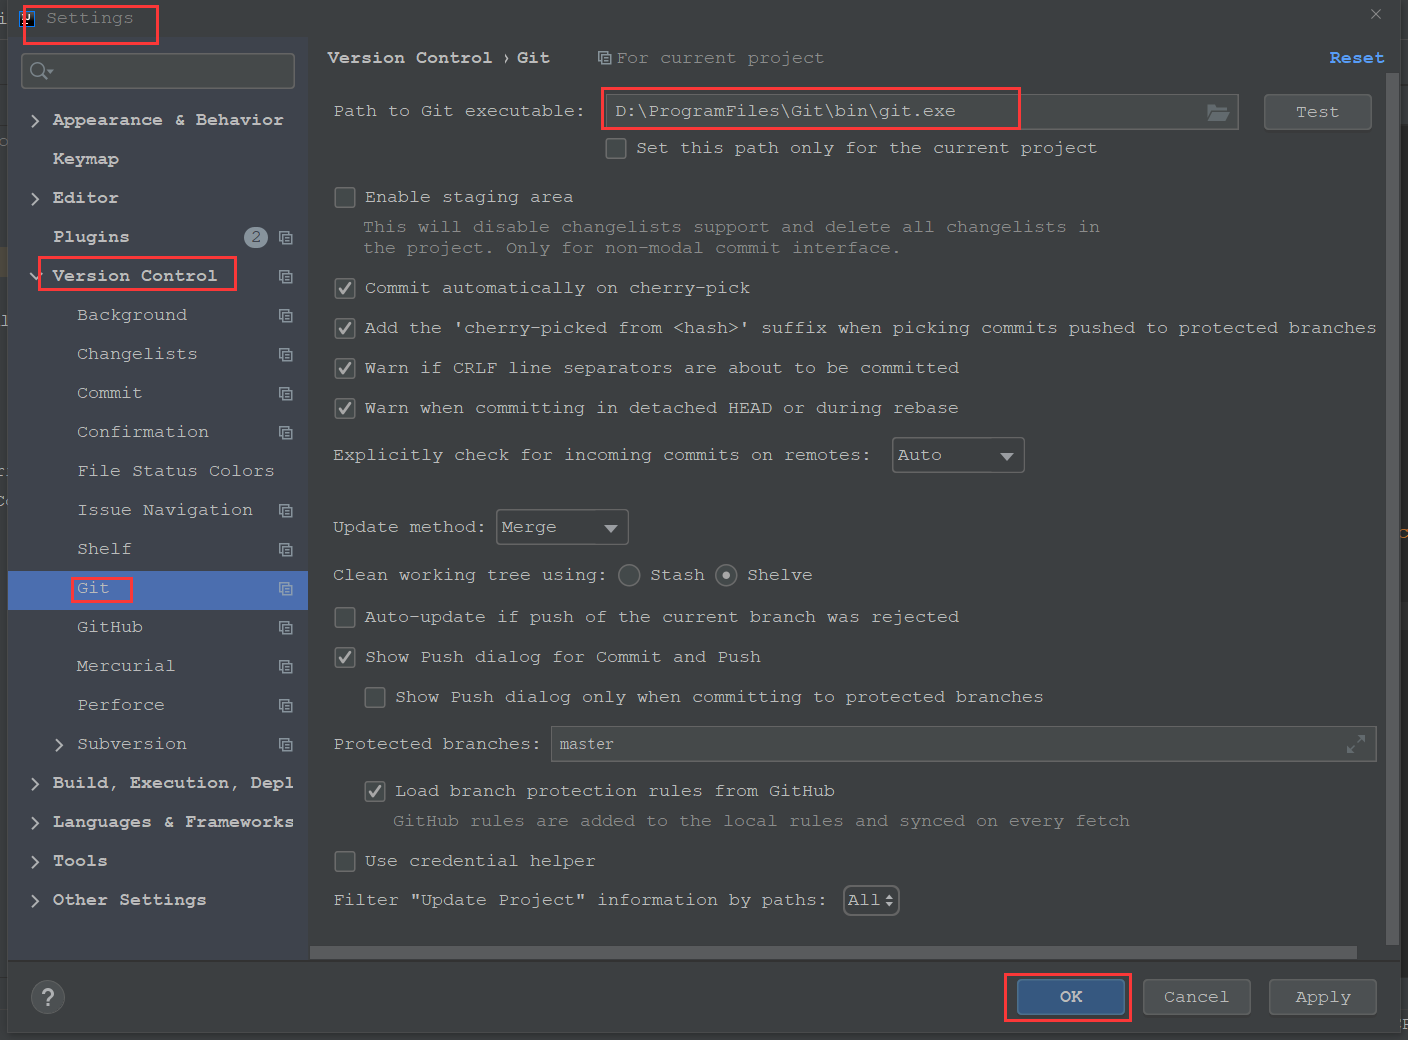
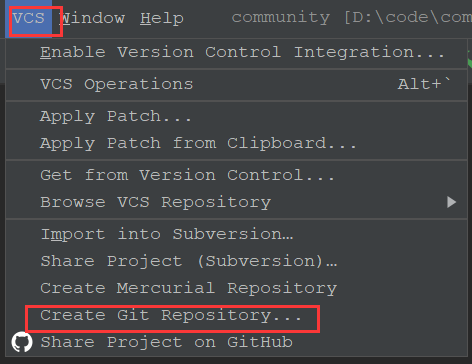
8.3 IEDA集成Git
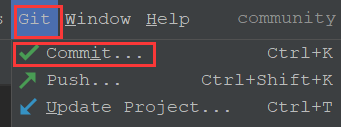
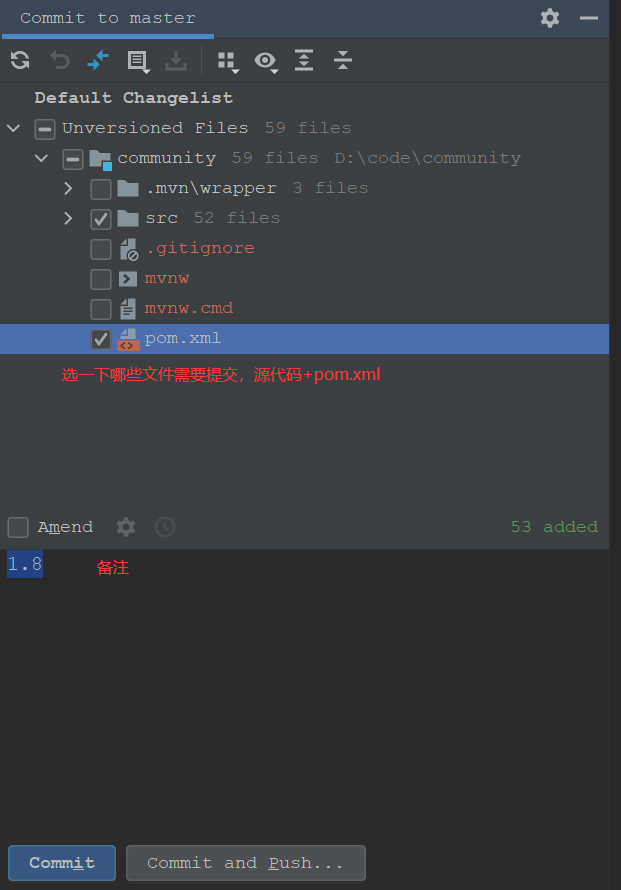
提交到本地仓库:
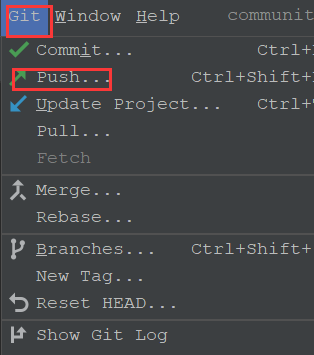
提交到远程仓库:
如果非首次使用
双击Shift 搜索Create Git Repository
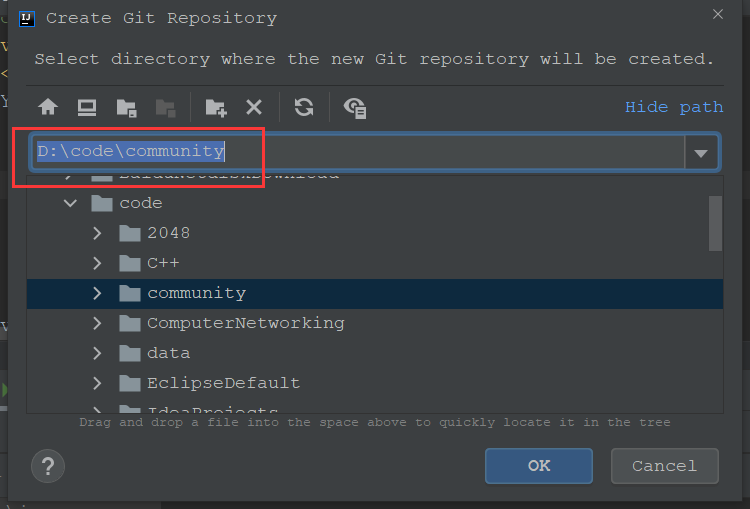
红框处为项目地址
后面步骤跟前面一样

CSDN联合极客时间,共同打造面向开发者的精品内容学习社区,助力成长!
更多推荐


 0
0 0
0- 0


 已为社区贡献1条内容

所有评论(0)