HTTPServletReques and HTTPServletRespons no 11.
配置servlet新建项目ServletRegister包名 com.st.servlet类名DemoDemo extend HttpServlet代码:package com.st.servlet;import java.io.IOException;import javax.servlet.ServletException;import javax.servlet.h...
配置servlet
新建项目ServletRegister 包名 com.st.servlet 类名Demo
Demo extend HttpServlet
代码:
package com.st.servlet;

import java.io.IOException;

import javax.servlet.ServletException;
import javax.servlet.http.HttpServlet;
import javax.servlet.http.HttpServletRequest;
import javax.servlet.http.HttpServletResponse;

public class Demo extends HttpServlet{

	@Override
	protected void doGet(HttpServletRequest req, HttpServletResponse resp) throws ServletException, IOException {
		// TODO Auto-generated method stub
		System.out.println("一个请求....");
	}
	@Override
	protected void doPost(HttpServletRequest req, HttpServletResponse resp) throws ServletException, IOException {
		// TODO Auto-generated method stub
		doGet(req, resp);
	}

}
配置web.xml
<servlet>
  <servlet-name>Dome</servlet-name>
  <servlet-class>com.st.servlet.Demo</servlet-class>
  </servlet>

  <servlet-mapping>
  <servlet-name>Dome</servlet-name>
  <url-pattern>/d</url-pattern>
  </servlet-mapping>
启动服务器 地址栏给:http://localhost:8080/ServletRegister/d
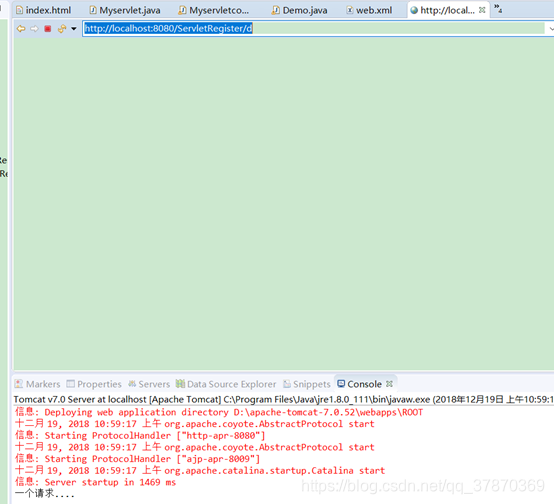
总结:配置servlet
- 全路径匹配
*以/开始 /a /aa//bb
Localhost:8080/项目名称/aa/bb - 路径匹配,前半段匹配
以/开始 ,但是以结束 /a/* /*
*其实是一个通配符,匹配任意文字 - 以扩展名匹配
写法:没有 / 以开始 *.扩展名 *.aa *.bb
ServletContext
说明:
ServletContext就是Servlet 上下文的意思
每个Servlet中只有一个ServletContext对象,不管在那个Servlet获取到这个类的对象都是同一个类
作用:
1.可以获取全局配置参数
例子:
新建项目ServletContext
Page:com.st.servlet
Class:ServletContext1.java
方法:继承HttpServlet 实现doget dopost
获得ServletContext
代码:
package com.st.servlet;

import java.io.IOException;

import javax.servlet.ServletContext;
import javax.servlet.ServletException;
import javax.servlet.http.HttpServlet;
import javax.servlet.http.HttpServletRequest;
import javax.servlet.http.HttpServletResponse;

public class ServletContext1 extends HttpServlet{
	@Override
	protected void doGet(HttpServletRequest req, HttpServletResponse resp) throws ServletException, IOException {

		ServletContext context=getServletContext();
		String resulst=context.getInitParameter("age");
		System.out.println("age is:"+resulst);
	}
	@Override
	protected void doPost(HttpServletRequest req, HttpServletResponse resp) throws ServletException, IOException {

	}

}
配置文件如下:
<context-param>
  <param-name>age</param-name>
  <param-value>18</param-value>
  </context-param>

  <servlet>
    <description></description>
    <display-name>ServletContext1</display-name>
    <servlet-name>ServletContext1</servlet-name>
    <servlet-class>com.st.servlet.ServletContext1</servlet-class>
  </servlet>
  <servlet-mapping>
    <servlet-name>ServletContext1</servlet-name>
    <url-pattern>/ServletContext1</url-pattern>
  </servlet-mapping>
启动服务器给地址:http://localhost:8080/ServletContext//ServletContext1
结果: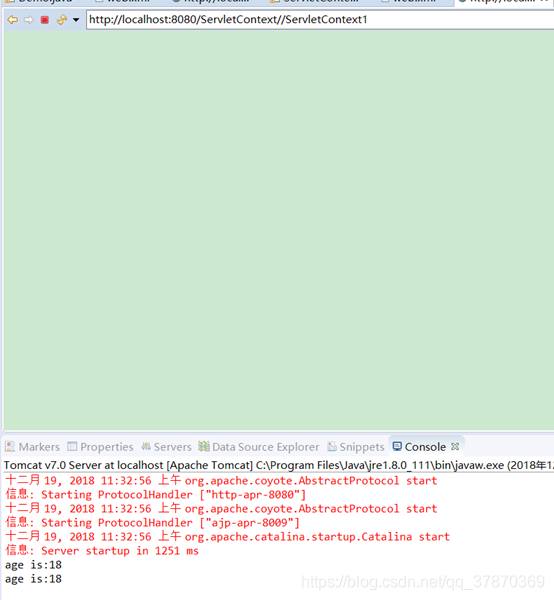
在ServletContext中获取工程文件:
三种方式:
第一种.//获取//获取给文件在服务器上路径
例子代码:
创建Dome
写一个名为config.properties的文件
结构如下: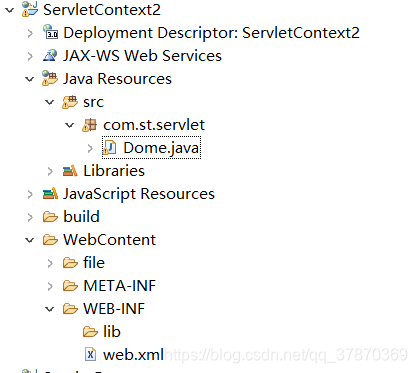
此文件在服务器上的结构: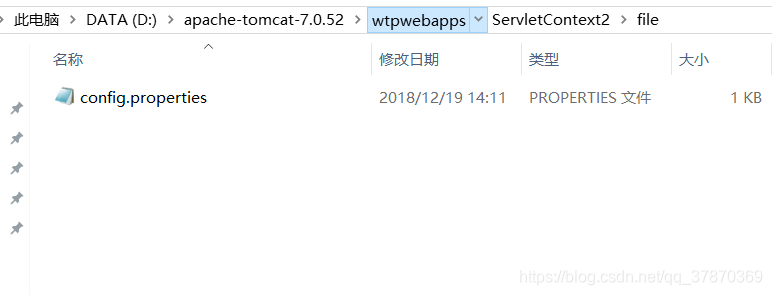
//代码:
package com.st.servlet;
import java.io.IOException;
import javax.servlet.ServletContext;
import javax.servlet.ServletException;
import javax.servlet.http.HttpServlet;
import javax.servlet.http.HttpServletRequest;
import javax.servlet.http.HttpServletResponse;
public class Dome extends HttpServlet{
@Override
protected void doGet(HttpServletRequest req, HttpServletResponse resp) throws ServletException, IOException {
	//获取servlet对象
	ServletContext  context=getServletContext();
	//获取给文件在服务器上路径
	String path=context.getRealPath("file/config.properties");
	System.out.println("path:"+path);
}
@Override
protected void doPost(HttpServletRequest req, HttpServletResponse resp) throws ServletException, IOException {

	doPost(req, resp);
}
}
web.xml配置
继续
第二种:这样我们也可以通过普通的方式获得config.properties里面的值:
在文件config.properties中 给任意参数:
name=zhangsan
代码获取方式:
		//创建属性对象
		Properties properties=new Properties();
		InputStream is =new FileInputStream(path);
		properties.load(is);
		String name=properties.getProperty("name");
		System.out.println("name:"+name);
结果: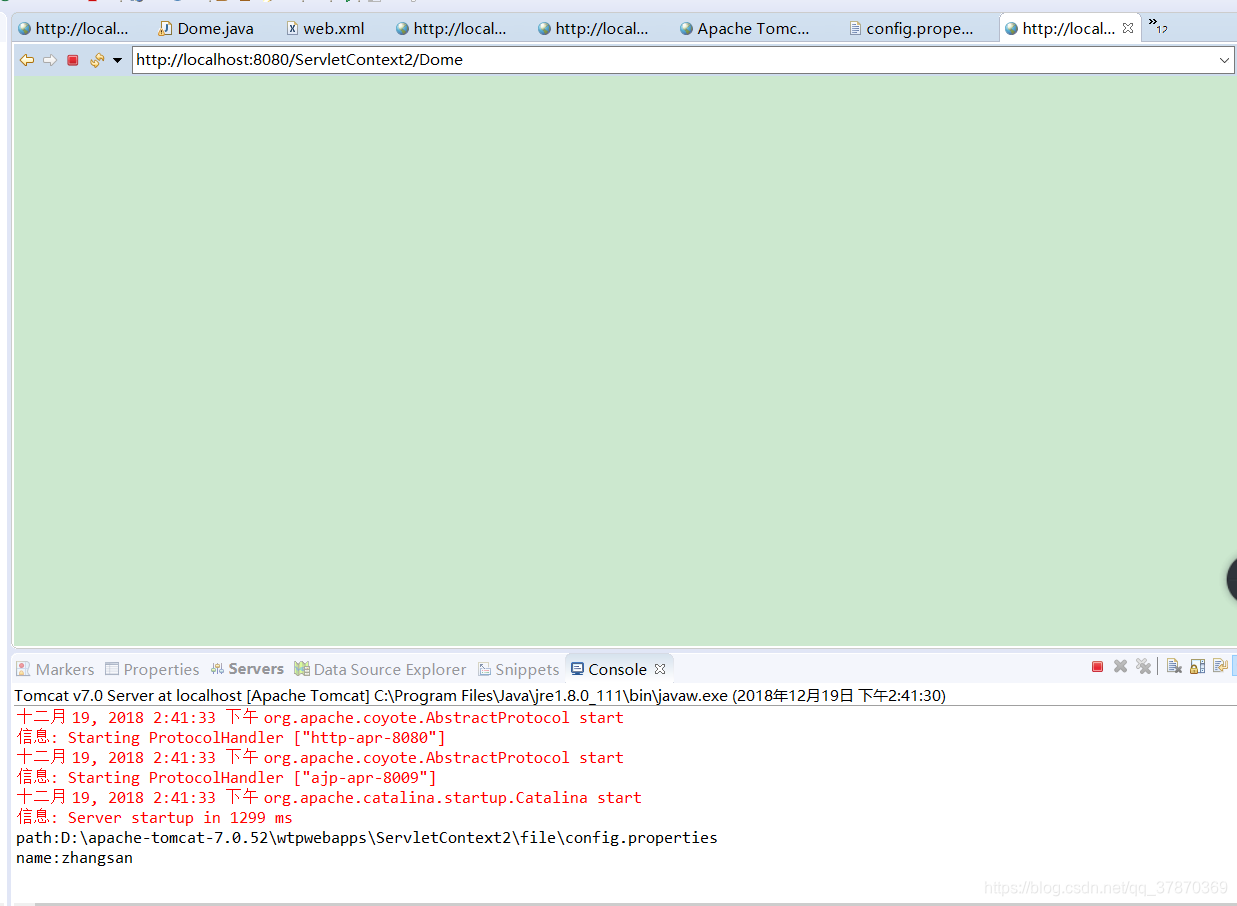
总结:
获取web工程下的资源,转化成流对象。前面隐藏当前工程的根目录。
相对路径(有参照物)相对谁?
工程在tomcat里面的根目录。
a路径–工程在tomcat里面的目录
D:\apache-tomcat-7.0.52\wtpwebapps\ServletContext2
b路径–
file\config.properties
D:\apache-tomcat-7.0.52\wtpwebapps\ServletContext2\file\config.properties
绝对路径没有参照物:
D:\apache-tomcat-7.0.52\wtpwebapps\ServletContext2\file\config.properties
第三种:
通过classloader获取
例子:
InputStream is=this.getClass().getClassLoader().getResourceAsStream("../..file/config.properties");
properties.load(is);
String name=properties.:getProperty("name");
System.out.println("name333333"+name);
is.close();
结果: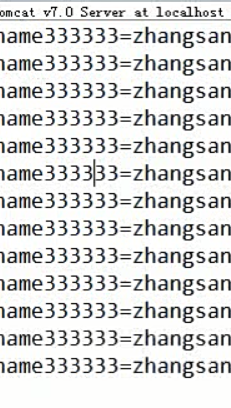
ServletContext获取登陆成功总数案例:
需求
客户端client:账号 密码 登陆
服务器端server:1获取提交过来的数据2判断账号信息是否正确:正确输出该用户是第几个登陆的人 3错误:登陆失败
需求流程图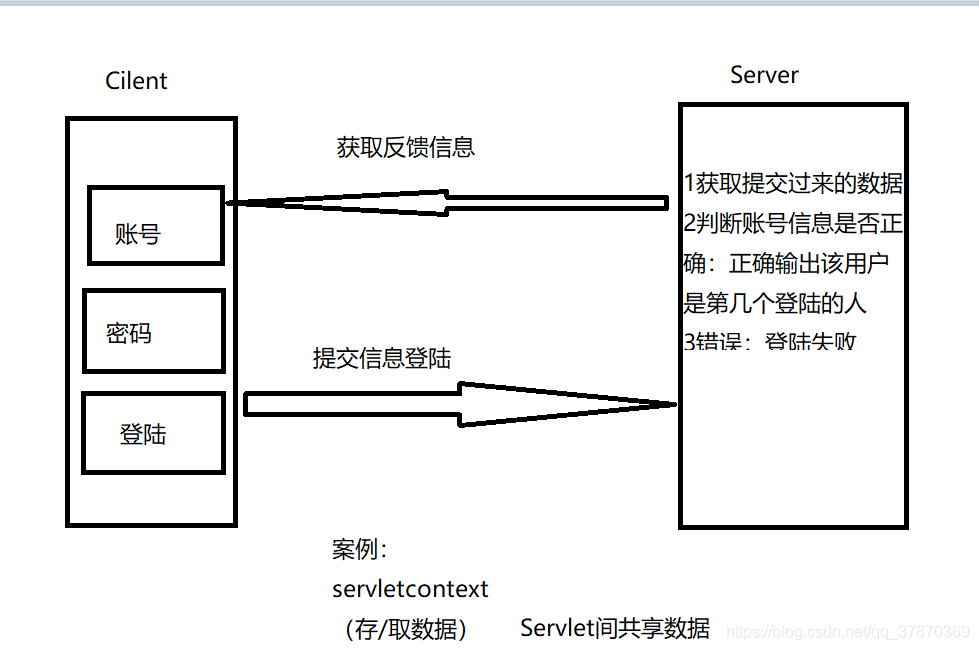
新建demo
文件结构如下: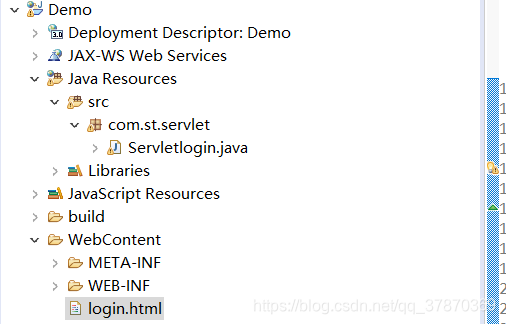
代码为:
package com.st.servlet;

import java.io.IOException;
import javax.servlet.ServletException;
import javax.servlet.annotation.WebServlet;
import javax.servlet.http.HttpServlet;
import javax.servlet.http.HttpServletRequest;
import javax.servlet.http.HttpServletResponse;

/**
 * Servlet implementation class Servletlogin
 */
@WebServlet("/Servletlogin")
public class Servletlogin extends HttpServlet {

	protected void doGet(HttpServletRequest request, HttpServletResponse response) throws ServletException, IOException {

		String username=request.getParameter("username");
		String password=request.getParameter("password");
		System.out.println("username:"+username+"password:"+password);
		if(username.equals("admin")&password.equals("123456")) {
			System.out.println("登陆成功");
		}else {
			System.out.println("登陆失败");
		}
	}


	protected void doPost(HttpServletRequest request, HttpServletResponse response) throws ServletException, IOException {
		// TODO Auto-generated method stub
		doGet(request, response);
	}

}
web.xml配置一下
在login.html中代码为:
<!DOCTYPE html>
<html>
<head>
<meta charset="UTF-8">
<title>Insert title here</title>
</head>
<body>
<form action="Servletlogin" method="get">
账号:<input type="text" name="username"/><br>
密码:<input type="text" name="password"><br>
<input type="submit" value="登陆"/>
</form>
</body>
</html>
启动服务器把login.html跑起来
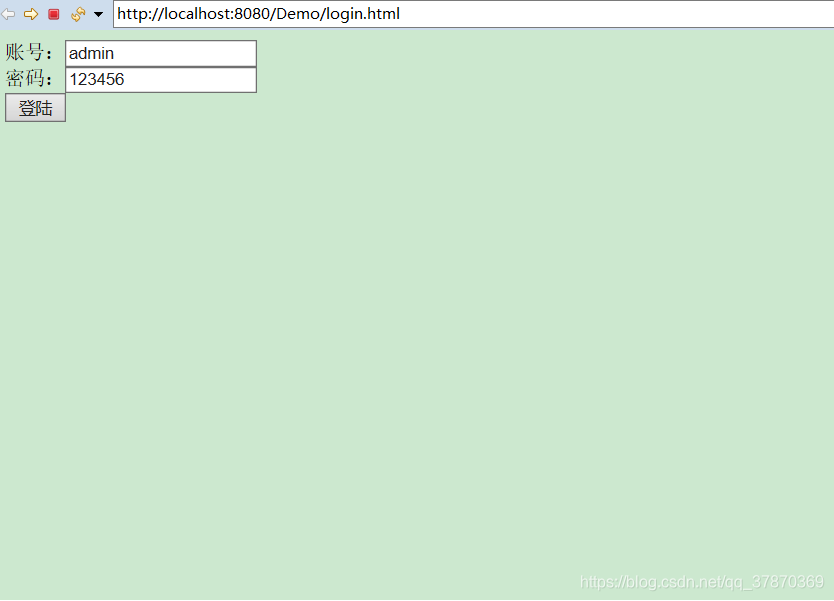
这里逻辑是如果登陆账号是:admin 密码是:123456就输出登陆成功!
结果: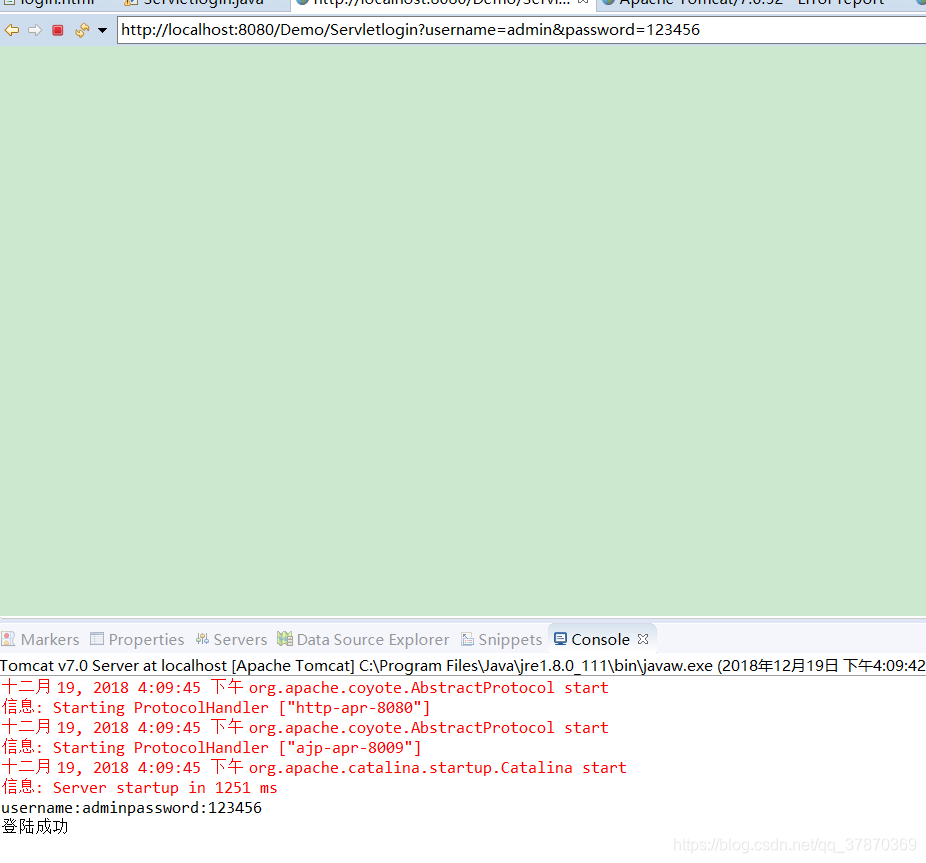
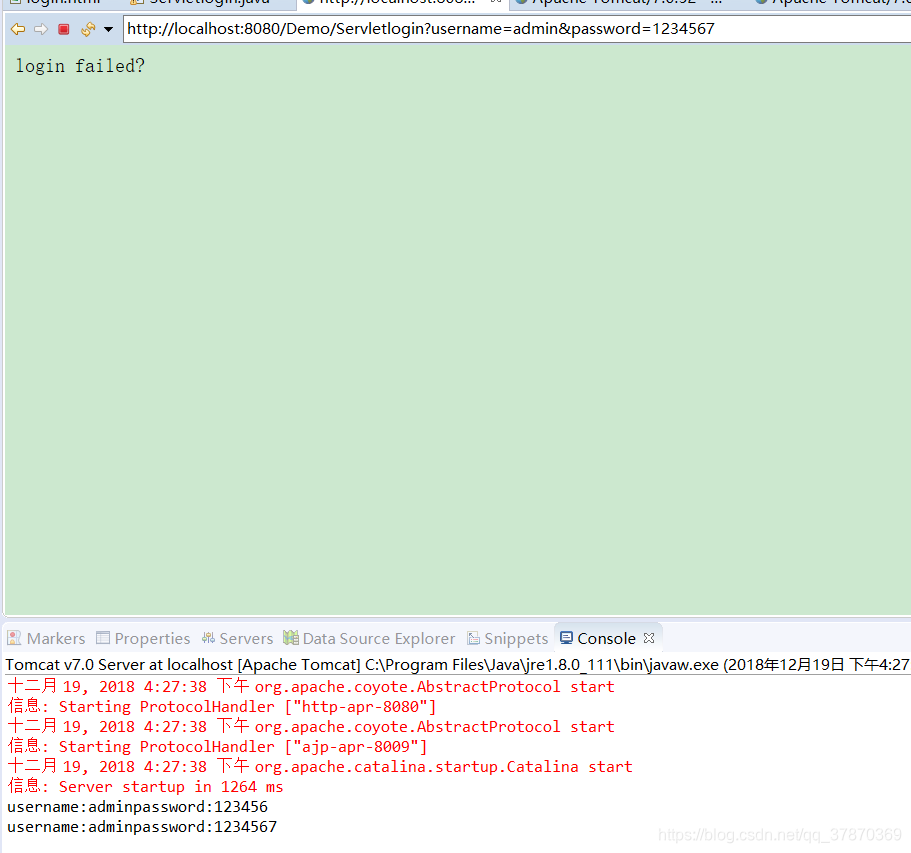
测试一下:密码为1234567
结果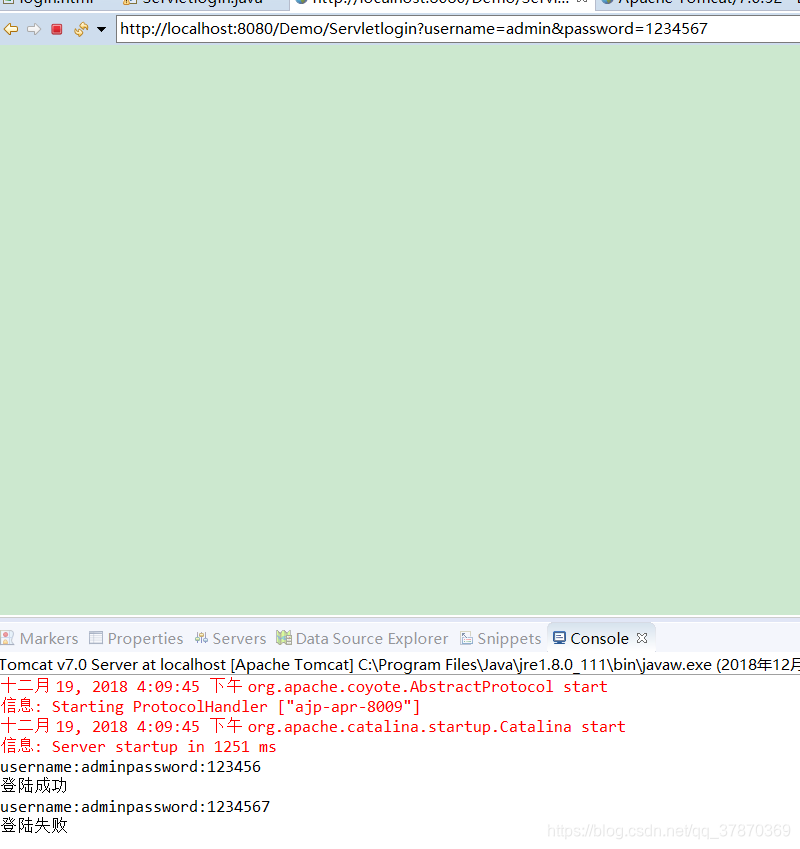
实际开发中我们要把信息反馈给用户 怎么做到这一步呢?
*reques 就是包含请求的数据
*respons就是:相应数据给浏览器
所以要用到respons
这里代码
	PrintWriter pw=response.getWriter();
		if(username.equals("admin")&password.equals("123456")) {
			//相应请求
			pw.write("login success..!");
			//System.out.println("登陆成功");
		}else {
			pw.write("login failed!");
			//System.out.println("登陆失败");
		}
重启tomcat
登陆页面分别写入:
admin 123456
admin 1234567
结果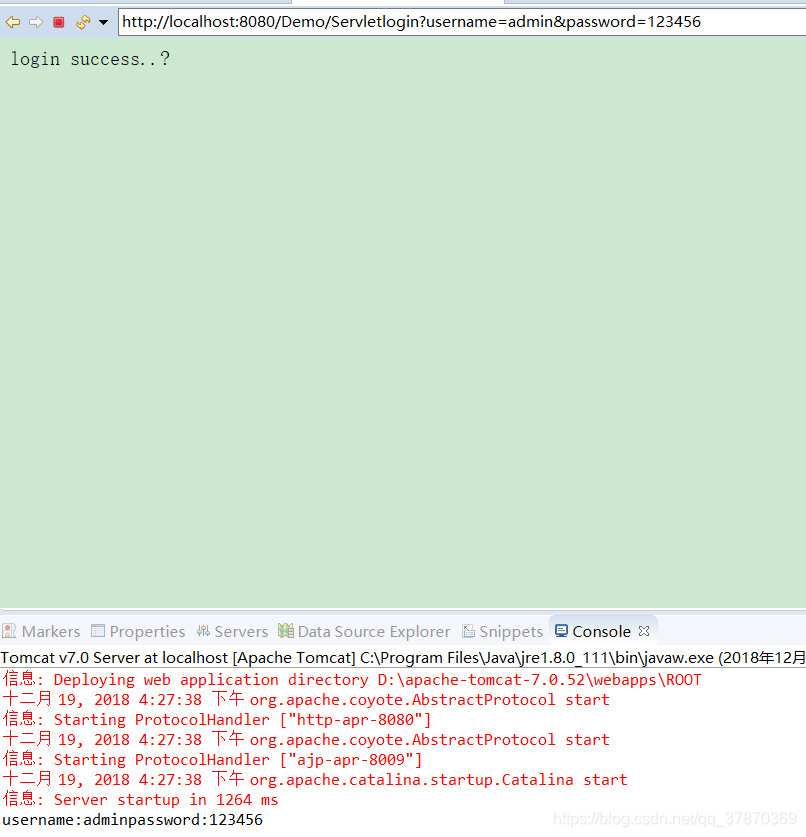
但是这样仍然没有用到ServletContext
继续:
需求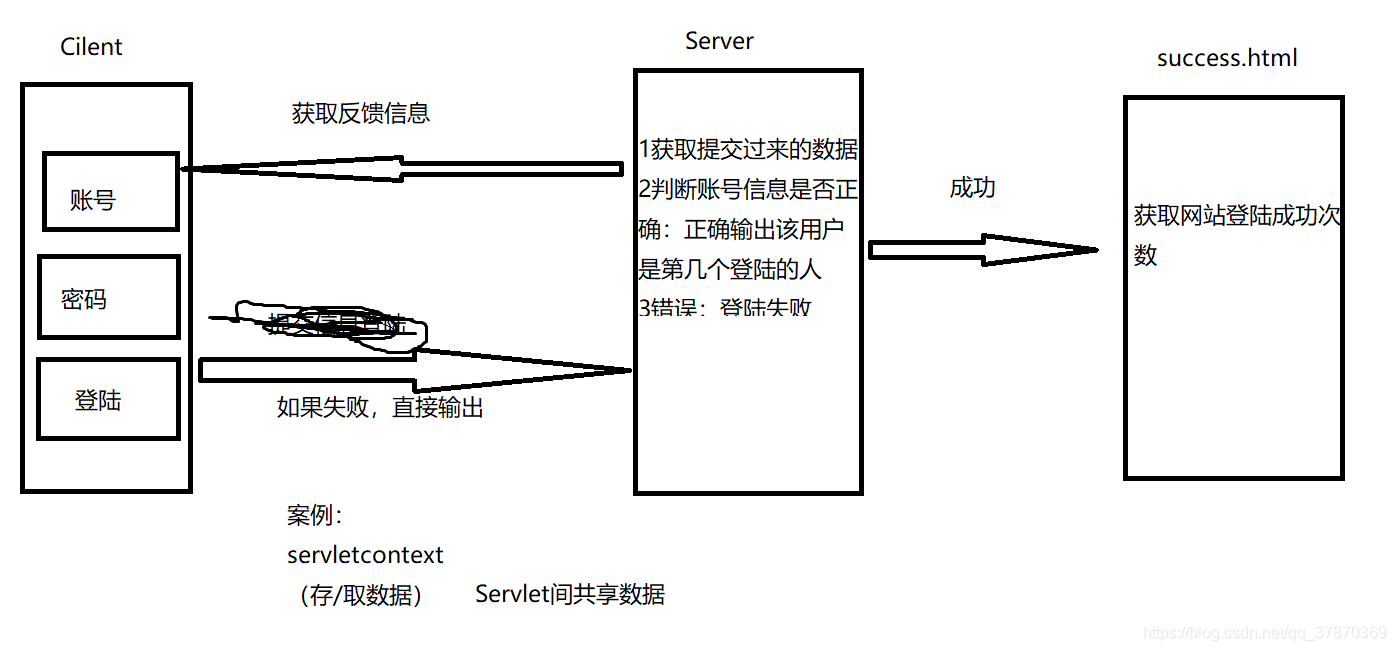
可以看api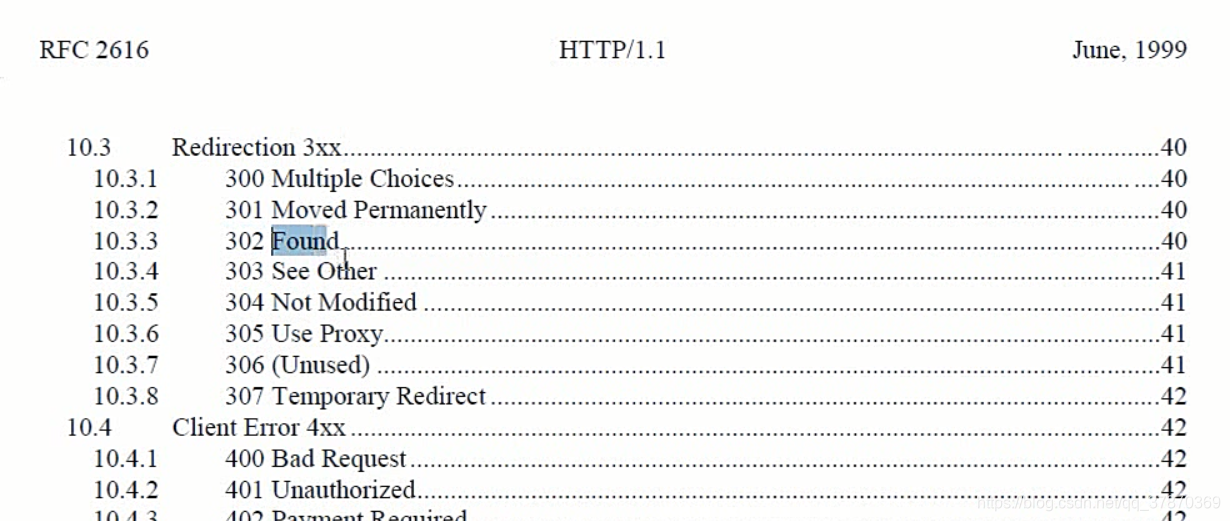
代码:
package com.st.servlet;

import java.io.IOException;
import java.io.PrintWriter;

import javax.servlet.ServletException;
import javax.servlet.annotation.WebServlet;
import javax.servlet.http.HttpServlet;
import javax.servlet.http.HttpServletRequest;
import javax.servlet.http.HttpServletResponse;

/**
 * Servlet implementation class Servletlogin
 */
@WebServlet("/Servletlogin")
public class Servletlogin extends HttpServlet {

	protected void doGet(HttpServletRequest request, HttpServletResponse response) throws ServletException, IOException {

		String username=request.getParameter("username");
		String password=request.getParameter("password");
		System.out.println("username:"+username+"password:"+password);

		PrintWriter pw=response.getWriter();
		if("admin".equals(username) && "123456".equals(password)) {
			//相应请求
			//pw.write("login success..!");
			//System.out.println("登陆成功");

			//1.成功的次数累加

			//获取以前存的值,然后在旧的值基础上+1
			Object obj=getServletContext().getAttribute("count");
			int totalCount=0;
			//默认就是0次
			if (obj!=null) {
				totalCount=(int)obj;
			}
			System.out.println("已知登陆成功的次数是:"+totalCount);
			getServletContext().setAttribute("count", totalCount+1);

			//设置定位码 重新定位 状态码
			response.setStatus(302);
			//定位跳转的页面是哪一个
			response.setHeader("Location", "login_success.html");
		}else {
			pw.write("login failed!");
			//System.out.println("登陆失败");
		}
	}


	protected void doPost(HttpServletRequest request, HttpServletResponse response) throws ServletException, IOException {
		// TODO Auto-generated method stub
		doGet(request, response);
	}

}
login_success.html
<!DOCTYPE html>
<html>
<head>
<meta charset="UTF-8">
<title>Insert title here</title>
</head>
<body>
<h1>登陆成功</h1>
<a href="">目前登陆总数为:</a>
</body>
</html>
重启 结果: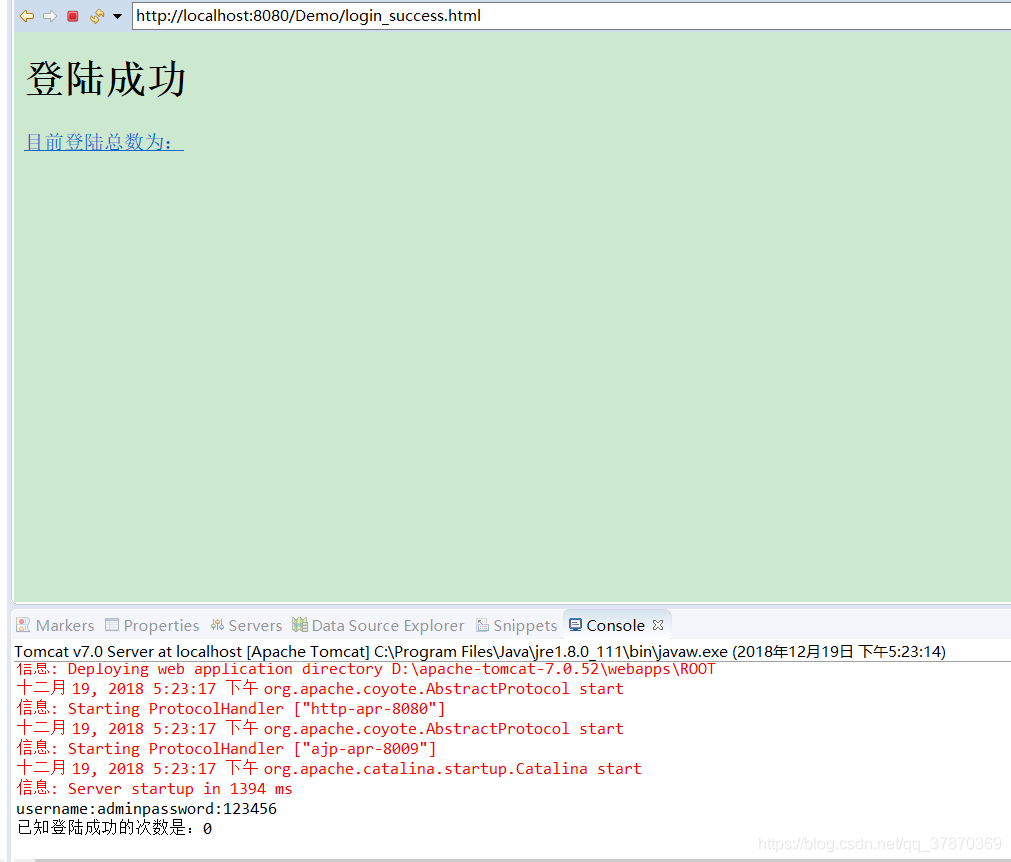
(注意:
//设置定位码 重新定位 状态码
			response.setStatus(302);
			//定位跳转的页面是哪一个
			response.setHeader("Location", "login_success.html");
)
累加的方法(
	Object obj=getServletContext().getAttribute("count");
			int totalCount=0;
			//默认就是0次
			if (obj!=null) {
				totalCount=(int)obj;
			}
			System.out.println("已知登陆成功的次数是:"+totalCount);
			getServletContext().setAttribute("count", totalCount+1);
)
继续 新建CountServlet.java实现超链接里面的 方法
代码:
package com.st.servlet;

import java.io.IOException;

import javax.servlet.ServletException;
import javax.servlet.http.HttpServlet;
import javax.servlet.http.HttpServletRequest;
import javax.servlet.http.HttpServletResponse;

public class CountServlet extends HttpServlet{
	@Override
	protected void doGet(HttpServletRequest req, HttpServletResponse resp) throws ServletException, IOException {
	//1取值
		int count=(int) getServletContext().getAttribute("count");
		//2输出界面
		resp.getWriter().write("login success count:"+count);
	}
	@Override
	protected void doPost(HttpServletRequest req, HttpServletResponse resp) throws ServletException, IOException {

		doPost(req, resp);
	}

}
配置web.xml
login_success里面写入web.xml配置的地址
<!DOCTYPE html>
<html>
<head>
<meta charset="UTF-8">
<title>Insert title here</title>
</head>
<body>
<h1>登陆成功</h1>
<a href="CountServlet">目前登陆总数为:</a>
</body>
</html>
重启 输入正确admin 123456进入
点击超链接
结果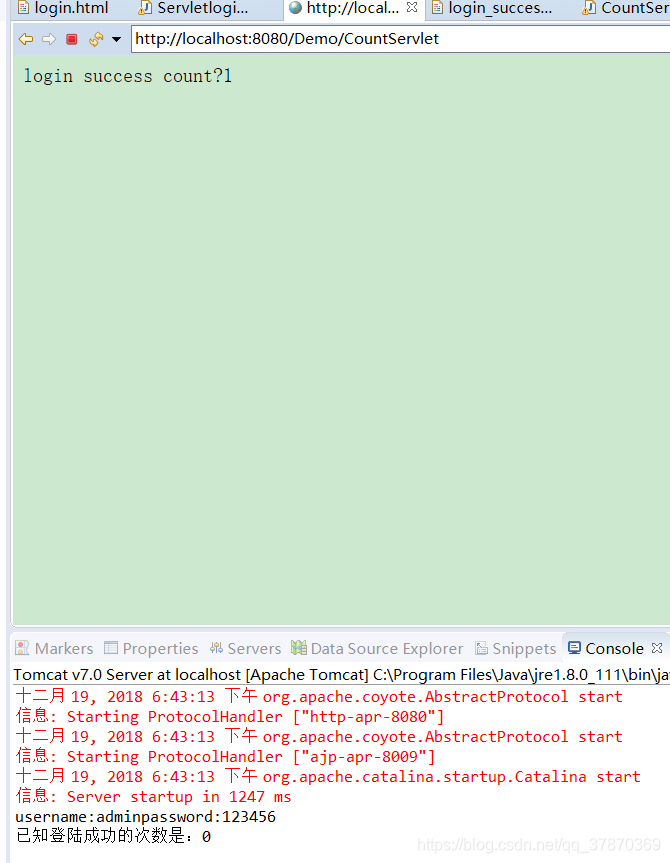
注意:像这里html里面获取的都是 而不是类名字 web.xml配置的地址 这一点需要小心 自己明白
也可以在xml改下图这个绝对路径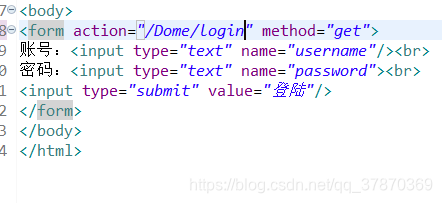
同样过得去.
ServletContext的生命周期 和 作用范围
ServletContext的生命周期:
当服务器创建的时候,就会托管每一个web应用程序,创建一个Servlet对象
当服务器移除托管,或者关闭服务器的时候就会销毁
ServletContext的作用范围:
只要在同一个项目里面都可以存取
在a项目里面存 在b项目里面是取不到的 因为:每开始创建的对象都不一样。
HttpServletRequest获取头信息
新建结构如下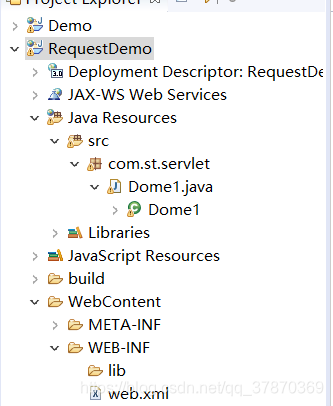
代码:
//Enumeration 看成是一个list集合类即可
package com.st.servlet;

import java.io.IOException;
import java.util.Enumeration;

import javax.servlet.ServletException;
import javax.servlet.http.HttpServlet;
import javax.servlet.http.HttpServletRequest;
import javax.servlet.http.HttpServletResponse;

public class Dome1 extends HttpServlet{
	@Override
	protected void doGet(HttpServletRequest req, HttpServletResponse resp) throws ServletException, IOException {

		Enumeration<String> headerName=req.getHeaderNames();
		while (headerName.hasMoreElements()) {
			String name = (String) headerName.nextElement();
			String value=req.getHeader(name);
			System.out.println("name:"+value);
		}
	}
	@Override
	protected void doPost(HttpServletRequest req, HttpServletResponse resp) throws ServletException, IOException {

		doPost(req, resp);
	}

}
运行: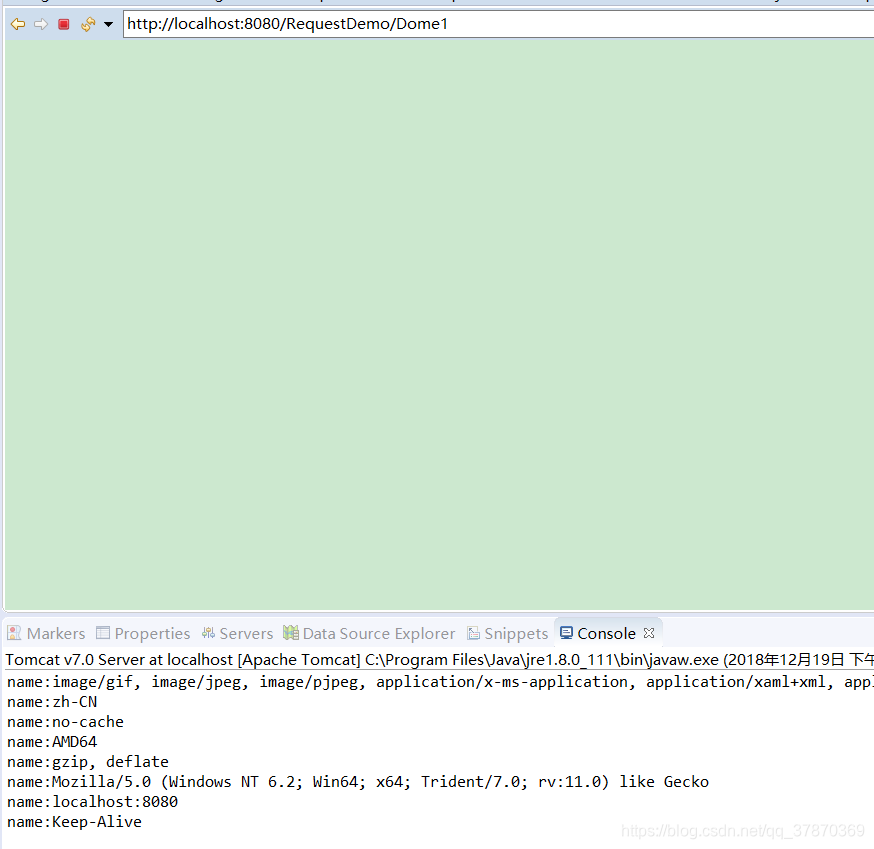
总结结果:
HttpServletRequest这个对象封装了客户端提交过来的一切数据。
- 可以获取客户端请求头信息
- 可以获取请求的数据
例子看下:
		//获取到客户端提交上来的数据
		String name=req.getParameter("name");
		System.out.println("name:"+name);
结果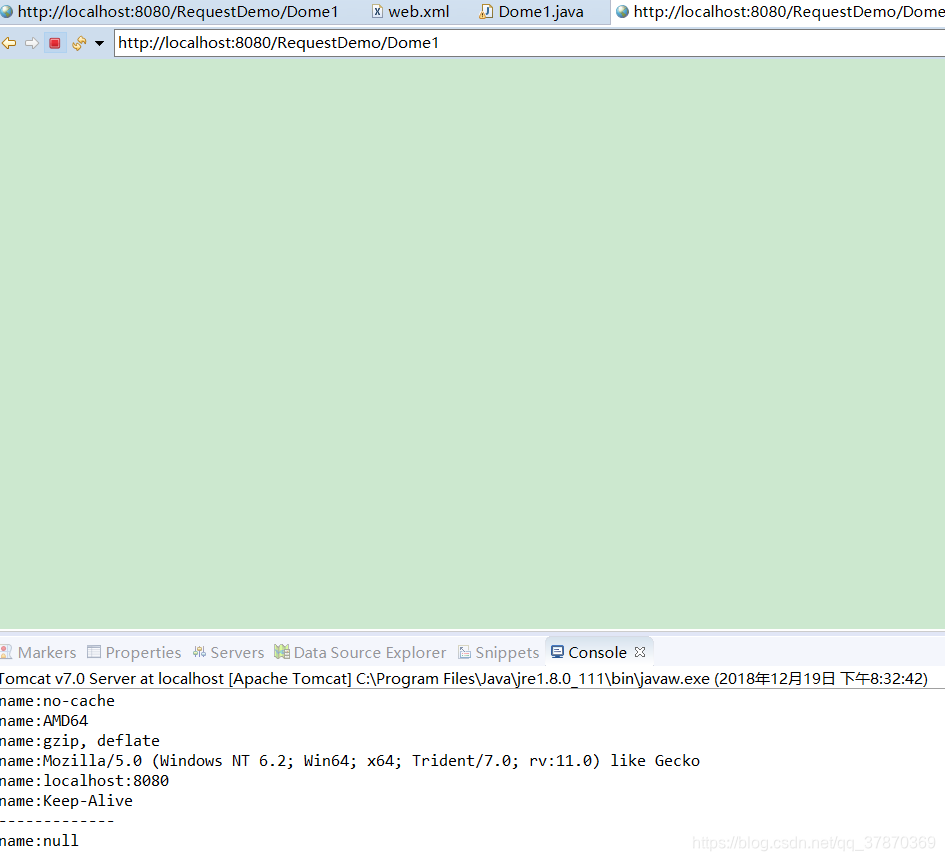
可以看出name=null
我们在地址栏给他赋值 让他请求相应:http://localhost:8080/RequestDemo/Dome1?name=zhangsan
结果
//可以获取所有参数方法: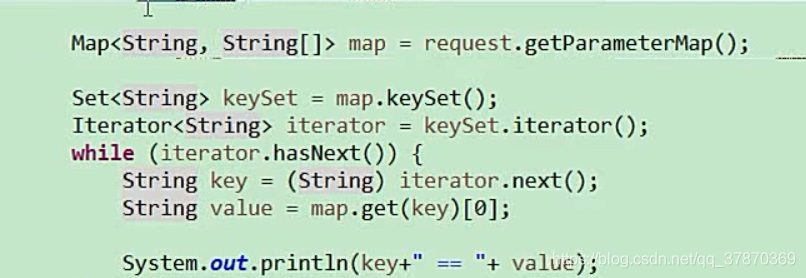
结果
解决HttpServletRequest请求 中文乱码问题
原因:因为get请求过来的数据,在url地址栏上就已经经过编码了,所以我们取到的就是乱码。
tomcat收到了这批数据,getparmet默认使用ISO-8859-1去解码
解决方法:先让文件回到ISO-8859-1对应的字节数组,然后再按照utf-8拼接字符串
protected void doGet(HttpServletRequest req, HttpServletResponse resp) throws ServletException, IOException {
String name=req.getParameter("username");
String passowrd=req.getParameter("password");
name=new String(name.getBytes("ISO-8859-1"),"UTF-8");
passowrd=new String(passowrd.getBytes("ISO-8859-1"),"UTF-8");
System.out.println(name +"  "+passowrd);

}
这样打印出来的字符就不会是中文乱码了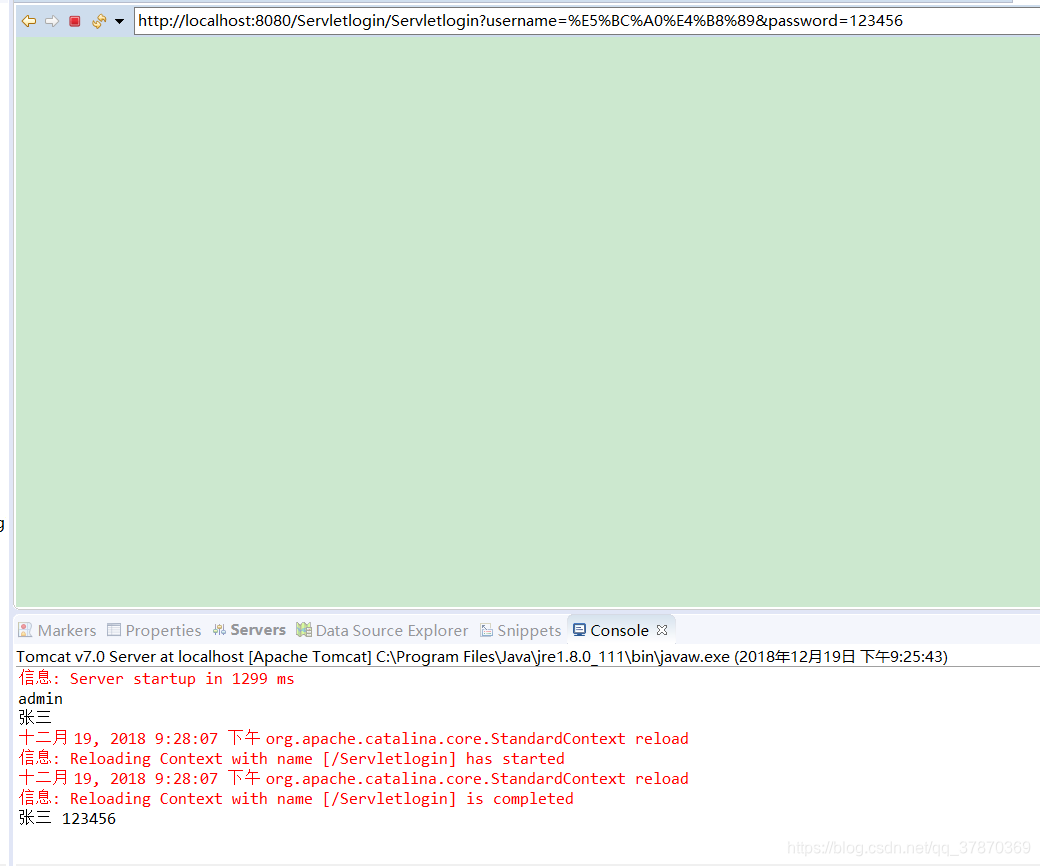
*
可以在tomcat中配置,以后传过来的请求就永远是UTF-8了
tomcat -conf-server.xml
找到8080端口加上一个URLEncoding="UTF-8"这样传过来的数据就是utf-8了

如果是post方式
就设置请求体里面的文字编码。get方式,用这行request.serCharacterEncoding(“UTF-8”);没有用,这行代码是写在getparamer之前
HttpServletResponse
作用:返回数据给客户端
//以字符流的方式写数据
resp.getWriter().write("hello response...");
//以字节流的方式写数据
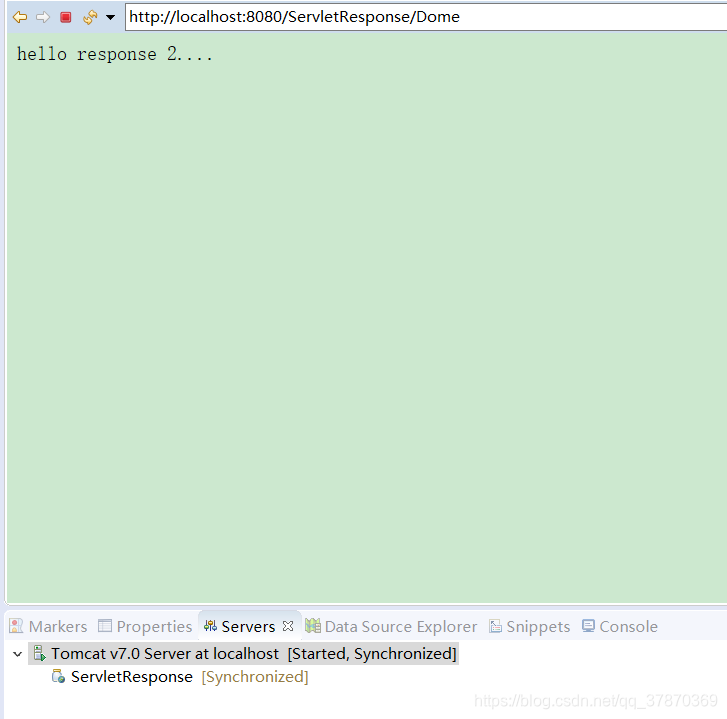
resp.getOutputStream().write("hello response 2....".getBytes());
结果分别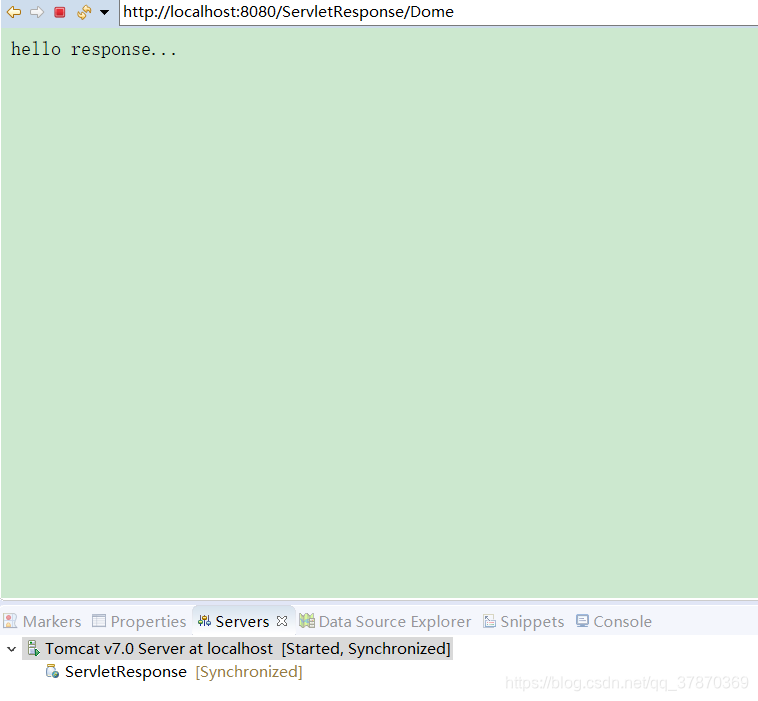
相应的数据中有中文,那么就有可能有中文乱码
*以字符流输出
resp.getWriter().
例子1.
//以字符流的方式写数据
		resp.getWriter().write("我是乱码...");
结果: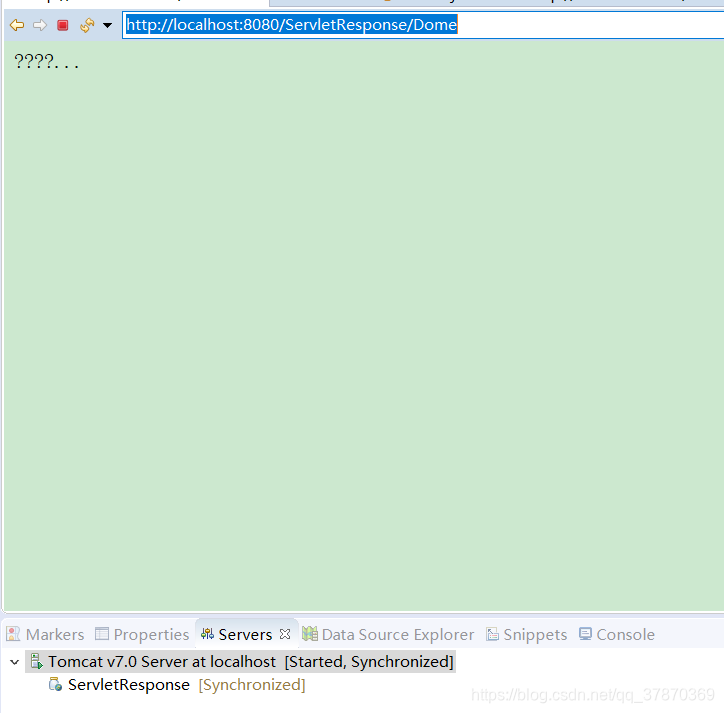
解决方法:
//1设置输出到客户端时候是utf-8(注意有的浏览器 解码方式不同 所以可能导致出现乱码,那么还要加上第二个 看注释二 )
resp.setCharacterEncoding("UTF-8");
//2直接规定浏览器看到这份数据时,用什么编码来看
resp.setHeader("Content-Type", "text/html;charset=UTF-8");
结果: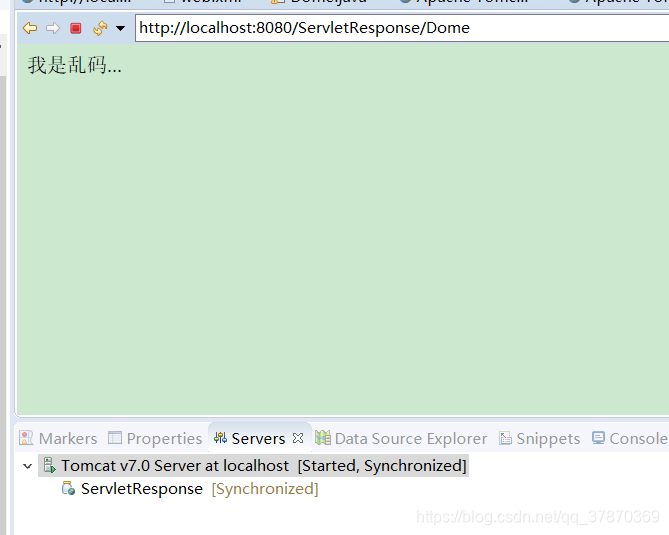
*以字节流输出
resp.getOutputStream()
例子2
//以字节流方式写数据
resp.getOutputStream().write("我是乱码 2....".getBytes());
结果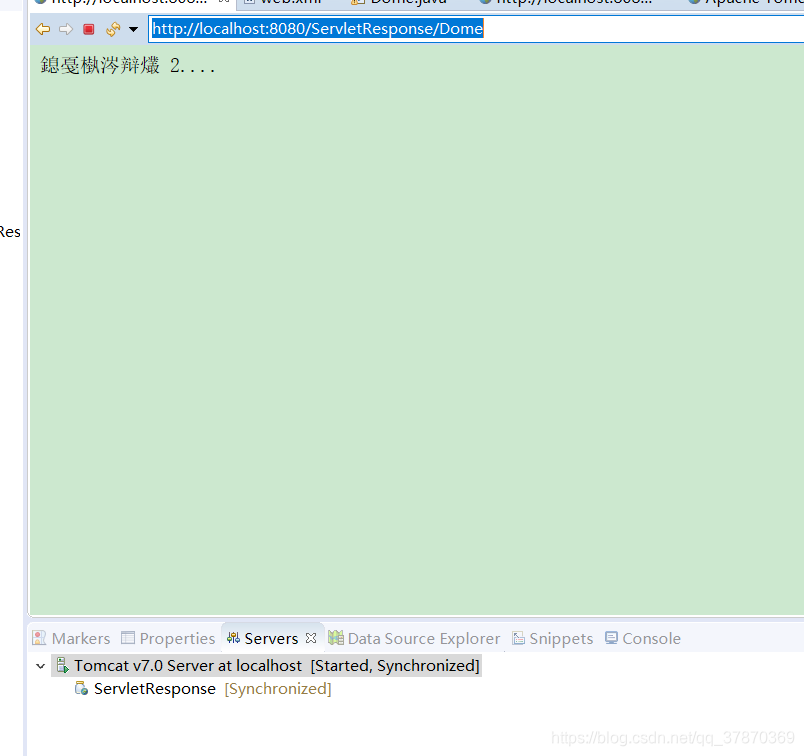
解决方法
直接在getBytes();里面指定使用UTF-8
//以字节流方式写数据
		resp.getOutputStream().write("我是乱码 2....".getBytes("UTF-8"));
结果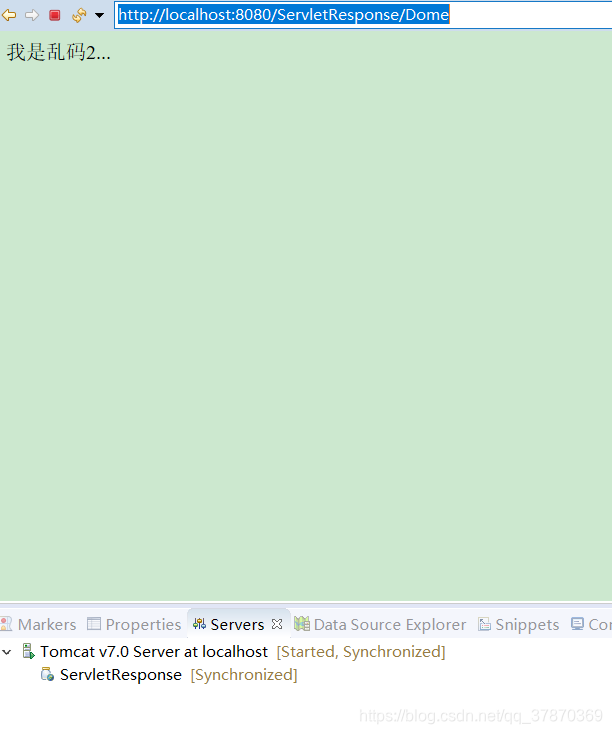
学以致用,不然存在将没有任何意义
小项目 下载资源
新建动态web项目,在webcontent下面放置资源 文件donwload
结构如下
测试:
先让tomcat默认的servlet去提供下载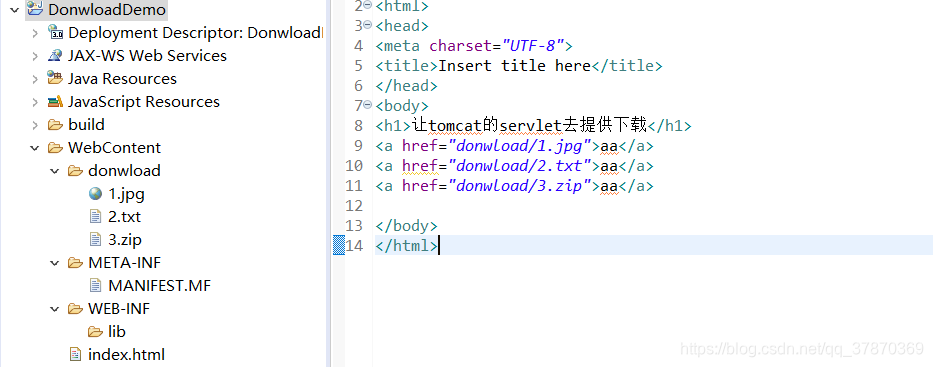
index.html
<!DOCTYPE html>
<html>
<head>
<meta charset="UTF-8">
<title>Insert title here</title>
</head>
<body>
<h1>让tomcat的servlet去提供下载</h1>
<a href="donwload/1.jpg">aa</a>
<a href="donwload/2.txt">aa</a>
<a href="donwload/3.zip">aa</a>

</body>
</html>
结果: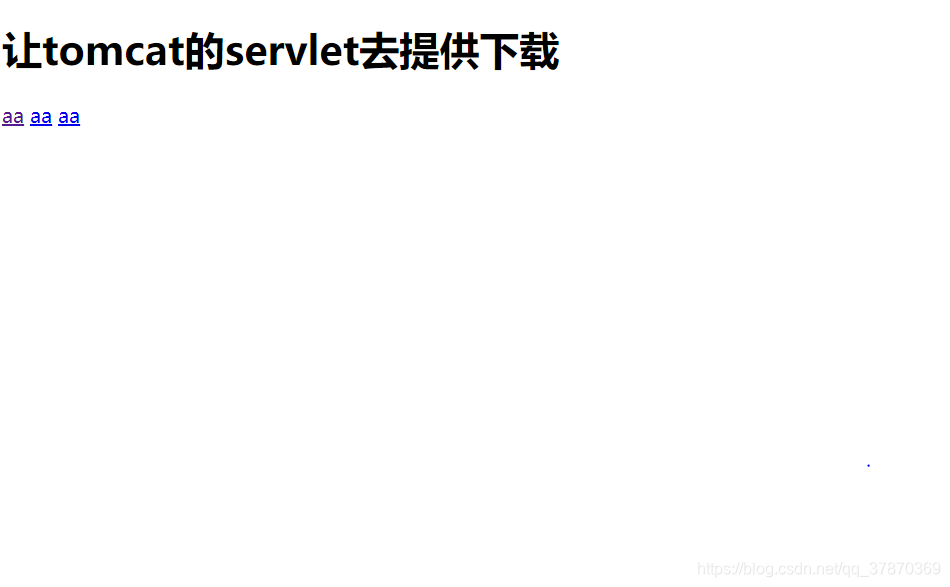

能够下载的原因是:
tomcat有一个默认的servlet叫做DefultServlet。这个DefaultServlet专门用于处理放在tomcat服务器上的静态资源。
接下来手动编码去实现下载
代码如下
package com.st.servlet;

import java.io.FileInputStream;
import java.io.IOException;
import java.io.InputStream;
import java.io.OutputStream;

import javax.servlet.ServletException;
import javax.servlet.http.HttpServlet;
import javax.servlet.http.HttpServletRequest;
import javax.servlet.http.HttpServletResponse;

import javafx.scene.shape.Path;

public class Demo extends HttpServlet{
	@Override
	protected void doGet(HttpServletRequest req, HttpServletResponse resp) throws ServletException, IOException {
		//1.获取要下载文件的名字
		String fileName=req.getParameter("filename");
		//2.获取这个文件在tomcat里面的绝对路径
		String path=getServletContext().getRealPath("donwload/"+fileName);
		resp.setHeader("Content-Disposition", "attachment;filename="+fileName);
		//3.转化成输入流
		InputStream is=new FileInputStream(path);
		OutputStream os=resp.getOutputStream();
		int len=0;
		byte[]buffer=new byte[1024];
		while ((len=is.read(buffer))!= -1) {
			os.write(buffer,0,len);

		}
		os.close();
		is.close();
	}
	@Override
	protected void doPost(HttpServletRequest req, HttpServletResponse resp) throws ServletException, IOException {
		// TODO Auto-generated method stub
		doGet(req, resp);
	}


}
结果: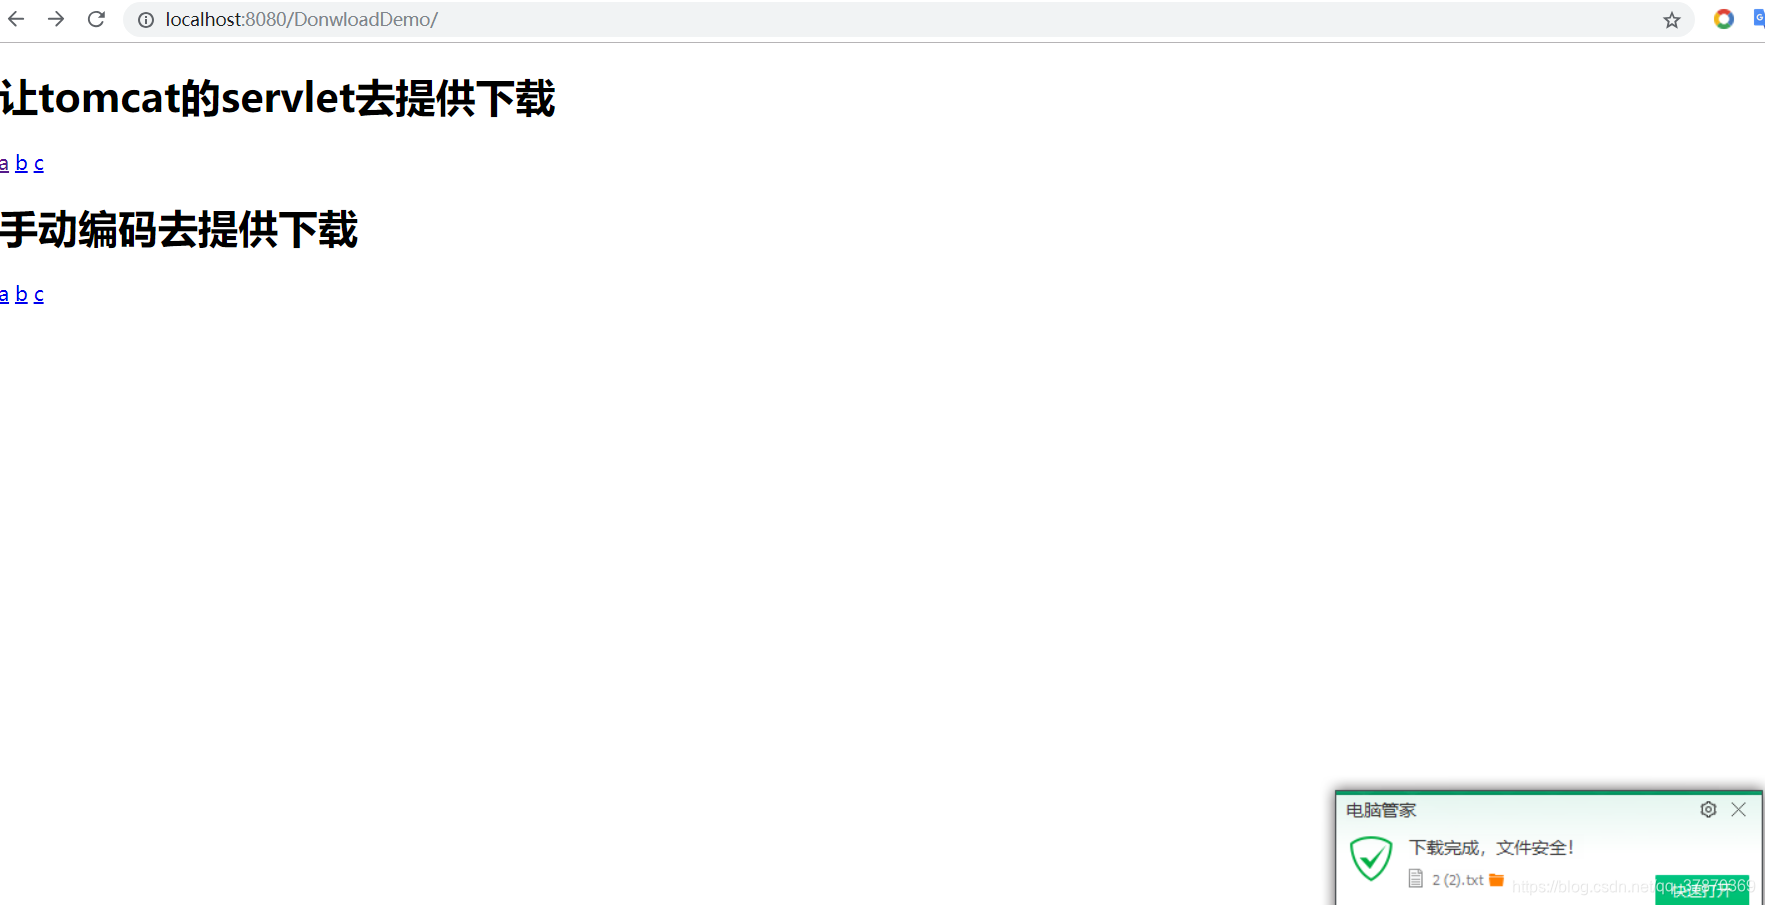
总结:
1.servlet注册方式
2. servletContext
作用:
1. 获取全局参数
2. 获取工程里面的资源
3. 资源共享/servletContext域作用
有一个
Servletcontext生命周期
服务器启动会创建一个servletcontext对象。服务器关闭会销毁
3.HttpServletRequest
1.获取请求头
2.获取提交过来的数据
4.HttpServletResponse
负责输出数据到客户端,对之前的请求做出相应
5.中文乱码 两种不同流的解决方式
6.下载…

CSDN联合极客时间,共同打造面向开发者的精品内容学习社区,助力成长!
更多推荐


 0
0 0
0- 0


 已为社区贡献1条内容

所有评论(0)